
Millions of users get on the Internet to access information for various purposes including learning, entertainment, news, and sharing their lives’ progress with friends. Hence, when deploying an app, it’s in your best interest that you implement a highly secure and scalable infrastructure for your application. The cloud offers various ways to secure and scale a Django application. Horizontal scaling is one method that can allow you to run several copies of your app. This ensures it is more fault-tolerant and highly available. It also increases its performance to process multiple requests simultaneously.
Horizontally Scaling a Django application
You can horizontally scale a Django application by provisioning several app servers that run the Django application and its WSGI HTTP server (like Gunicorn or uWSGI). You will then need to set up an infrastructure to distribute incoming requests across these app servers. A load balancer and a reverse proxy like Nginx can help your infrastructure with traffic distribution. Nginx can deploy SSL certificates ensuring secure connections to your app through HTTPS. Lastly, Nginx can also provide caching of static content to minimize the load on your server.
Configuring these various components separately and ensuring they communicate can be a daunting task. Fortunately, using Docker simplifies the configuration process and ensures that the various components behave the same way regardless of where they are deployed.
What You Will be Doing in This Guide
In this guide, you will learn how to horizontally scale a containerized Django application, served with a Gunicorn WSGI HTTP server. You will provision two application servers, each having Docker installed, running the same copy of a Django and Gunicorn app container.
You will also secure your application with a Let’s Encrypt SSL certificate by provisioning and configuring a third proxy server that will run an Nginx reverse proxy container and a Certbot client container. Certbot is a package that helps with managing SSL certificates from Let’s Encrypt certificate authority. It retrieves the certificate, configures Nginx server blocks with the certificate’s location, and manages auto-renewals. It does this by configuring a cron job to periodically check if the certificate is about to expire and needs to be renewed. By keeping your SSL certificate updated, your website will always have a high-security rating on SSL Labs.
The third proxy server sits in front of your distributed architecture and receives all incoming external traffic. Then, it distributes the traffic to your app servers. The app servers sit behind a firewall, only allowing the proxy server to access them.
This tutorial is the second in a series of three tutorials working with Django, Docker, and Kubernetes. You should first follow the steps described in the tutorial on Building a Django and Gunicorn Application with Docker on Ubuntu. In that tutorial, we set up the base project code, a Dockerfile, and connect the app to MinIo Simple Storage Service (S3) to serve our static files.
Prerequisites
To follow along with this tutorial, you will need the following:
- Four Ubuntu 20.04 servers:
If you have followed the steps in the prerequisite tutorial, Building a Django and Gunicorn Application with Docker on Ubuntu, you already have two of the four servers:
-
The first server will run the PostgreSQL database instance. Follow Steps 1 and 2 of the tutorial: Building a Django and Gunicorn Application with Docker on Ubuntu to set up the database. The Postgres configs should be modified to allow external connections from your app server IPs only.
-
The second and third servers will host the containers for your application code. You should already have the second server running from the prerequisite tutorial. We will be modifying its firewall to only allow external connections from the proxy server IP. You may follow steps 1 to 4 of this step-by-step tutorial to help you set up your Ubuntu server on CloudSigma.
-
The fourth server will be the proxy server handling load balance and distribution of traffic to the two application server containers.
-
Docker should be installed on the two app servers and the proxy server.
After following the steps in the prerequisite tutorial, you should have Docker already installed on one of the servers. You may follow steps 1, 2, and 3 of our tutorial on installing and operating Docker. Remember to add the sudo user created above to the Docker group.
- Acquire a registered domain name and set up its DNS records to point to the proxy server’s public IP address. For demonstration purposes, we will use example_domain.com.
-
Setup an S3 object storage service. We used MinIO as the storage service in the prerequisite tutorial. Hence, follow the explanations in Step 5 of the prerequisite tutorial to set up your MinIO storage bucket.
Step 1: Verifying that the First Django Application Server is Working
As explained in the Prerequisites, this guide comes after the tutorial on Building a Django and Gunicorn Application with Docker on Ubuntu. If you are coming from that tutorial and have already implemented the steps, you should have the first server running. The code of the application is based on Django documentation’s Polls application tutorial. It’s important that you read through those steps to have an understanding of the initial setup. If you have implemented the steps in the tutorial, you can skip this first step.
Otherwise, you can just clone the Dockerized branch into your server. Start by logging into your first app server and execute the following git command to clone the django-polls-docker branch of the django-polls repository:
|
1 |
git clone --single-branch --branch django-polls-docker --depth 1 https://github.com/jaymoh/django-polls.git |
Next, navigate into the django-polls directory:
cd django-polls
In this directory, you will find a Dockerfile used by Docker to build the application image, django-polls directory which contains the Python application code, and an env file containing a list of environment variables that will be passed into the container at startup to modify its behavior. In the Dockerfile, we define Django package dependencies through the requirements.txt file. In addition, we need to declare a port 8000 to be used to accept incoming traffic, and set it to run a gunicorn server with 3 workers. To learn more about the Dockerfile instructions, please have a look at Step 7 of the tutorial Building a Django and Gunicorn Application with Docker on Ubuntu.
You can build the Docker image using the command:
docker build -t django-polls:v1 .
After Docker builds the image, you can list the available images on the server with the following command:
docker images
Here is the output when we ran the command:

Next, we need to modify the env file used in configuring the runtime environment. This file is passed into the Docker run container when firing up the container. Open the env file with nano editor:
|
1 2 3 4 5 6 7 8 9 10 11 12 13 14 15 16 17 18 |
DJANGO_SECRET_KEY=your_secret_key DEBUG= DJANGO_LOGLEVEL=info DJANGO_ALLOWED_HOSTS=your_server_IP_address DB_ENGINE=postgresql_psycopg2 DB_DATABASE=polls_db DB_USERNAME=hackins DB_PASSWORD=your_database_password DB_HOST=your_database_host DB_PORT=your_database_port STATIC_DEFAULT_FILE_STORAGE=storages.backends.s3boto3.S3Boto3Storage STATIC_MINIO_BUCKET_NAME=test-bucket MINIO_ACCESS_KEY=your_minio_access_key MINIO_SECRET_KEY=your_minio_secret_key MINIO_URL=your_minio_url:your_minio_port |
The env file has some placeholder text that you need to modify and fill with your correct values:
-
DJANGO_SECRET_KEY: Generate a unique, unpredictable value as explained in the Django docs. You may use this command to generate a random string and set it to the variable: python -c 'from django.core.management.utils import get_random_secret_key; print(get_random_secret_key())'.
-
DJANGO_ALLOWED_HOSTS: this value is used to secure your app from HTTP Host Header attacks. You may set it to *, wildcard matching all hosts if in development mode. When you deploy your app to production, set this to your registered domain name. For our demonstration it is example_domain.com.
-
DB_DATABASE: set this to the name of the PostgreSQL database you created in the Prerequisites section, for our case it is polls_db.
-
DB_USERNAME: set this to the username you chose for your database.
-
DB_PASSWORD: set this to the password you chose for your database.
-
DB_HOST: set this to the host running your database instance as you had set up in the Prerequisites section. This is explained in Steps 1 and 2 of the tutorial Building a Django and Gunicorn Application with Docker on Ubuntu to set up the database.
-
DB_PORT: set this to the port of your database.
Save and close the file once you finish editing. With our database credentials in place, we can create the database schema by running the container and overriding the CMD command set in the Dockerfile. You can find more information on the Dockerfile entry point from official Docs. Next, execute the following command:
|
1 |
docker run --env-file env django-polls:v1 sh -c "python manage.py makemigrations && python manage.py migrate" |
In this command, we are running the django-polls:v1 image and passing in the env file modified earlier. The part: sh -c "python manage.py makemigrations && python manage.py migrate” creates the database schema defined by the app code. If you are executing the command for the first time, you should see a similar output indicating the creation of the database schema:

Once we have the schema created, we can create the Django superuser. Execute the following command to start the container with an interactive shell:
|
1 |
docker run -i -t --env-file env django-polls:v1 sh |
The command starts up the container with a shell prompt that you can use to interact with the Python shell. Let’s create a user with the following command:
|
1 |
python manage.py createsuperuser |
Follow the prompts to provide a username, email address, and password. Retype the password, and hit enter to create the user. Exit the shell and kill the container by hitting CTRL+D.
Next, we need to run the container again, overriding the default command with collectstatic Django command. The command will generate the static files for the app and upload them to MinIO Cloud Storage:
|
1 |
docker run --env-file env django-polls:v1 sh -c "python manage.py collectstatic --noinput" |
The command generates and uploads the file to your configured object storage service. Here is the output:
![]()
You can now run the application without specifying any additional command to override the default CMD command defined in the Dockerfile:
|
1 |
docker run --env-file env -p 80:8000 django-polls:v1 |

Docker runs the default command defined in the Dockerfile, fires up the container with gunicorn server, exposes container port 8000, and maps it to Ubuntu’s port 80. You can now view the application’s interface in your browser by accessing the first server’s IP address in your address bar: http://FIRST_SERVER_IP.
You will get a 404 Page Not Found because we have not defined anything for the / path. Navigate to http://FIRST_SERVER_IP/polls to see the Polls interface:

Visit the admin interface to create some polls: http://FIRST_SERVER_IP/admin:
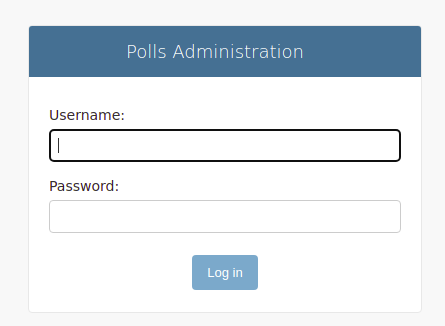
Provide the credentials you set with the createsuperuser command above to access the administrative interface:
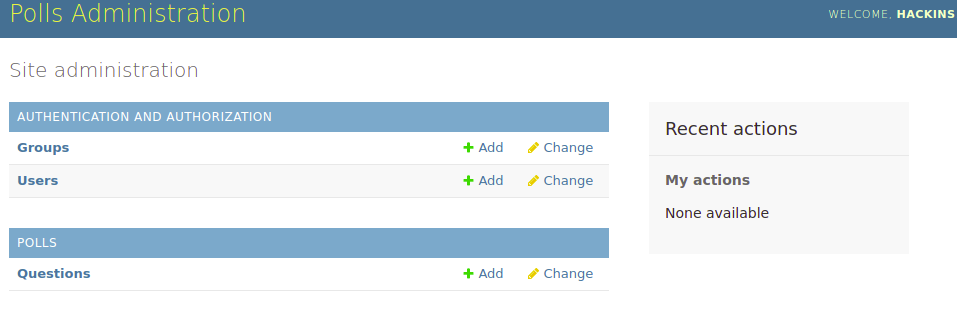
If you view the page source, you will notice the static files being fetched from the storage bucket as defined. After confirming that the container serves the app as expected, you can kill the container by hitting CTRL+C in the terminal.
Next, we need to keep the container running in the detached mode, so that we can exit the SSH session of the first server. This will leave the container running in the background. Execute the following command:
|
1 |
docker run -d --rm --name polls --env-file env -p 80:8000 django-polls:v1 |
The -d flag spins up the container in a detached mode so it can remain running in the background. The --rm flag cleans up the container’s filesystem after the container exits. We give the container a name, polls, so we can see it when we list the containers.
Exit the SSH session of your first server and navigate to http://FIRST_SERVER_IP/polls in your browser to confirm that it is running as expected. If you can view the polls interface, then your first app server has been set up successfully. Let’s set up the second application server in the next step.
Step 2: Setting up the Second Application Server
We will be cloning the Dockerized branch of the application we created in the Building a Django and Gunicorn Application with Docker on Ubuntu tutorial. You can find more details of the commands we will use here from that tutorial, or the summarized version in Step 1.
You should be having the second server running, added a non-root sudo user, and installed Docker as explained in the Prerequisites section.
The next step is to configure this server to connect to the PostgreSQL server instance. As explained in Step 1 of the tutorial Building a Django and Gunicorn Application with Docker on Ubuntu, you need to allow the second server’s IP address through the ufw and the PostgreSQL configurations.
First, log into the PostgreSQL database server instance with your non-root sudo user. To add the ufw rule, execute the following command:
|
1 |
sudo ufw allow from SECOND_SERVER_IP to any port 5432 |
Next, execute this command and add the second server’s IP address to the PostgreSQL client authentication file:
|
1 |
sudo nano /etc/postgresql/12/main/pg_hba.conf |
Read through the comments to understand more about the configurations. Next, add this line under the hosts section, specifying your IP address:
|
1 |
host all all SECOND_SERVER_IP/24 md5 |
Save and close the file when you finish editing.
Then, restart the PostgreSQL service for the changes to take effect:
|
1 |
sudo service postgresql restart |
Log out of the PostgreSQL database server instance and proceed with configuring the second app server instance.
Log into the second app server with ssh. Then clone the django-polls-branch of the django-polls repository with the following command:
|
1 2 |
git clone --single-branch --branch django-polls-docker --depth 1 https://github.com/jaymoh/django-polls.git |
Move into the django-polls directory:
|
1 |
cd django-polls |
After that, build the image with the following command:
|
1 |
docker build -t django-polls:v1 . |
Once the image building process completes, modify the env file with configuration values as explained in Step 1. Open the file with nano:
|
1 |
nano env |
|
1 2 3 4 5 6 7 8 9 10 11 12 13 14 15 |
DJANGO_SECRET_KEY=your_secret_key DEBUG= DJANGO_LOGLEVEL=info DJANGO_ALLOWED_HOSTS=your_server_IP_address DB_ENGINE=postgresql_psycopg2 DB_DATABASE=polls_db DB_USERNAME=hackins DB_PASSWORD=your_database_password DB_HOST=your_database_host DB_PORT=your_database_port STATIC_DEFAULT_FILE_STORAGE=storages.backends.s3boto3.S3Boto3Storage STATIC_MINIO_BUCKET_NAME=test-bucket MINIO_ACCESS_KEY=your_minio_access_key MINIO_SECRET_KEY=your_minio_secret_key MINIO_URL=your_minio_url:your_minio_port |
Replace the placeholder texts with the actual values you added in Step 1. Remember to modify the DJANGO_ALLOWED_HOSTS variable appropriately. Save and close the file when you are done. Update your MinIO credentials in the env file as you did in the previous step.
Now you can run the app container in detached mode with the following command:
|
1 |
docker run -d --rm --name polls --env-file env -p 80:8000 django-polls:v1 |
The command starts the container and keeps it running in the background. Exit the ssh session of the second app server and navigate to http://SECOND_SERVER_IP/polls in your browser to confirm that it is running as expected. You should be able to view the polls interface if everything went as expected.
You now have two app servers running the same copy of your application. In the next step, you will be configuring the Nginx container to serve as a reverse proxy.
Step 3: Setting Up the Nginx Docker Container
Nginx is one of the most popular open-source web server software in the world. It is responsible for ensuring the availability and scalability of the highest-traffic sites on the internet. It guarantees security and it’s very versatile. You can use it for reverse proxying, caching, and load balancing. We have set up our application to use a separate object storage service to handle its static and media files. Hence, we won’t be using Nginx caching functionalities. Instead, we will use Nginx reverse proxy and load balancing capabilities. Nginx front-facing server will receive incoming traffic and distribute it to the backend application servers. Then, it will ensure secure communication between client and server by securing the traffic using SSL certificates obtained from Let’s Encrypt.
There are several ways to implement Nginx reverse proxying and load balancing. One of the ways is setting the Nginx reverse proxy separate from the backend application server, as we have done in this tutorial. This setup is flexible and allows you to scale both the Nginx proxy layer as well as the application layer. You can add multiple Nginx proxies, or implement a cloud load balancer. Another way of implementing reverse proxying is using one of the backend app servers as an Nginx proxy. Then, you can proxy incoming requests locally and to other app servers. Optionally, you may configure an Nginx container on all backend app servers and set a front-sitting cloud load balance to receive incoming traffic and distribute it to the backend app servers.
Let’s begin to configure the proxy server. Log into the fourth Ubuntu server you had set to be used as an Nginx proxy and create a configuration directory:
|
1 |
mkdir conf |
Open a configuration with nano inside the directory:
|
1 |
nano conf/nginx.conf |
Next, add the following configuration to the file:
|
1 2 3 4 5 6 7 8 9 10 11 12 13 14 15 16 17 18 19 20 21 22 23 24 25 26 27 28 29 30 31 32 33 34 35 36 37 38 39 40 41 42 43 |
upstream django { server FIRST_SERVER_IP; server SECOND_SERVER_IP; } server { listen 80 default_server; return 444; } server { listen 80; listen [::]:80; server_name example_domain.com; return 301 https://$server_name$request_uri; } server { listen 443 ssl http2; listen [::]:443 ssl http2; server_name example_domain.com; # SSL ssl_certificate /etc/letsencrypt/live/example_domain.com/fullchain.pem; ssl_certificate_key /etc/letsencrypt/live/example_domain.com/privkey.pem; ssl_session_cache shared:le_nginx_SSL:10m; ssl_session_timeout 1440m; ssl_session_tickets off; ssl_protocols TLSv1.2 TLSv1.3; ssl_prefer_server_ciphers off; ssl_ciphers "ECDHE-ECDSA-AES128-GCM-SHA256:ECDHE-RSA-AES128-GCM-SHA256:ECDHE-ECDSA-AES256-GCM-SHA384:ECDHE-RSA-AES256-GCM-SHA384:ECDHE-ECDSA-CHACHA20-POLY1305:ECDHE-RSA-CHACHA20-POLY1305:DHE-RSA-AES128-GCM-SHA256:DHE-RSA-AES256-GCM-SHA384"; client_max_body_size 4G; keepalive_timeout 5; location / { proxy_set_header X-Forwarded-For $proxy_add_x_forwarded_for; proxy_set_header X-Forwarded-Proto $scheme; proxy_set_header Host $http_host; proxy_redirect off; proxy_pass http://django; } location ^~ /.well-known/acme-challenge/ { root /var/www/html; } } |
In this configuration file, we specify the server, upstream, and location blocks to instruct Nginx to redirect HTTP requests to HTTPS and distribute the requests among the two app servers we set up in Step 1 and Step 2. You can find general information about the Nginx configuration file structure from their official docs.
We studied configuration files provided by the Docker Hub Nginx image documentation, Certbot, and Gunicorn to come up with this minimal Nginx configuration file. While this is only for demonstration purposes and getting our setup running, you are free to explore and experiment with other configurations following the Nginx guides.
The upstream block is used to define the group of servers that will process incoming requests. A name is given to the group and is called by the proxy_pass directive. We have named the block as django and specified the IP addresses of the two backend app servers:
|
1 2 3 4 |
upstream django { server FIRST_SERVER_IP; server SECOND_SERVER_IP; } |
We have also defined 3 server blocks. The first server block captures all requests not matching your domain and returns a 444 code (closes the connection without sending a response to the client hence denying malicious or malformed requests). A direct HTTP request to your server’s IP address is handled by this block since it is defined as the default_server:
|
1 2 3 4 |
server { listen 80 default_server; return 444; } |
The second server block handles incoming HTTP (port 80) requests and redirects them to HTTPS (port 443) using HTTP 301 redirect:
|
1 2 3 4 5 6 |
server { listen 80; listen [::]:80; server_name example_domain.com; return 301 https://$server_name$request_uri; } |
The third server block now handles the requests. It has several directives, and we will define their importance below.
We have two directives defining the paths to the TLS certificate and key as provisioned by Certbot. The certificates are mounted into the Nginx container when we start it up:
|
1 2 3 |
# SSL ssl_certificate /etc/letsencrypt/live/example_domain.com/fullchain.pem; ssl_certificate_key /etc/letsencrypt/live/example_domain.com/privkey.pem; |
Next, we have SSL security defaults as recommended by Certbot. You can learn more from the Nginx official docs on the ngx_http_ssl_module. Mozilla also offers some more information on Server Side security. The ssl_ciphers value in the conf file is lifted from Mozilla’s page:
|
1 2 3 4 5 6 |
ssl_session_cache shared:le_nginx_SSL:10m; ssl_session_timeout 1440m; ssl_session_tickets off; ssl_protocols TLSv1.2 TLSv1.3; ssl_prefer_server_ciphers off; ssl_ciphers "ECDHE-ECDSA-AES128-GCM-SHA256:ECDHE-RSA-AES128-GCM-SHA256:ECDHE-ECDSA-AES256-GCM-SHA384:ECDHE-RSA-AES256-GCM-SHA384:ECDHE-ECDSA-CHACHA20-POLY1305:ECDHE-RSA-CHACHA20-POLY1305:DHE-RSA-AES128-GCM-SHA256:DHE-RSA-AES256-GCM-SHA384"; |
In the next two directives, we will define the maximum allowed size of the client request body and set the timeout for keep-alive connections with the client. Nginx will close connections with the client after the seconds you set on the keepalive_timeout directive. You can find more information on Nginx configurations for Deploying Gunicorn from the official docs:
|
1 2 |
client_max_body_size 4G; keepalive_timeout 5; |
In the configuration file, we also have defined two location blocks. The first block handles the proxying of the requests as defined with the proxy directives. Incoming requests are proxied to the upstream django servers defined earlier:
|
1 2 3 4 5 6 7 |
location / { proxy_set_header X-Forwarded-For $proxy_add_x_forwarded_for; proxy_set_header X-Forwarded-Proto $scheme; proxy_set_header Host $http_host; proxy_redirect off; proxy_pass http://django; } |
You can find more information about the proxy directives from Nginx Module ngx_http_proxy_module and the docs on deploying a Gunicorn server.
In the second location block, we define a path: /well-known/acme-challenge/. It is usually used by Certbot to verify your domain name with Let’s Encrypt before provisioning or renewing an SSL certificate:
|
1 2 3 |
location ^~ /.well-known/acme-challenge/ { root /var/www/html; } |
That is all for the Nginx configuration file. You can now save and close the file once you finish editing.
The configuration file you just defined can be used to run an Nginx container. However, it will fail as we have not provisioned the SSL certificates from Let’s Encrypt. In this tutorial, we will use the nginx:1.20.2 Docker image version 1.20.2 from the official Nginx image repository on Docker Hub.
You can run the command below to download the image and verify that everything is working correctly:
|
1 2 3 4 |
docker run --rm --name nginx -p 80:80 -p 443:443 \ -v ~/conf/nginx.conf:/etc/nginx/conf.d/nginx.conf:ro \ -v /var/www/html:/var/www/html \ nginx:1.20.2 |
This command creates a container named nginx and maps the ports 80 and 443 between the host system and the container. The --rm flag removes any intermediate containers after a successful build. We use the -v flag to mount the config file into the container at /etc/nginx/conf.d/nginx.conf which is the default Nginx configurations directory. It’s mounted in read-only mode using the ro flag to prevent the Nginx container from modifying it. We set the default webroot directory and mount it as /var/www/html. We finish by instructing Docker to use the nginx:1.20.2 image for this build. Let’s acquire the TLS/SSL certificate and key from Let’s Encrypt in the next step.
Step 4: Provisioning SSL/TLS Certificate from Let’s Encrypt and Configuring Certbot Autorenewal
Certbot helps provision free TLS certificates from Let’s Encrypt as well as manage their autorenewal before they expire. This improves the security of your websites and ensures they are served over HTTPS. In line with keeping our architecture containerized, we will be using the Certbot Docker image to pull the SSL/TLS certificates and configure autorenewal. Make sure you have Docker installed on your proxy server as per the Prerequisites instructions.
You should also have a DNS A record of your registered domain name pointing to your proxy server’s IP address. You can verify by running the certbot Docker image and passing in the --staging flag:
|
1 2 3 4 |
docker run -it --rm -p 80:80 --name certbot \ -v "/etc/letsencrypt:/etc/letsencrypt" \ -v "/var/lib/letsencrypt:/var/lib/letsencrypt" \ certbot/certbot certonly --standalone --staging -d example_domain.com |
The command will download the Certbot image and run it in interactive mode. This means that it will come with a shell, allowing you to enter some details. It maps port 80 of the host to port 80 inside the container. We use the -v flag to mount two host directories into the container: /etc/letsencrypt/ and /var/lib/letsencrypt/. The --standalone flag specifies that we want the Certbot image to run without using Nginx. Finally, we have the --staging flag which will have Certbot executing on the staging servers and validating your domain name.
Enter your email address and accept the Terms of Service when prompted. The following is the output of a successful validation:
|
1 2 3 4 5 6 7 |
Account registered. Requesting a certificate for example_domain.com Successfully received certificate. Certificate is saved at: /etc/letsencrypt/live/example_domain.com/fullchain.pem Key is saved at: /etc/letsencrypt/live/example_domain.com/privkey.pem This certificate expires on 2022-04-29. These files will be updated when the certificate renews. |
NEXT STEPS:
The certificate will need to be renewed before it expires. Certbot can automatically renew the certificate in the background, but you may need to take steps to enable that functionality. Check this link for instructions.
You can view the certificate using the cat command:
|
1 |
sudo cat /etc/letsencrypt/live/example_domain.com/fullchain.pem |
The above command should display your certificate in the terminal. Once you have confirmed that Certbot has provisioned your certificate, you can now test the Nginx configuration you had created in Step 3. Execute the Docker command below to start up the Nginx container:
|
1 2 3 4 5 6 |
docker run --rm --name nginx -p 80:80 -p 443:443 \ -v ~/conf/nginx.conf:/etc/nginx/conf.d/nginx.conf:ro \ -v /etc/letsencrypt:/etc/letsencrypt \ -v /var/lib/letsencrypt:/var/lib/letsencrypt \ -v /var/www/html:/var/www/html \ nginx:1.20.2 |
In this command, we have used the -v flag to mount the location of the Let’s Encrypt SSL/TLS certificates directories.
When the container is up and running, open the webpage in your browser: http://example_domain.com. You will likely see a warning about the website being insecure:

This is because we had only provisioned staging/test certificates and not production certificates from Let’s Encrypt. Let’s get the production certificates by executing the following Certbot command without the --staging flag:
|
1 2 3 4 |
docker run -it --rm -p 80:80 --name certbot \ -v "/etc/letsencrypt:/etc/letsencrypt" \ -v "/var/lib/letsencrypt:/var/lib/letsencrypt" \ certbot/certbot certonly --standalone -d example_domain.com |
In the prompt, confirm that you want to renew and replace the existing certificate by typing 2 and hit ENTER. This should provision a production ready certificate. You can now run the Nginx container and everything should work well:
|
1 2 3 4 5 6 |
docker run --rm --name nginx -p 80:80 -p 443:443 \ -v ~/conf/nginx.conf:/etc/nginx/conf.d/nginx.conf:ro \ -v /etc/letsencrypt:/etc/letsencrypt \ -v /var/lib/letsencrypt:/var/lib/letsencrypt \ -v /var/www/html:/var/www/html \ nginx:1.20.2 |
Once the container is up and running, open the webpage in your browser: http://example_domain.com again. Notice that your browser is redirected to HTTPS even if you put HTTP. This means our server in the Nginx configuration as well as the provisioned SSL/TLS certificates are working fine. Navigate to the polls route http://example_domain.com/polls since we do not have a route defined for the home path /. You should see the polls interface:

So far, you have successfully configured a production-ready architecture. You have implemented two backend servers that will process incoming requests proxied from the proxy server. The proxy server will handle load balancing and securing of traffic using the provisioned TLS certificates.
However, you should keep in mind that Let’s Encrypt certificates expire in 90 days. Thus, you should renew them before the 90-day mark. Since the Nginx container will be running, you should use the webroot mode instead of the standalone mode when you execute the certbot command for certificate renewal. Remember you had specified the /var/www/html/.well-known/acme-challenge/ directory in the Nginx config file in Step 3. Certbot will use this path to store validation files. Also, Let’s Encrypt client will call this path with validation requests when you try to renew the certificates. Once the renewal command finishes executing, you can reload Nginx to effect the changes.
Kill the container by hitting CTRL+C in your terminal, and let’s spin it up again in detached mode with the -d flag:
|
1 2 3 4 5 6 |
docker run --rm --name nginx -d -p 80:80 -p 443:443 \ -v ~/conf/nginx.conf:/etc/nginx/conf.d/nginx.conf:ro \ -v /etc/letsencrypt:/etc/letsencrypt \ -v /var/lib/letsencrypt:/var/lib/letsencrypt \ -v /var/www/html:/var/www/html \ nginx:1.20.2 |
This will leave the Nginx container running in the background. Let’s test the certificate renewal procedure with the --dry-run flag by executing the command below:
|
1 2 3 4 5 |
docker run -it --rm --name certbot \ -v "/etc/letsencrypt:/etc/letsencrypt" \ -v "/var/lib/letsencrypt:/var/lib/letsencrypt" \ -v "/var/www/html:/var/www/html" \ certbot/certbot renew --webroot -w /var/www/html --dry-run |
In this command, we have specified the --webroot plugin as well as the path to use for validation requests with -w flag. We also specify the --dry-run flag to verify the auto-renewal procedure without actually provisioning a certificate.
You should see a similar output on a successful simulation:
|
1 2 3 4 5 6 7 8 |
- - - - - - - - - - - - - - - - - - - - - - - - - - - - - - - - - - - - - - - - Processing /etc/letsencrypt/renewal/example_domain.com.conf - - - - - - - - - - - - - - - - - - - - - - - - - - - - - - - - - - - - - - - - Simulating renewal of an existing certificate for example_domain.com - - - - - - - - - - - - - - - - - - - - - - - - - - - - - - - - - - - - - - - - Congratulations, all simulated renewals succeeded: /etc/letsencrypt/live/hackinroms.com/fullchain.pem (success) - - - - - - - - - - - - - - - - - - - - - - - - - - - - - - - - - - - - - - - - |
Whenever you renew a certificate for your running application, you must reload Nginx for the container to start using the new certificate. The following Docker command reloads the nginx (remember we named the container as nginx) container:
|
1 |
docker kill -s HUP nginx |
The command sends a HUP Unix signal to the Nginx process running inside the nginx Docker container. This causes Nginx to reload its configurations and starts using the renewed certificates.
Since we have TLS/SSL installed on our proxy server, and have our website being served with HTTPS, we now need to secure our backend app servers to only allow requests from the proxy server.
Step 5: Securing the Backend Django Servers from External Access
The proxy server you implemented in this tutorial handles SSL termination where it decrypts the SSL connection and forwards unencrypted packets to the backend app servers. Since we will be securing the backend servers against any external access, this level of security should work for most cases. However, if you are deploying applications that transmit sensitive data such as bank information or health data, then you should implement end-to-end encryption.
In this tutorial, the Gunicorn servers in the backend are being protected by Nginx since they are not meant to be front-facing. The Nginx proxy server is like a gateway to the backend servers, preventing external clients from directly accessing the backend app servers. You should make sure that all requests go through the proxy server. That being the case, Docker happens to have an issue where it bypasses the ufw firewall rules and opens ports externally, which may leave your infrastructure insecure. This is actually evident since we set up our app servers in Step 1 and Step 2 without allowing port 80 in the ufw rules. However, you can still access the web pages when you visit either of the server’s public IP addresses in the browser. One way you can fix this issue is by using iptables directly without going through ufw. You can read the Docker and iptables official documents to learn more. Another recommended way is using cloud firewalls.
Let’s modify the UFW’s configurations to block external access to all ports that may have been opened by Docker. When we mapped the hosts port 80 to the Docker container’s port 8000 with the flag -p 80:8000 on the Docker command, we also inadvertently opened port 80 on the host machine. You can disable this access by modifying the UFW’s configuration as described in the ufw-docker repository README.
Let’s change for the first Django app server. Log in to the server and open the file at /etc/ufw/after.rules with nano as a sudo user:
|
1 |
sudo nano /etc/ufw/after.rules |
The file contains the following ufw rules:
|
1 2 3 4 5 6 7 8 9 10 11 12 13 14 15 16 17 18 19 20 21 22 23 24 25 26 27 28 29 30 |
# # rules.input-after # # Rules that should be run after the ufw command line added rules. Custom # rules should be added to one of these chains: # ufw-after-input # ufw-after-output # ufw-after-forward # # Don't delete these required lines, otherwise there will be errors *filter :ufw-after-input - [0:0] :ufw-after-output - [0:0] :ufw-after-forward - [0:0] # End required lines # don't log noisy services by default -A ufw-after-input -p udp --dport 137 -j ufw-skip-to-policy-input -A ufw-after-input -p udp --dport 138 -j ufw-skip-to-policy-input -A ufw-after-input -p tcp --dport 139 -j ufw-skip-to-policy-input -A ufw-after-input -p tcp --dport 445 -j ufw-skip-to-policy-input -A ufw-after-input -p udp --dport 67 -j ufw-skip-to-policy-input -A ufw-after-input -p udp --dport 68 -j ufw-skip-to-policy-input # don't log noisy broadcast -A ufw-after-input -m addrtype --dst-type BROADCAST -j ufw-skip-to-policy-input # don't delete the 'COMMIT' line or these rules won't be processed COMMIT |
Add the following block of UFW configuration lines to the bottom of the file:
|
1 2 3 4 5 6 7 8 9 10 11 12 13 14 15 16 17 18 19 |
# BEGIN UFW AND DOCKER *filter :ufw-user-forward - [0:0] :DOCKER-USER - [0:0] -A DOCKER-USER -j RETURN -s 10.0.0.0/8 -A DOCKER-USER -j RETURN -s 172.16.0.0/12 -A DOCKER-USER -j RETURN -s 192.168.0.0/16 -A DOCKER-USER -p udp -m udp --sport 53 --dport 1024:65535 -j RETURN -A DOCKER-USER -j ufw-user-forward -A DOCKER-USER -j DROP -p tcp -m tcp --tcp-flags FIN,SYN,RST,ACK SYN -d 192.168.0.0/16 -A DOCKER-USER -j DROP -p tcp -m tcp --tcp-flags FIN,SYN,RST,ACK SYN -d 10.0.0.0/8 -A DOCKER-USER -j DROP -p tcp -m tcp --tcp-flags FIN,SYN,RST,ACK SYN -d 172.16.0.0/12 -A DOCKER-USER -j DROP -p udp -m udp --dport 0:32767 -d 192.168.0.0/16 -A DOCKER-USER -j DROP -p udp -m udp --dport 0:32767 -d 10.0.0.0/8 -A DOCKER-USER -j DROP -p udp -m udp --dport 0:32767 -d 172.16.0.0/12 -A DOCKER-USER -j RETURN COMMIT # END UFW AND DOCKER |
The rules you have added prevent public access to ports Docker opens. Further, they allow access from the 10.0.0.0/8, 172.16.0.0/12, and 192.168.0.0/16 private IP ranges. You can read more details about the rules from the ufw-docker README. Save and close the files when you finish editing. This setup should work if you had set up a virtual private cloud network (VPC), with all your three servers in the VPC, then you had specified the private IPs of the Django servers in the upstream directive of the Nginx config file.
However, we used public IPs and we may not have a VPC. Thus, you need to add a rule to ufw to allow traffic from the Nginx proxy server through port 80 of both Django app servers. You can add an allow rule to ufw specifying the originating server IP to port 80 using the following command:
|
1 |
sudo ufw allow from NGINX_PROXY_IP to any port 80 |
Once you are done with the modifications, reboot your Django app server for the changes to take effect since running sudo ufw reload only seems to fail to effect changes:
|
1 |
sudo reboot |
When the server has rebooted, spin up the container as you did in Step 1 or Step 2:
|
1 |
docker run -d --rm --name polls --env-file env -p 80:8000 django-polls:v1 |
Next, try visiting the IP of the first Django server in the browser to see if it presents the Polls interface: http://FIRST_SERVER_IP/polls. It will fail. Now, log out of the first server and repeat the steps you have done here for the second server. Open the /etc/ufw/after.rules with nano as a sudo user:
|
1 |
sudo nano /etc/ufw/after.rules |
As you did earlier, scroll to the bottom and add the UFW configurations block:
|
1 2 3 4 5 6 7 8 9 10 11 12 13 14 15 16 17 18 |
# BEGIN UFW AND DOCKER *filter :ufw-user-forward - [0:0] :DOCKER-USER - [0:0] -A DOCKER-USER -j RETURN -s 10.0.0.0/8 -A DOCKER-USER -j RETURN -s 172.16.0.0/12 -A DOCKER-USER -j RETURN -s 192.168.0.0/16 -A DOCKER-USER -p udp -m udp --sport 53 --dport 1024:65535 -j RETURN -A DOCKER-USER -j ufw-user-forward -A DOCKER-USER -j DROP -p tcp -m tcp --tcp-flags FIN,SYN,RST,ACK SYN -d 192.168.0.0/16 -A DOCKER-USER -j DROP -p tcp -m tcp --tcp-flags FIN,SYN,RST,ACK SYN -d 10.0.0.0/8 -A DOCKER-USER -j DROP -p tcp -m tcp --tcp-flags FIN,SYN,RST,ACK SYN -d 172.16.0.0/12 -A DOCKER-USER -j DROP -p udp -m udp --dport 0:32767 -d 192.168.0.0/16 -A DOCKER-USER -j DROP -p udp -m udp --dport 0:32767 -d 10.0.0.0/8 -A DOCKER-USER -j DROP -p udp -m udp --dport 0:32767 -d 172.16.0.0/12 -A DOCKER-USER -j RETURN COMMIT # END UFW AND DOCKER |
Save and close the file once you have added the block above.
Next, add an allow rule to ufw specifying the originating server IP to port 80 using the following command:
|
1 |
sudo ufw allow from NGINX_PROXY_IP to any port 80 |
Reboot your server for the changes to take effect:
|
1 |
sudo reboot |
When the server is back on, spin up the container again with the command:
|
1 |
docker run -d --rm --name polls --env-file env -p 80:8000 django-polls:v1 |
Test if you can view the polls interface by going directly to the second server’s IP address: http://SECOND_SERVER_IP/polls. It should also fail.
This architecture is now ready to be tested. You can visit https://example_domain_here/polls to view the default Polls interface from your browser. This means the Nginx proxy server still has access to the Django backend servers.
Conclusion
In this guide, we showed you how to implement a scalable infrastructure using Docker containers. The infrastructure includes a separate PostgreSQL database server, two backend application servers, and an Nginx proxy server to load balance and distribute traffic across the two servers. While we based our application on the Django Polls application, you can customize this architecture for various applications using different frameworks, like Node.js, Laravel, etc.
This is a basic guideline to get you started. A few improvements you can add is to host your image on an image repository like Docker Hub allowing easy distribution of the image to multiple servers. You may also add continuous integration and deployment pipelines to automatically build, test and deploy images to app servers whenever an event happens. For example, an event could be pushing new code to a specified branch on a git repository. You may also want to automate what happens when the container encounters an error. Docker official docs provide a good guideline on Starting containers automatically in case of errors or system reboot.
Happy Computing!
- How To Enable, Create and Use the .htaccess File: A Tutorial - March 8, 2023
- An Overview of Queries in MySQL - October 28, 2022
- Introduction to Cookies: Understanding and Working with JavaScript Cookies - October 25, 2022
- An Overview of Data Types in Ruby - October 24, 2022
- The Architecture of Iptables and Netfilter - October 10, 2022