
Introduction
SSL certificates are tools that enable you to make your server more secure. These data files make the connections between a server and a browser safer. They are the difference between an HTTP and an HTTPS website. The way an SSL certificate works is that it encrypts your data stream, vets out the traffic, and verifies user identities. It also indicates to the visitor that your website is safe to visit.
There are two ways you can go about acquiring an SSL certificate. The first option is to use a self-signed certificate. However, with this you have to keep in mind that users will be receiving a warning message. The message will indicate that the system cannot verify the identity of your website. This is why the other route is the preferable method. It will require you to purchase an SSL certificate from a trusted certificate authority, or CA.
In this comprehensive guide we will explore how you can get an SSL certificate from CAs like GoDaddy and RapidSSL. Additionally, we will see how you can choose the optimum CA as per your requirements and expectations. Lastly, the tutorial will explain how you can install your SSL certificate on HTTP web servers, Nginx and Apache in particular.
If you don’t have a web server installed, you can first take a look at these tutorials that will guide you through:
- Installing Nginx on Ubuntu 18.04
- Installing the Apache Server on Ubuntu 18.04: A How-To Guide
- The World of Web Servers: Apache vs. Nginx
Prerequisites
Before you get around to choosing and installing a certificate on your server, you have to cater to some prerequisites. Let’s take a look at everything you need to take care of beforehand:
- Purchasing Resources
First of all, it is important to remember that you will have to purchase your certificate. You cannot acquire authentic SSL certificates free of cost from most commercial CAs. There is, however, a new CA called Let’s Encrypt that offers free SSL/TLS certificates to users. These certificates work effectively in most browsers. Here is a guide on how you can secure Apache with Let’s Encrypt.
- Registering a Domain Name
The second thing you need to take care of is arranging for a domain name. You will need a registered domain with which to use your certificate. There are many services available online that allow you to register for a domain name of your choice. We will be working with the likes of Namecheap and GoDaddy.
- Validation Rights for the Domain
Once you have your domain name, you need to get domain validation rights. For this purpose, you need to have access to one of two things. Either the ‘admin type’ email address at the domain or one of the email addresses on the WHOIS record of your domain. This is important because CAs typically send validation emails to one of these email addresses for your SSL certificate.
Other times, your CA might give you the option to use an alternative validation method. For example, they may allow you to perform DNS or HTTP-based validation. Regardless, the goal is to receive an Organization Validation (OV) or Extended Validation (EV) SSL certificate. As such, you will have to prove your status as the legal owner of the website to the CA with the relevant paperwork.
- Preparing the Web Server
Lastly, you need to ready your web server as you will need to install the certificate on it. You can use servers like Nginx, Apache HTTP, Varnish, and HAProxy. Make sure that your server of choice is configured to use your registered domain name. You will also have to configure the domain to use the relevant nameservers. Finally, remember to add DNS records for the server to the nameservers.
Which Certificate Authority Should You Opt For?
Now that you are prepared, it is time to select the ideal certificate authority. Simply put, you will want to go with an option that best caters to your requirements. Not only should it provide the features you need, but it should also fit within your budget. Apart from that, you may also want to look out for extra features that provide you benefit and tip the scales in a CA’s favor. For example, you should prefer a CA that offers free reissues of SSL certificates over one that does not.
Let’s explore some of these critical parameters in further detail.
What are the Types of Certificates That They Offer?
One of the most important things to consider is that your chosen CA actually issues the type of certificate you want. Let’s familiarize ourselves with some of the certificate variations:
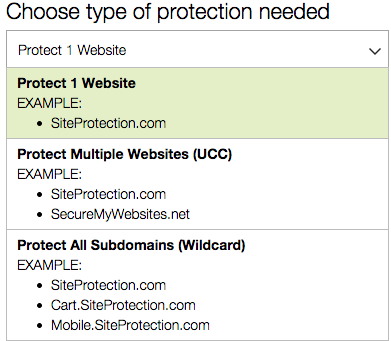
Based on Domains
- SINGLE DOMAIN: As explained by the name, these certificates are used for one, singular domain. Let’s say our certified domain is
example.com. The certification will not include a subdomain likewww.example.com.
- WILDCARD: While a wildcard certificate also caters to one domain, it also includes all of the subdomains. So if we were to get a wildcard certificate for the
*.example.comwebsite, it would cover its subdomains likeexample.com,, and
www.example.comexample.netas well.
- MULTIPLE DOMAIN: These are also called SAN or UC certificates. You can use them with multiple domains and subdomains like
example.com,, and
www.example.comexample.net. These are added to the Subject Alternative Name field.
Based on Validation Level
- DOMAIN VALIDATION (DV): Before a CA issues a DV certificate, they must ensure that you are the owner of the domain.
- ORGANIZATION VALIDATION (OV): Before a CA issues a DV certificate, they must validate your legal identity.
- EXTENDED VALIDATION (EV): Before a CA issues an EV certificate, they have to ensure your legal identity and other things based on a strict set of regulations. This is because an EV certificate lends legitimacy to your website in addition to security. With the extended validation, you have a single domain and multiple domain variations. There is no wildcard EV certificate.
How to Generate Your CSR and Private Key?
Now that you have decided which certificate to get, let’s move onto the next step. It is time to generate a CSR and a private key. CSR stands for certificate signing request.
To do this, you will have to use openss1 on your Apache or Nginx server. We will show you how to use it to generate your CSR and private key. For the purposes of this example, we will store all files in the home directory. However, you can store them anywhere securely.
|
1 |
cd ~ |
Let’s say we want to generate a CSR called example.com.csr and a private key by the name of example.com.key. Here is the command you will use:
|
1 |
openssl req -newkey rsa:2048 -nodes -keyout example.com.key -out example.com.csr |
You can replace example.com with the name of your domain. After you run this command, you will have to enter some information for your CSR. The most critical field to fill in is the Common Name. This has to be the same as the domain name you want to use the certificate with like example.com, www.example.com, or *.example.com. If you are getting an OV or EV certificate, make sure all details are filled in accurately. Here is an example:
|
1 2 3 4 5 6 7 |
Country Name (2 letter code) [AU]:US State or Province Name (full name) [Some-State]:New York Locality Name (eg, city) []:New York Organization Name (eg, company) [Internet Widgits Pty Ltd]:My Company Organizational Unit Name (eg, section) []: Common Name (e.g. server FQDN or YOUR name) []:example.com Email Address []:sammy@example.com |
Submitting this info will give you the CSR and the key in the form of .csr and .key files. Keep the .key file safe and send the .csr file to your selected CA by copying and pasting it in your certificate request. You can print out your CSR with this command:
|
1 |
cat example.com.csr |
RapidSSL Certificates Through Namecheap
Now we can get around to purchasing a certificate. In this tutorial, we will be looking at two CAs: RapidSSL via Namecheap and GoDaddy. Lets begin with the former.
Selecting the Certificate
First, you need to decide which type of certificate you want to get. To determine this, browse through the options available on the SSL certificate page at Namecheap right here. Next, you need to select your validation level, certificate type, or CA.
Purchasing the Certificate
Once you have made the selection, click on ‘Compare Products’ in the ‘Domain Validation’ section. Next, search for ‘RapidSSL’. Click Add to Cart and register or login to make the purchase.
Requesting the Certificate
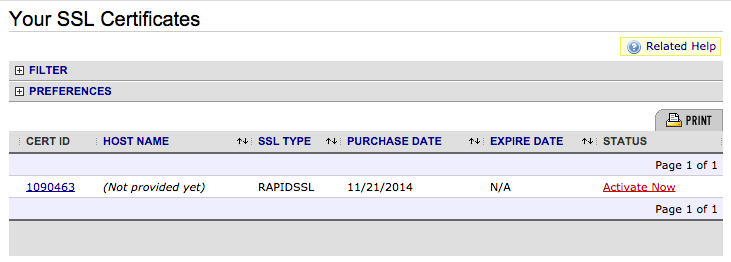
After making the purchase, click on your username at the top of the page. From the drop-down menu, click on Manage SSL Certificates:
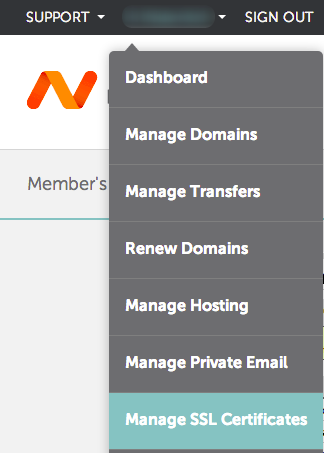
This will show you all of the SSL certificates you have purchased using Namecheap. Find the certificate of choice, and click on Activate Now:
Next, choose your web server software. Some sample options include “Apache + MOD SSL”, “nginx”, or “Tomcat”. This decides what the format of the certificate will be. Now, paste your CSR in the box and click Next. The next step requires you to select the address you wish to receive the validation link on. You can choose between an admin type address on your domain or an address on the domain’s WHOIS record.
Now enter the “Administrative Contact Information” and click Submit Order.
Validating the Domain
Next, you need to wait to receive a validation email on the approver address that you provided. Then, approve the certificate request in the email.
Downloading the Certificates
Once approved, the certificate will go to Technical Contact. You will find the certificate for your domain at the bottom of this email. Copy this certificate and the CA’s intermediate certificate. Save these on your server in the same location as your CSR and private key.
You have to save the domain certificate with the domain name and the .crt extension. For example, the name of the domain certificate will be example.com.crt and the intermediate certificate will be intermediate.crt. Now, your certificate is ready for installation on the web server.
Certificates from GoDaddy
Next, let’s see how you can purchase a certificate from GoDaddy. While it offers all certificate types, we will acquire a single domain certificate in our example.
Selecting the Certificate
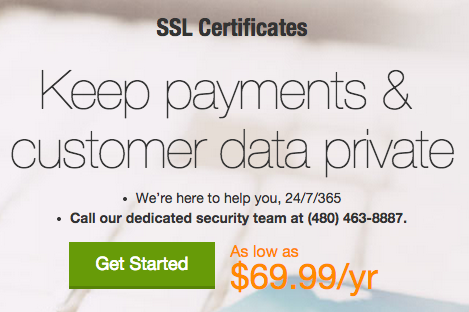
Browse through GoDaddy’s SSL certificate page right here. Click on the Get Started button:
Next, you have to choose the type of certificate you want. Browse through the drop-down menu. In our example, we will be selecting a single domain:
Then, choose the level of validation and determine the duration of validity.
Purchasing the Certificate
Finally, click on Add to Cart, Proceed to Checkout, register for an account, and then complete the payment.
Requesting the Certificate
Now that you made the purchase, you have to request the certificate. Click on My Account and go to Manage SSL Certificates. Find the certificate you just purchased and click on Set Up. If it is your first time using GoDaddy, it will ask you to set up the product. Wait for a few minutes, then refresh your browser.
Now, you should be able to see a ‘New Certificate’ and a ‘Launch’ option on your GoDaddy account. Click on Launch next to your desired certificate. Copy and paste your CSR in the space, click the I Agree checkbox, and then press Request Certificate.
Validating the Domain
GoDaddy will require some documents and information to verify your ownership of the domain. You will receive an email on the address on your domain’s WHOIS record. Follow the instructions to get the certificate issued.
Downloading the Certificate
Next, you will receive an email on your GoDaddy-associated email address verifying the issuance of your certificate. Either click on the download certificate link or click Launch next to your certificate in the GoDaddy control panel. Next, click Download.
Similar to Namecheap, you will have to specify the server software from the Server Type drop-down menu. Click Apache if you are using Apache HTTP or Nginx. Next, click on Download Zip File. On extracting the ZIP archive, you will find two .crt files, one is an SSL certificate and the other is the intermediate certificate. The former will have a random name while the latter will be named gd_bundle-g2-1.crt. Copy and paste them to your web server. Rename the certificate with the domain name like example.com.crt and intermediate bundle as intermediate.crt.
Your certificate is ready for installation on the webserver.
How to Install Your Certificate on Your Web Server?
Now that you have acquired your certificate, you need to install it on your web server. To do this, you have to do some configuration in your server software. The goal is to add some SSL-associated lines. Next, we will see how to make these configuration changes for Apache HTTP and Nginx on Ubuntu 14.04.
Before we begin, we have to make the following assumptions for our example:
- The private key, and SSL and CA intermediate certificates are present in a home directory called
/home/sammy. - The name of the private key is
example.com.key. - The name of the SSL certificate is
example.com.crt. - The intermediate certificates are located in a file called
intermediate.crt.
Make sure that connections on port 443 (HTTPS) are allowed if your firewall is enabled. We will explore how to configure both Nginx and Apache servers for your certificate.
Nginx
If you have a CA intermediate certificate, you need to make a certificate file that is ‘chained’. The file must contain the SSL certificate and the intermediate certificate. Then, shift to the directory containing the private key, SSL certificate, and the intermediate certificate. Let’s say they are in the home directory:
|
1 |
cd ~ |
We will use the following command to make the combined file. It will be called example.com.chained.crt:
|
1 |
cat example.com.crt intermediate.crt > example.com.chained.crt |
Next, open the Nginx server block configuration directory. Let’s assume it is present at /etc/nginx/sites-enabled. Run the following command:
|
1 |
cd /etc/nginx/sites-enabled |
Open it for editing with this command to add SSL lines to the default server block file:
|
1 |
sudo vi default |
Next, change the listen directive to the following:
|
1 |
listen 443 ssl; |
Confirm that the value of the server_name directive is the same as the common name on your certificate. Next, add the ssl_certificate and ssl_certificate_key directives. They help specify the paths of the certificate and the private key files:
|
1 2 3 |
server_name example.com; ssl_certificate /home/sammy/example.com.chained.crt; ssl_certificate_key /home/sammy/example.com.key; |
Adding these lines will make your server open to only the most secure SSL protocols and ciphers:
|
1 2 3 |
ssl_protocols TLSv1 TLSv1.1 TLSv1.2; ssl_prefer_server_ciphers on; ssl_ciphers 'EECDH+AESGCM:EDH+AESGCM:AES256+EECDH:AES256+EDH'; |
You also have the option to add this server block if you want HTTP traffic redirected to HTTPS:
|
1 2 3 4 5 |
server { listen 80; server_name example.com; rewrite ^/(.*) https://example.com/$1 permanent; } |
Now you can Save and Quit the session. Finally, restart Nginx. This will load the new configuration:
|
1 |
sudo service nginx restart |
To check out whether or not it worked, try opening your website using HTTPS like so: https://example.com.
Apache
Here are the configuration details for Apache on Ubuntu 14.04. We shall assume that the server is running on the default virtual host configuration file which is /etc/apache2/sites-available/000-default.conf. Make a copy of your configuration file with this command:
|
1 2 |
cd /etc/apache2/sites-available cp 000-default.conf 000-default.conf.orig |
After that, open it for editing with this:
|
1 |
sudo vi 000-default.conf |
Allow connections on port 443 by editing the <VirtualHost *:80> entry:
|
1 |
<VirtualHost *:443> |
Next, add your domain name with the ServerName directive:
|
1 |
ServerName example.com |
Add these lines to specify paths for the certificate and key:
|
1 2 3 |
SSLEngine on SSLCertificateFile /home/sammy/example.com.crt SSLCertificateKeyFile /home/sammy/example.com.key |
To specify the CA intermediate bundle in Apache 2.4.8 or above, use the following:
|
1 |
SSLCACertificateFile /home/sammy/intermediate.crt |
Use the following if you are using an older version of Apache:
|
1 |
SSLCertificateChainFile /home/sammy/intermediate.crt |
As you can see, we configured the server to listen on port 443 for HTTPS. This means it will not be listening on power 80 for HTTP. So, to redirect, add these lines:
|
1 2 3 4 |
<VirtualHost *:80> ServerName example.com Redirect permanent / https://example.com/ </VirtualHost> |
Next, Save and Quit the session. Run this command to enable the Apache SSL module:
|
1 |
sudo a2enmod ssl |
Finally, restart Apache. This will load the new configuration:
|
1 |
sudo service apache2 restart |
To check out whether or not it worked, try opening your website using HTTPS like so: https://example.com. You can also check the redirect by connecting through HTTP at http://example.com.
Conclusion
This guide covers all the bases when it comes to understanding what SSL certificates are. We also showed you how to acquire them and how to install them on your web server. An SSL certificate helps make your web server much more safe and secure. With a little guidance, you can select the best Certificate Authority for yourself and your server.
Happy Computing!
- How To Enable, Create and Use the .htaccess File: A Tutorial - March 8, 2023
- An Overview of Queries in MySQL - October 28, 2022
- Introduction to Cookies: Understanding and Working with JavaScript Cookies - October 25, 2022
- An Overview of Data Types in Ruby - October 24, 2022
- The Architecture of Iptables and Netfilter - October 10, 2022