High data availability and consistently good performance are a necessity for modern applications. Database clusterization makes this a possibility. Clusterization is, however, a complex process that requires a lot of experience and expertise. To simplify the task and make it achievable, CloudSigma PaaS allows its users to access auto-clustering for MariaDB/MySQL.
In this guide, we will discuss why database clusterization is critical, how you can perform auto-clustering with CloudSigma PaaS, as well as how to navigate the load balancing options and replication types available to you.
Benefits of Database Clusterization
There are many benefits to implementing database clusterization, some of which include:
- As we mentioned before, clusterization improves availability thanks to the pre-configured replication options at your disposal (for e.g., Primary-Secondary, Primary-Primary, and Galera).
- In case you perform horizontal scaling down the line, the new nodes will connect to the cluster automatically.
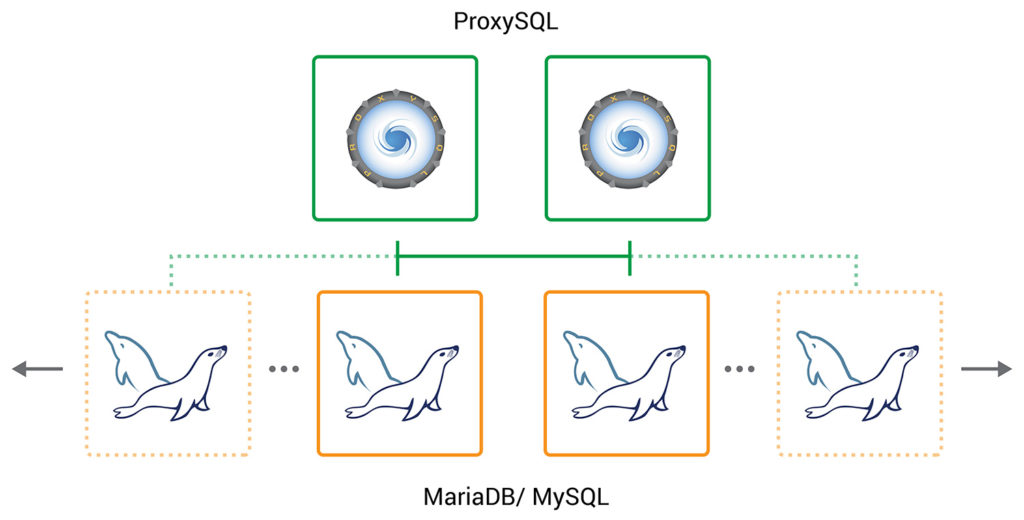
- Load balancing is managed with two ProxySQL nodes for each cluster.
- Nodes in your database that are unavailable or have high latency will be excluded from the cluster automatically to ensure consistent performance. They will be added to the cluster again once they reconnect.
If you wish to take full advantage of these benefits, use the steps below to activate auto-clustering for your MariaDB and MySQL databases in CloudSigma PaaS.
How to Enable Auto-Clustering for Your Databases on CloudSigma PaaS
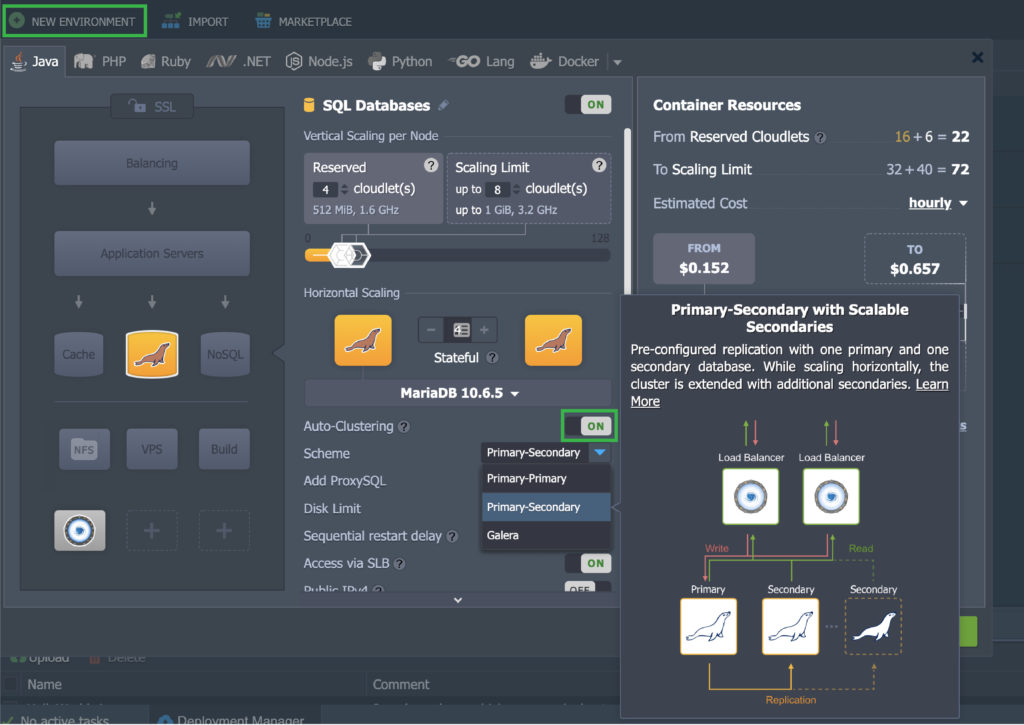
- To start off, click on New Environment on your dashboard.
- Next, select the MariaDB or MySQL database:
- Tap on the Auto-Clustering button to activate it.
- In the drop-down menu, you will be able to visualize the various replication options:
- MariaDB:
Primary-Secondary, Primary-Primary, and Galera
- MySQL:
Primary-Secondary and Primary-Primary
Auto-Clustering Settings and Parameters
The next step is for you to select your preferred application type and the number of nodes. Let’s see how to go about that.
- ProxySQL Load Balancer
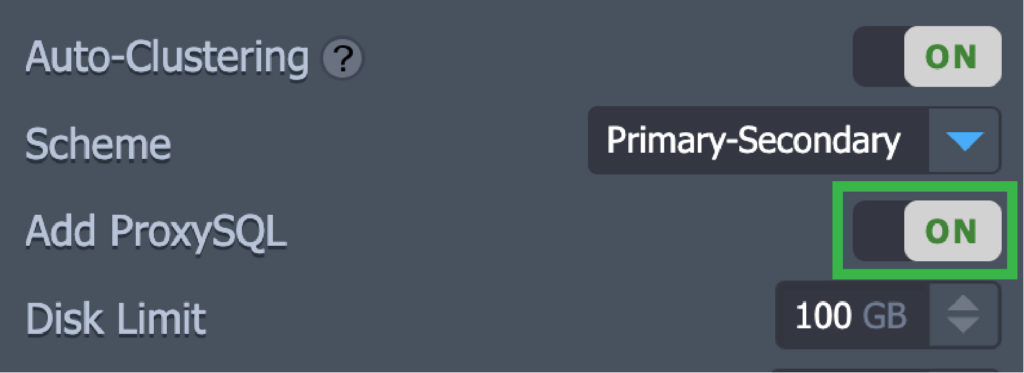
As highlighted in the previous section, each auto-clustering solution has two ProxySQL nodes that are enabled by default. It is possible for you to exclude them before you install your cluster with the following switch:
Note that you cannot do this later/after installation.
- Cluster Access Credentials
Your credentials to access the database will be generated automatically when you make your cluster. If you want to use your personal credentials, you can override them this way:
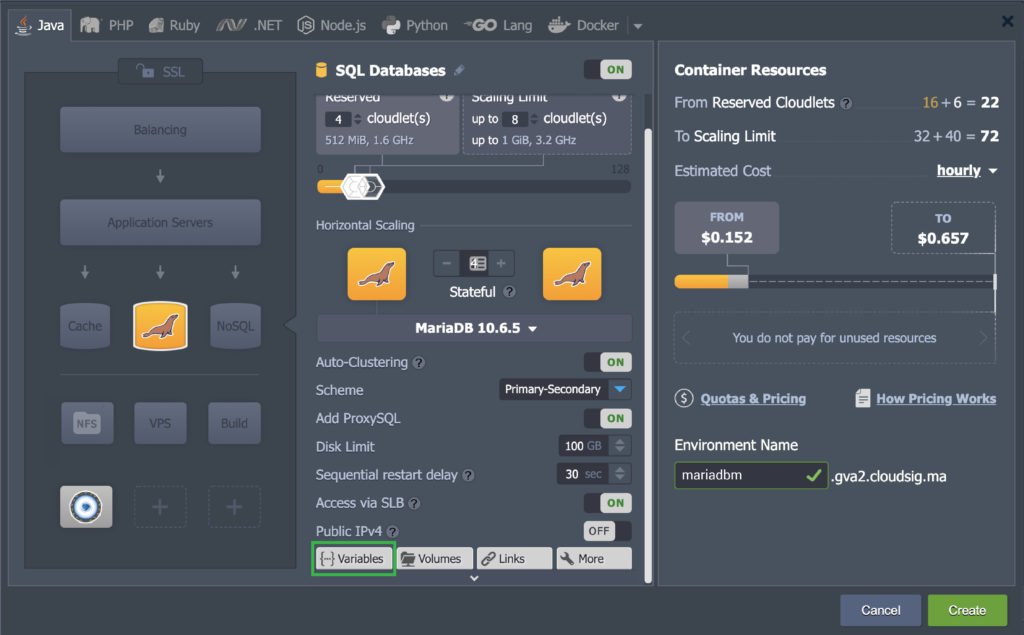
- First, click on Variables:
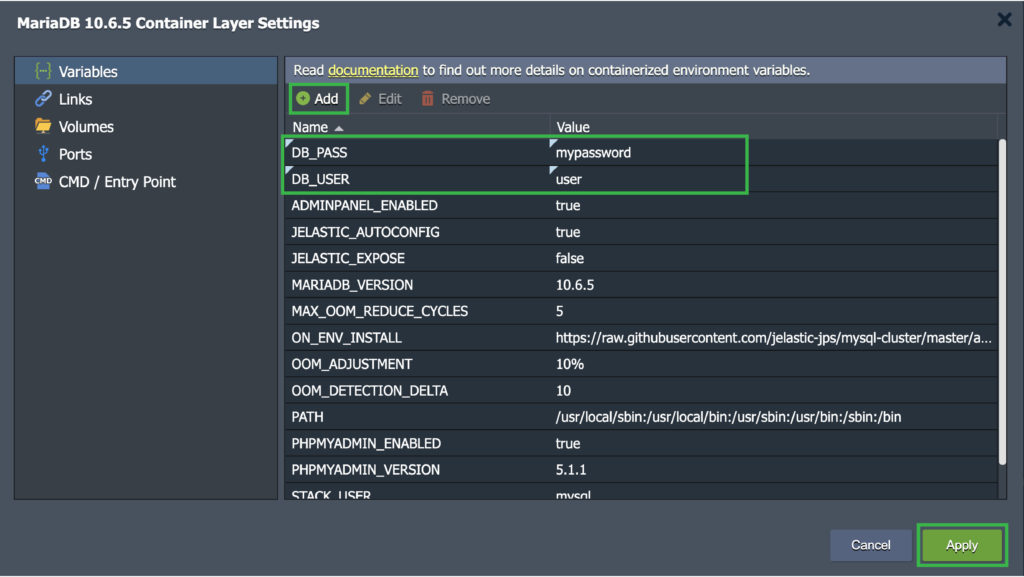
2. Next, click on Add and use DB_USER and DB_PASS to enter custom database credentials like this:
3. Finally, click on Apply. You will receive your custom credentials at your registered email once the cluster is installed. You can use those values to gain access to the PHPMyAdmin at Primary Node and database cluster Entry Point.
- Cluster Horizontal Scaling
You can scale the primary-secondary/primary-primary topologies using an extra database node. If you do this, the PaaS will clone an existing secondary node to create it. Once cloning is complete, binlog replay is used to catch up the data on the new node. This is done so that horizontal scaling is performed quickly and the binlog never expires.
- Cluster Layer Isolation
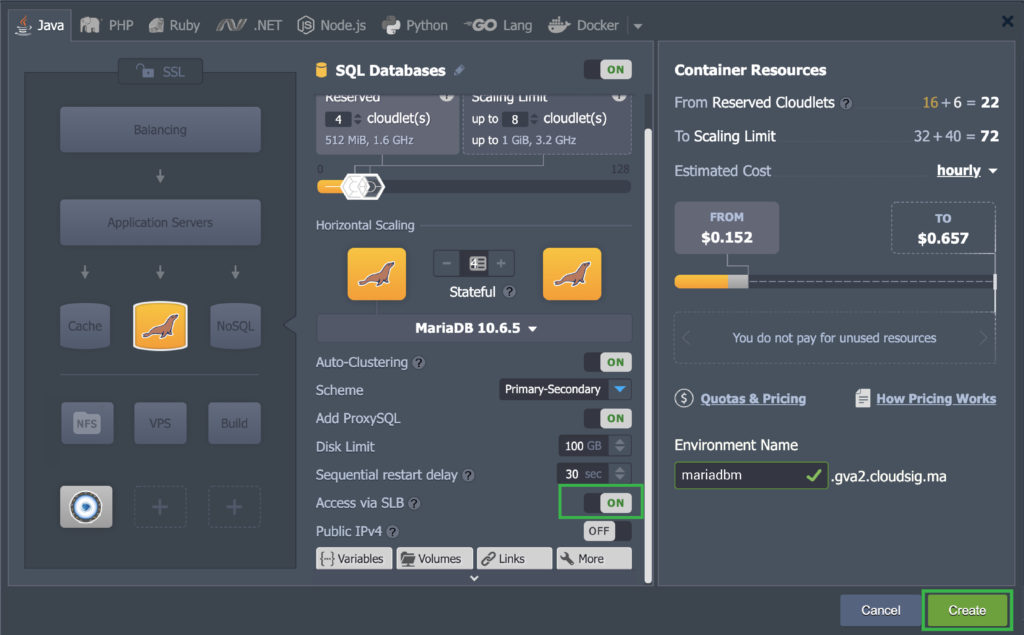
It is up to you to determine which layers will be exposed outside. You can choose to expose all layers or just the entry point proxy layer depending on whether you wish to use an external application. To make this decision, tap on the SLB access switch as needed for each layer and click on Create:
Voila! As you can see, the cluster is all prepped up to operate with just these simple configurations:
Cluster Information for Your Database
Now that you have created your cluster, you will receive a number of emails with all of the relevant information. Here is what you need to know.
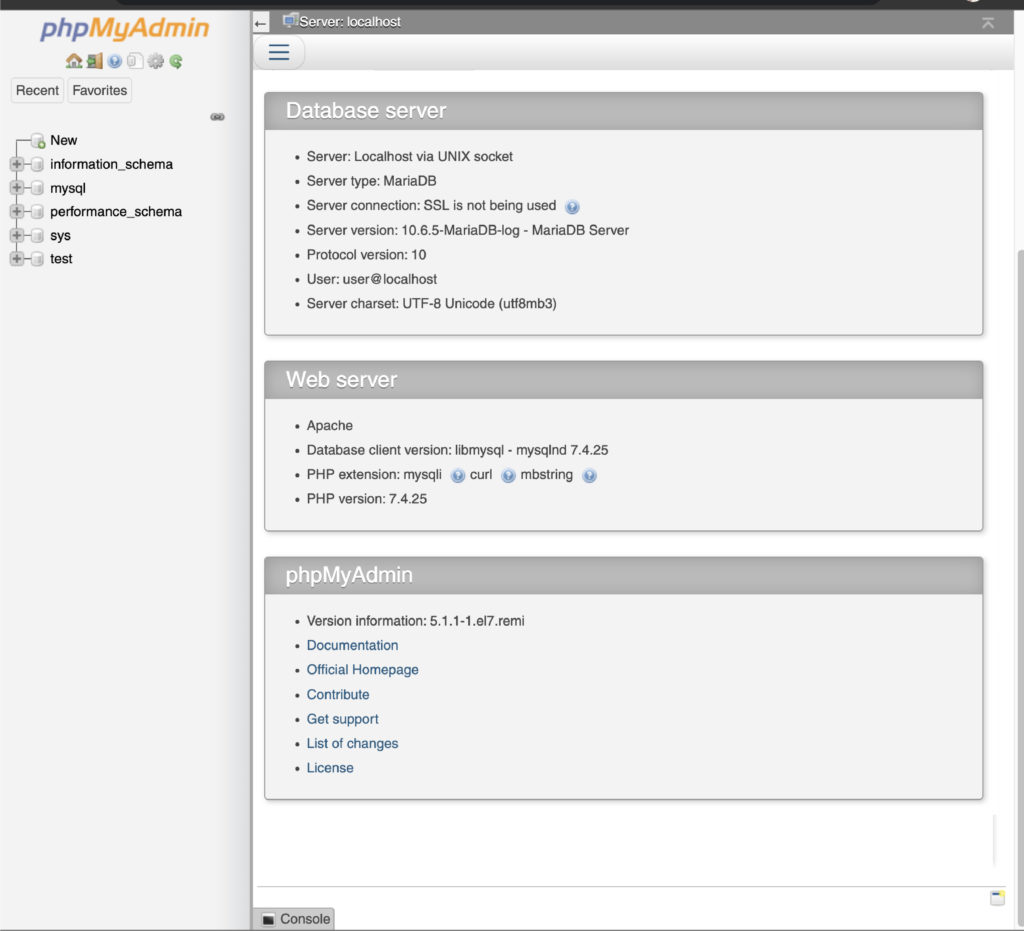
- PHPMyAdmin at Primary Node
You will receive access to this web administration interface along with the credentials. You can use this platform for interactive database management:
- Entry Point for Connection to MySQL Cluster
You will also get the hostname and credentials to connect an application with your database cluster. The entry point is a proxy layer containing your database nodes. The hostname for this layer will be:
|
1 |
proxy.${envName}.${platformDomain} |
If you are planning on using custom user accounts with your cluster after you have installed it, make sure you add them to the mysql_users table on each of your two ProxySQL nodes. Not doing so will result in a failure to connect to the database through the proxy layer.
Next, use the following commands to do this:
|
1 2 3 4 |
$ MYSQL_PWD=admin mysql -h 127.0.0.1 -P6032 -uadmin -e "INSERT INTO mysql_users (username,password,default_hostgroup) VALUES ('', '', 2);" $ MYSQL_PWD=admin mysql -h 127.0.0.1 -P6032 -uadmin -e "LOAD MYSQL USERS TO RUNTIME; SAVE MYSQL USERS TO DISK;" |
Lastly, enter the credentials of your new custom account in place of <username> and <password>.
- Cluster Orchestrator Panel
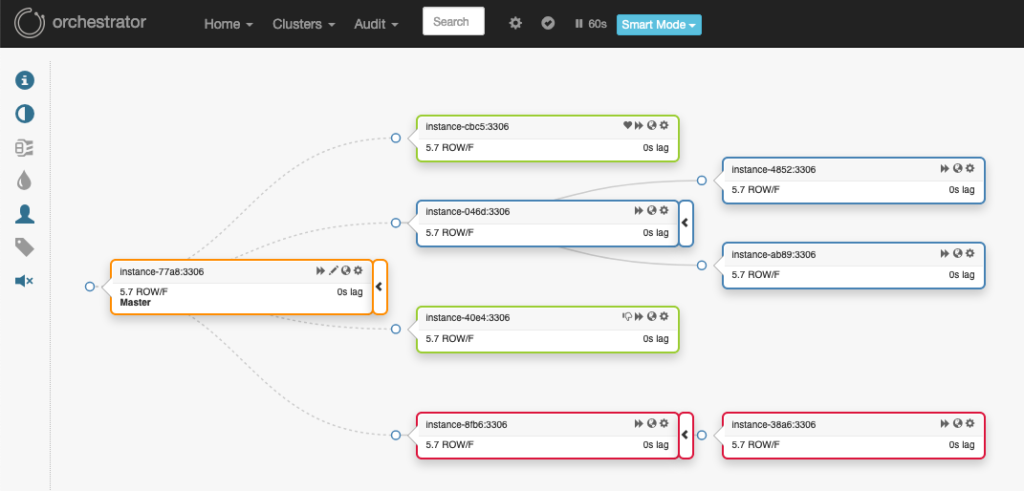
You will also receive credentials for the Orchestrator panel which is dedicated to cluster management. You will find the admin panel of the cluster Orchestrator installed on the ProxySQL node. The panel will display the cluster topology information, show potential replication issues, detail the read/write distribution, and show auto-discovery of new DB nodes among several other features:
Selecting a Replication Type
Next, we shall discuss each type of replication option available to you in the CloudSigma PaaS and which one is best to use in a given situation. Let’s begin!
- Primary-Secondary MariaDB/MySQL Replication
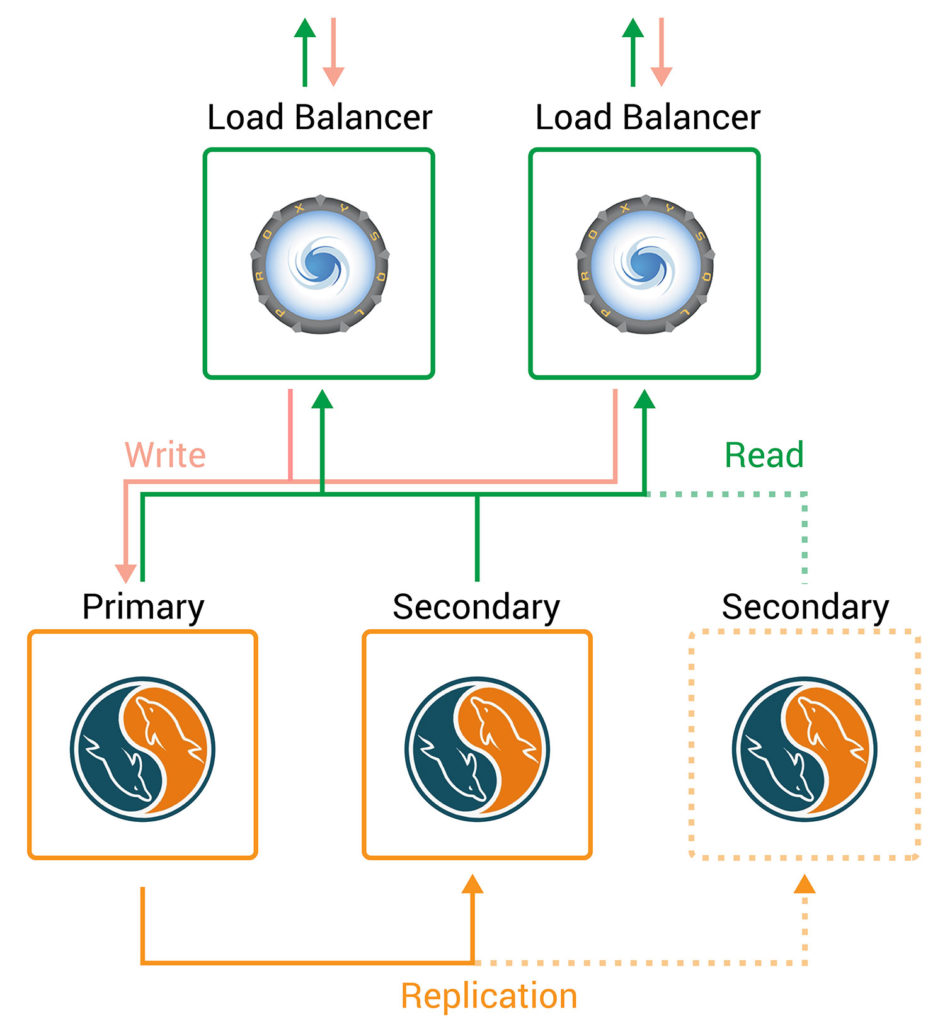
The most commonly found and used topology is the Primary-Secondary replication scheme. Only one node is used to modify data which makes it a consistent model. There is typically no automatic failover if the primary node fails.
Another benefit of using this replication option is the lack of write latency. The reason behind this is the fact that the write is first recorded locally by the primary server and then written to the secondary servers. As such, the addition of replicas has no impact on replication latency and the reads can be scaled out to ensure the best performance.
Additionally, this also allows for easy database backup and loading of secondary instances for analytical requests without any impact on the primary node:
- Primary-Primary MariaDB/MySQL Replication
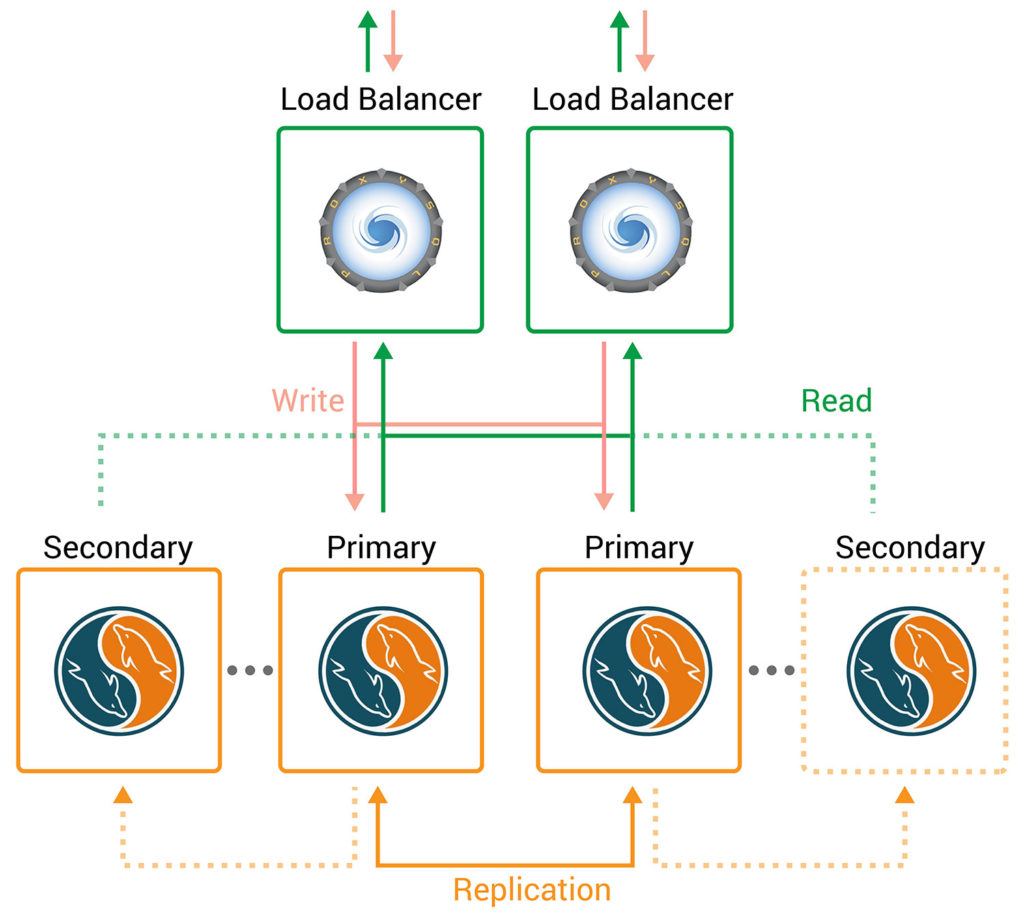
Primary-Primary is an asynchronous replication option that works with two primary instances at the same time. The major benefits of using this scheme include a great balance of writing load as well as relatively straightforward recovery if a primary node fails:
If you were to perform Primary-Primary cluster scaling in the CloudSigma PaaS, the system will add the secondaries to the cluster. All the secondaries are distributed equally between the two primary nodes so that the workload is managed efficiently and the read capacity of the cluster improves as a whole.
MariaDB Galera
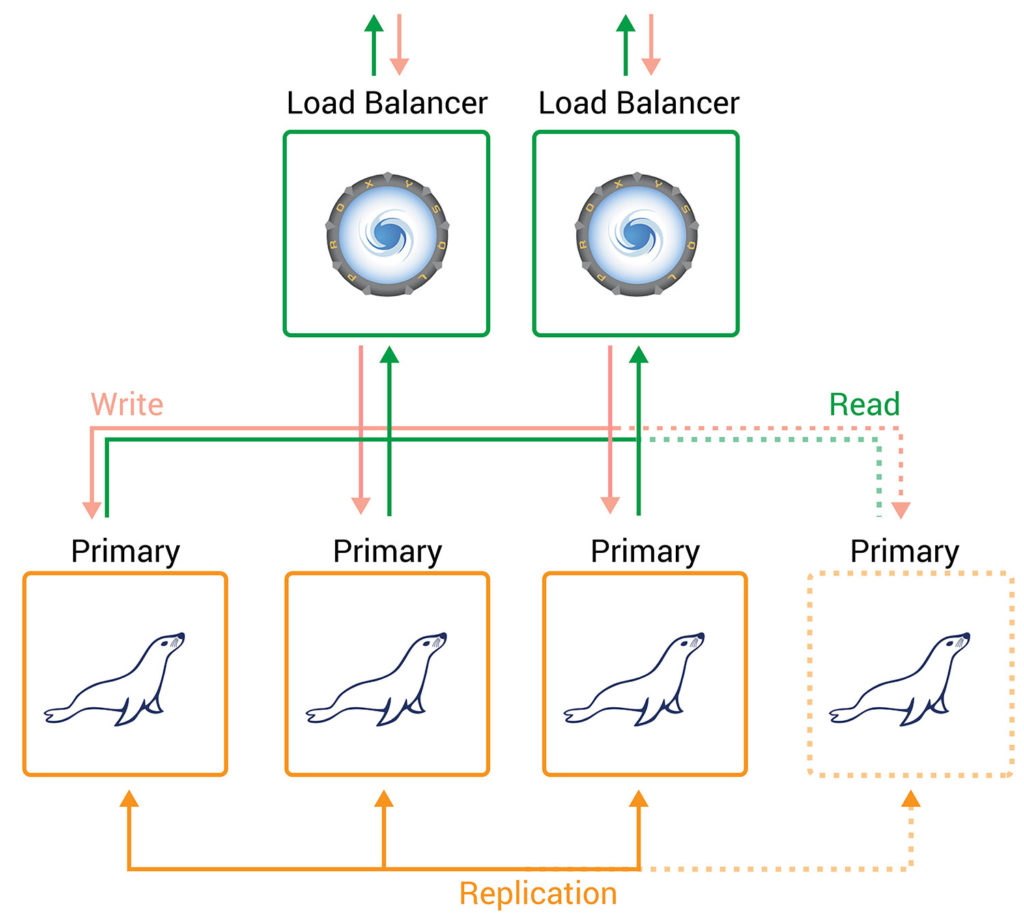
Lastly, we have a Galera cluster which comprises a multi-primary type of synchronous replication which is performed at a transaction commit time. The write is sent to all the nodes in the cluster before it is committed or applied:
You can easily scale your transactions as an application can send reads and writes to any node in the cluster. Apart from that, the process of adding nodes to a given cluster is completely automated. To remove nodes, you can simply exclude them. The gist is that you can implement scaling easily and automatically without practically making any changes to the application logic.
Galera is also one of the safest options to protect against data loss. This is because there is no delay or latency in data replication. In case one node in the cluster fails to work, the application will continue to use the other nodes regardless.
All in all, the CloudSigma PaaS allows its users to perform database clusterization and management with surprising ease and convenience as seen within this tutorial. If you would like to check out these options for yourself, visit the platform for a trial run or demo.
Further, you can learn more about what the CloudSigma PaaS dashboard has to offer to its users. If you face any problems or require technical assistance reach out to our support team which is available free of charge 24/7 by chat or email at support@cloudsigma.com.
- 5 Tips to Achieve Optimal Cloud Computing Cost Efficiency - October 31, 2022
- CloudSigma Empowers Blockchain Infrastructure Provider with a Green, Reliable, and Cost-Efficient Cloud Platform - October 27, 2022
- Whitech Launches New Egypt Cloud Computing Offering, Powered by HPE and CloudSigma - October 17, 2022
- Key Aspects of Protecting your Data in the Cloud - September 20, 2022
- How to Configure MongoDB Replication and Automated Failover - September 19, 2022


