

A replica set is defined as a database cluster of multiple nodes with replication and automated failover configured between them. To make sure the PRIMARY database is elected correctly, it is important to have an odd number of members in the set (including or excluding the Arbiter node).
The selected database is responsible for all the major tasks. It processes incoming write operations and stores their information in the oplog. This information can be accessed and replicated by the SECONDARY replica members to apply to their own datasets. As a result, all of the servers in the set will represent the same content and ensure its availability:

Now consider a situation where an unexpected issue (like hardware or connection failure) causes the primary database to experience downtime. In such a case, the system will automatically begin a new election process to restore normal functioning without requiring any manual intervention. The benefit of such a system is that you get the best of replication, such as increased availability, failover redundancy, and disaster recovery, without having to worry about managing multiple databases separately.
If you want to employ a similar system, this tutorial will show you how to configure a MongoDB replica set with the CloudSigma PaaS. As you will see in this guide, we will be using three members which is typically sufficient to provide a good margin of information safety and out-turn to handle I/O operations for most common applications. Along with the actual configuration of the replication, we will also learn how to prepare the environment, set up authentication among the DB nodes, and how to ensure your work has been successful.
Step 1: Make a New Environment
To start off, you will need at least 3 MongoDB nodes to start configuring a replica set. So go ahead and create a new environment as follows:
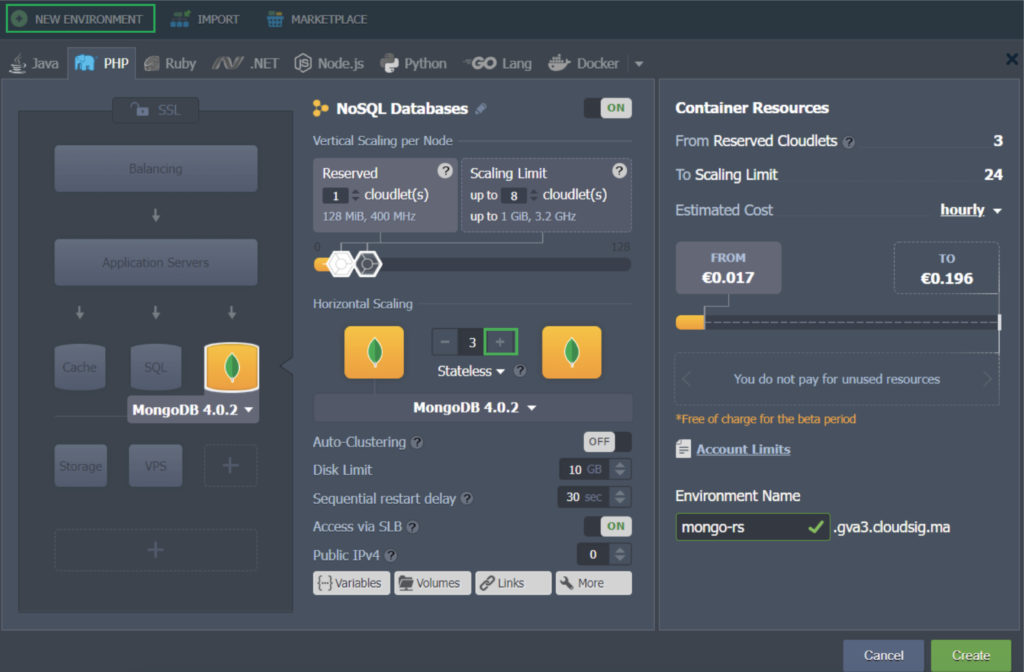
In our example, we are allocating all MongoDB instances of the 4.0.2 version to the same environment. You can change the Environment Name if needed in the given space and continue with the installation process.
The next step in the process will be dealing with the security of the communication between these nodes using the authentication key file.
Step 2: Add an Authentication Key File
Authentication is a critical component of any replication. It is a security assurance process that only gives access to a replica set member after it identifies itself correctly with a unique authentication key file. This keeps your data safe from unwanted onlookers and third parties. Here is how you can generate your own authentication key file:
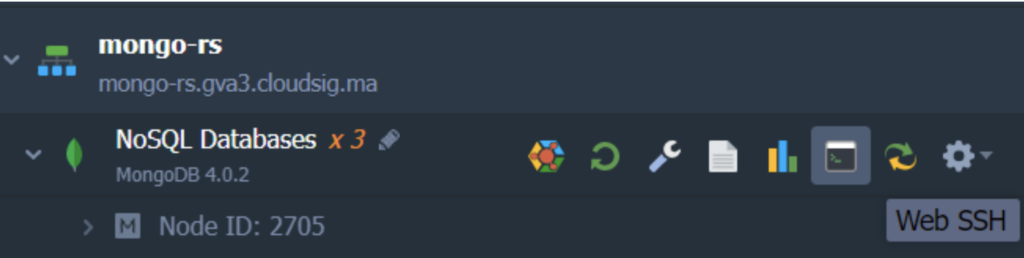
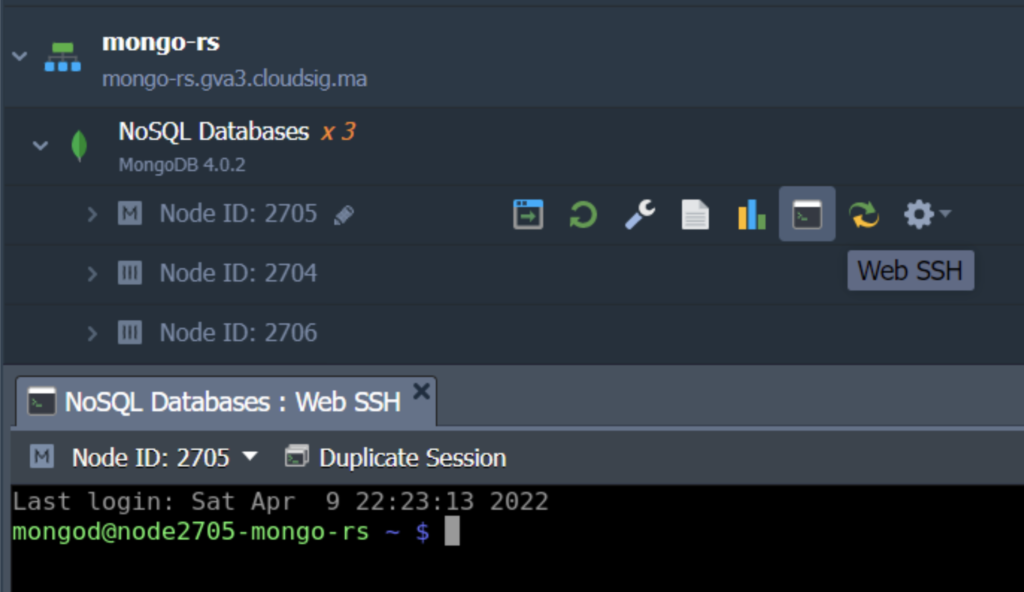
- Click on the Web SSH option for one of the database nodes and log in:
2. Next, you can enter your own key file or generate a new one with openssl using the following command:
|
1 |
openssl rand -base64 741 > my.key |
In this command, 741 represents the key size in bytes and my.key is the name of the key.
3. Time to distribute the new key file across all of your MongoDB instances. Here is how to do that:
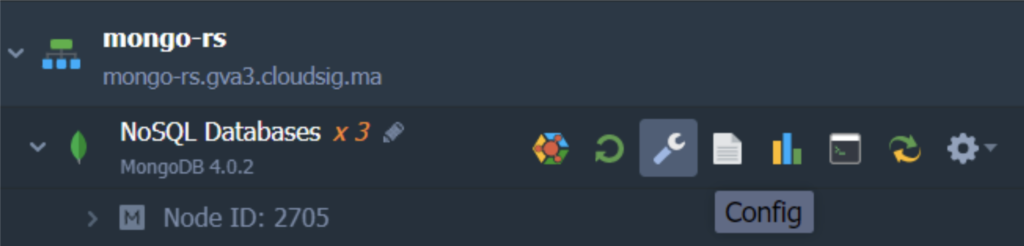
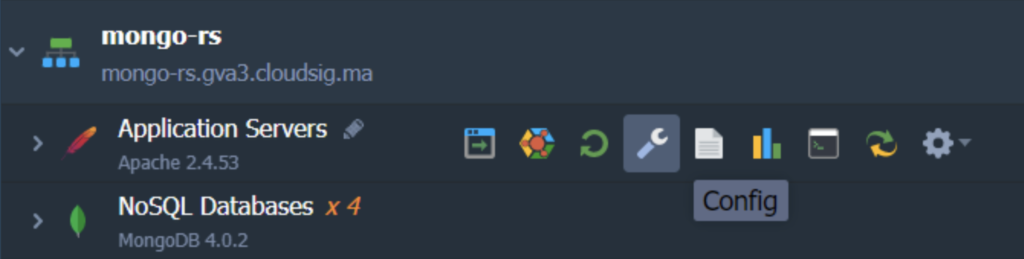
- Open the File Manager by clicking on the Config button next to any one of the database nodes:
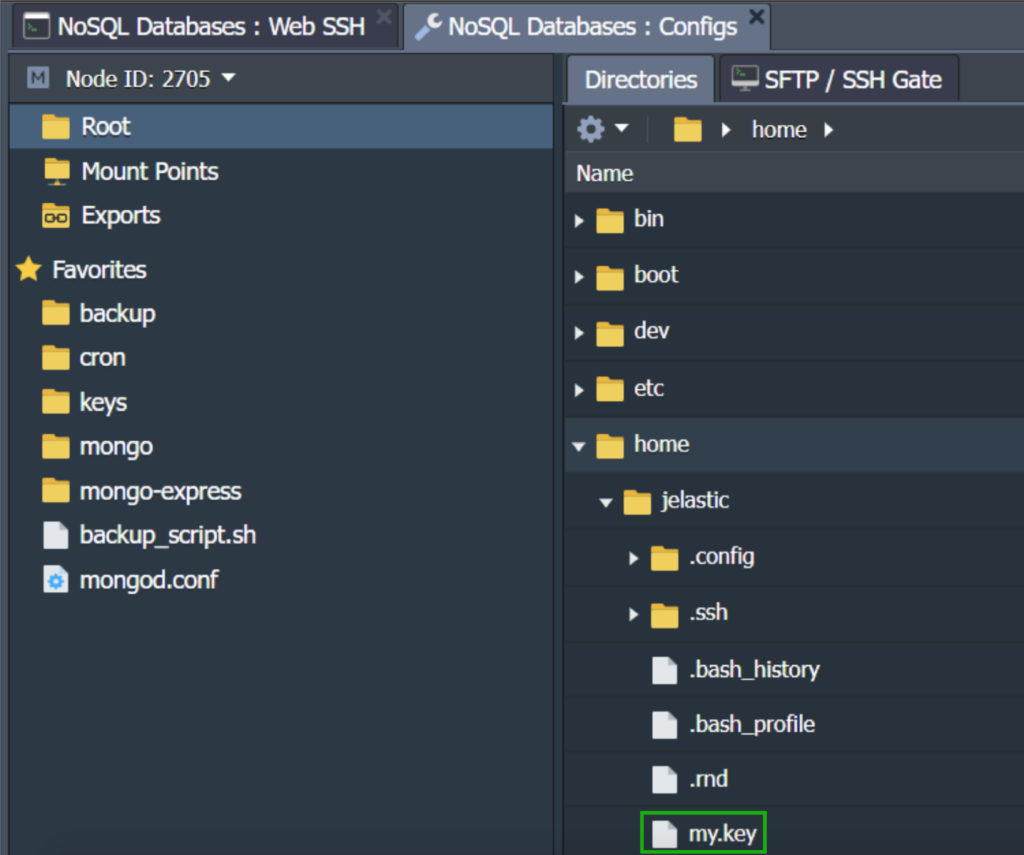
- Locate the my.key file in the configuration tab under the path: /home/jelastic/my.key. Open it and copy the contents of the file:
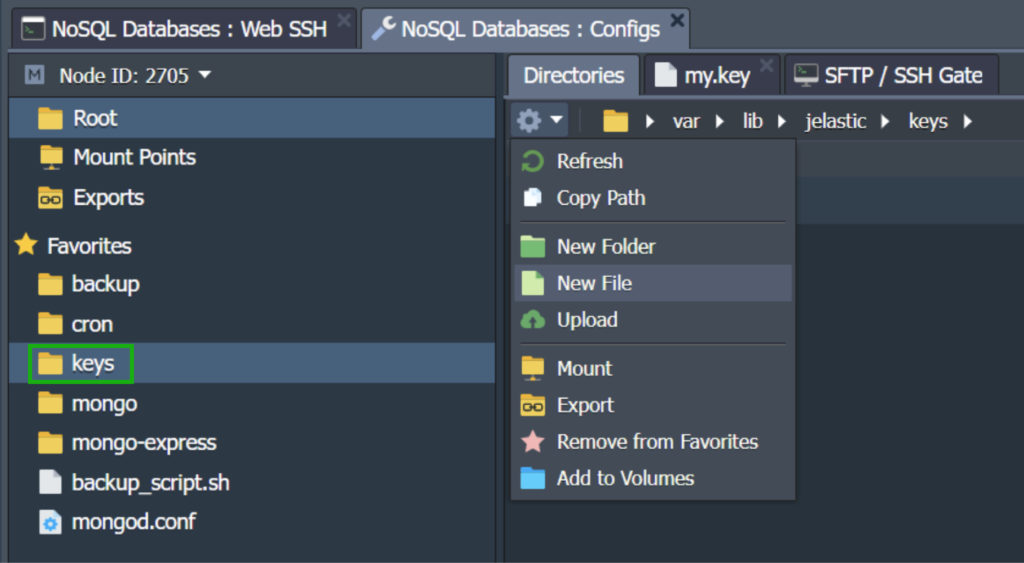
- Under the path /var/lib/jelastic/keys you will find the keys directory. Create a New File which the MongoDB instances will utilize to authenticate each other’s identities. In our case, we will create a file called mongo-set.key:
- Paste the previously copied content in this file and apply changes by clicking Save for all instances:
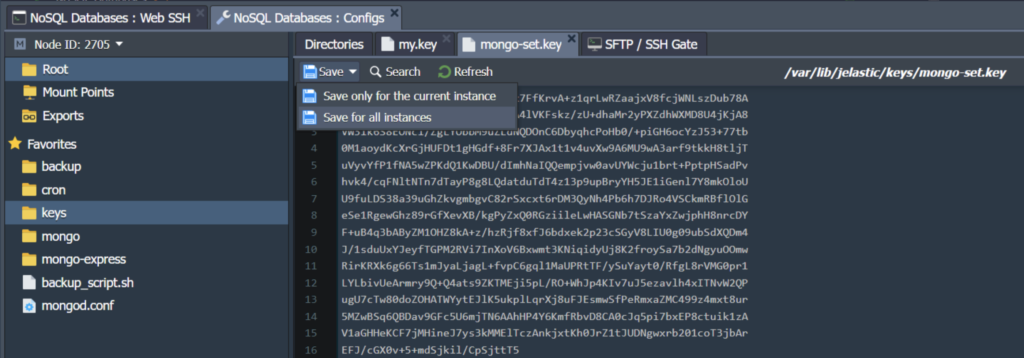
As a result of this process, the mongo-set.key file has been distributed across all our MongoDB nodes.
Step 3: Configure the MongoDB Replication
Now that we have assured the security of the instances, we can move on to actually configuring the replica set. Let’s begin:
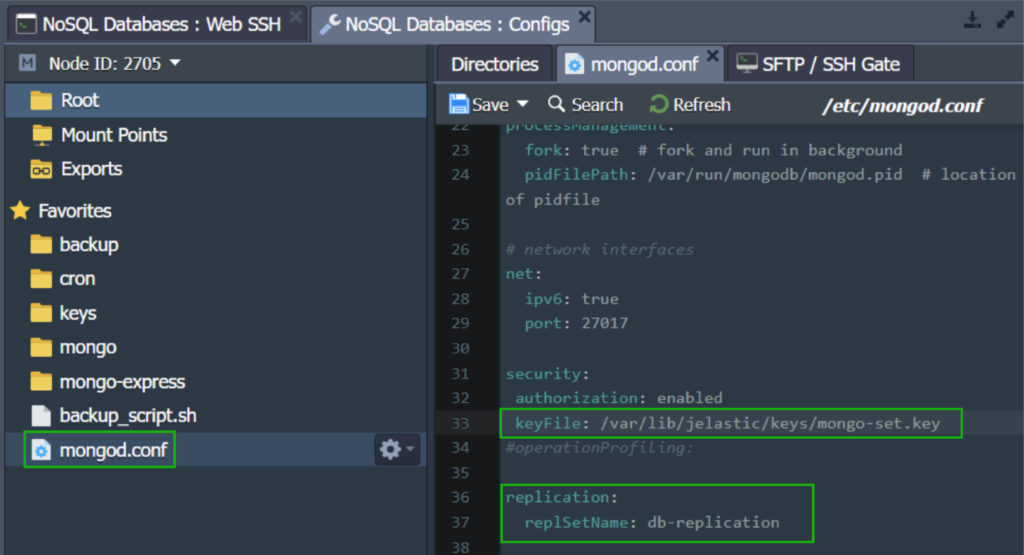
- Start by going to the configuration tab for MongoDB nodes and opening the mongo.conf file in the etc folder. Scroll down until you find the replication section. Uncomment it and add the following string with a unique name for your replica set. For our example, we shall name it db-replication:
|
1 |
replSetName: db-replication |
3. Click on the appropriate button to Save the changes for all instances in the editor window.
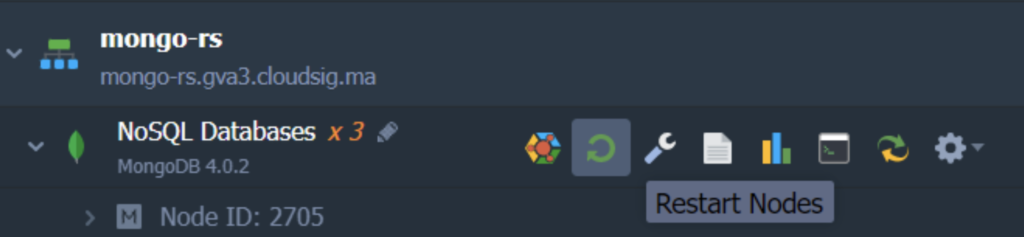
4. Now you must Restart all of your DB nodes to apply the new configuration parameters:
One thing to keep in mind is that you are done configuring the replica set and are either restarting all nodes or the PRIMARY node, the new PRIMARY database election process will begin during the restart.
5. Choose the MongoDB server you want to use as the PRIMARY and access it using the SSH protocol:
Remember: once the PRIMARY database has been elected, the other replica set members will no longer be accessible for direct write operations. This means that all changes and configurations can only be performed and applied to the current PRIMARY node only. So unless you have arranged priorities, you will have to change a connection string in your application to the new PRIMARY node.
6. Next, access the replicated database using your respective credentials:
|
1 |
mongo -u {user} -p {password} {DB_name} |

In this command:
- {user} –refers to the administrator username which will be sent to your email (it is usually admin by default).
- {password} –this is the password sent to your email along with the corresponding username.
- {DB_name}- represents the name of the database you wish to replicate in this replica set (we are using the default admin in our example).
In the case of a new election, you can use the same admin user credentials to log into a new PRIMARY database.
7. Now that the connection has been established, you will need to execute the following lines to define the parameters for the current MongoDB node and initiate the replica set:
|
1 2 3 4 5 |
config = {_id : "{replica_set}", members : [{_id : 0, host:"{current_db_ip}:27017"},]} rs.initiate() |
In the above lines, you will substitute the values in the brackets with your own corresponding data:
- {replica_set} – this is the name of your replicating database group which you specified at the beginning of this section. In our case, this was db-replication.
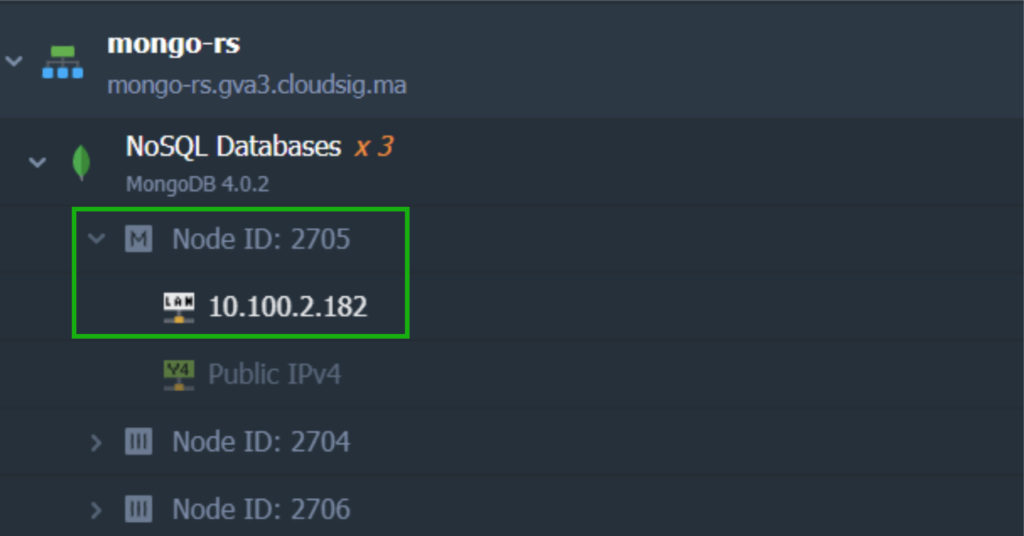
- {current_db_ip} – indicates the IP address of the database container you have selected:
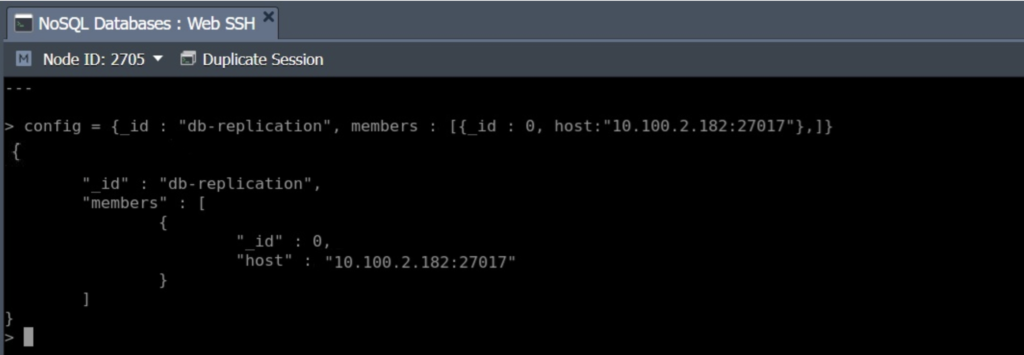
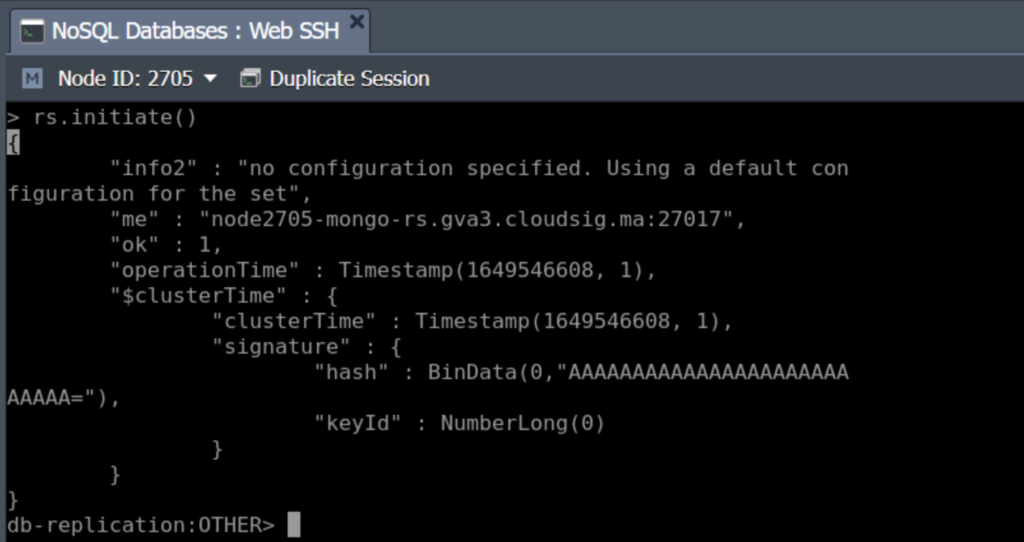
In our case, the executed lines are:
|
1 2 |
config = {_id : "db-replication", members : [{_id : 0, host:"10.100.2.182:27017"},]} |
|
1 |
rs.initiate() |
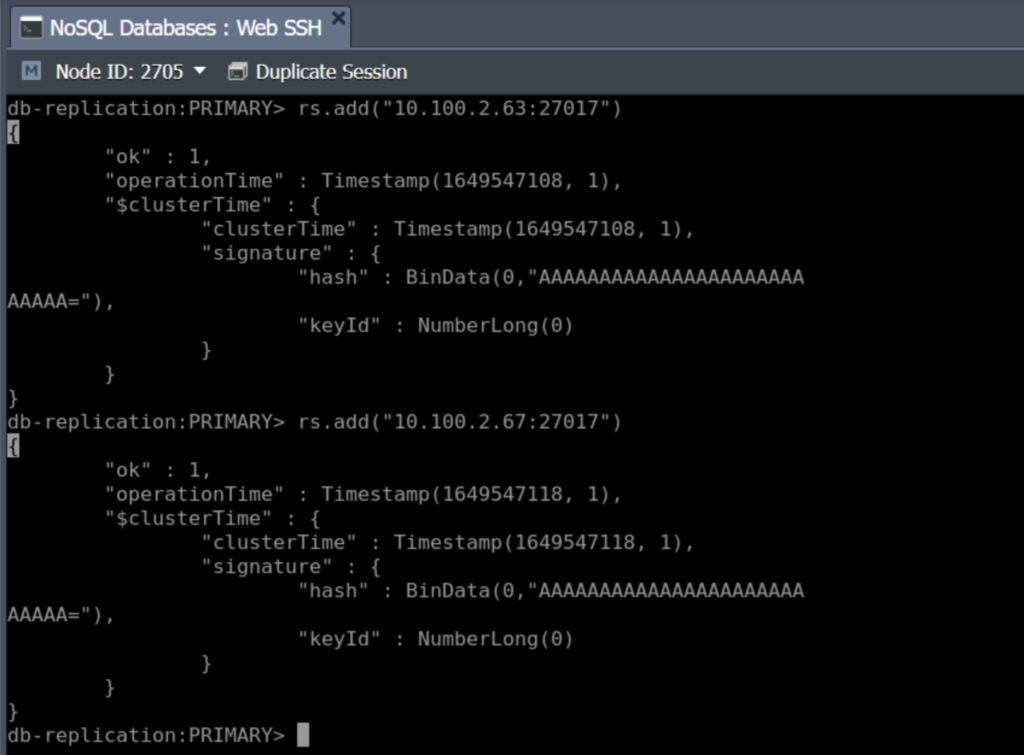
8. Next, execute the following command for all of the remaining databases:
|
1 |
rs.add("{db_ip}:27017") |
Here, {db_ip} refers to the IP address of each database:
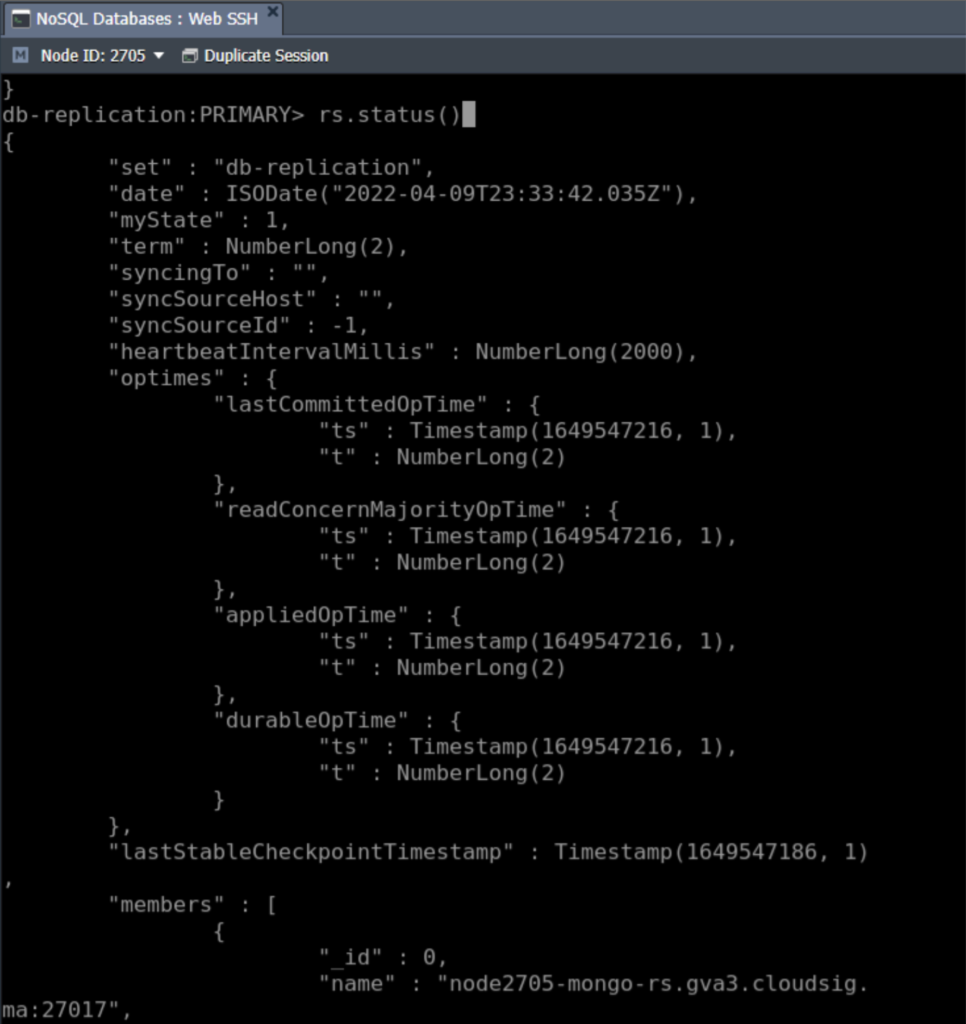
9. Once you have added all of the replication members, you will get a fully functional replica set. We recommend ensuring everything has been configured properly at the end of the process. To do so, execute the command: rs.status(). This will show you full information regarding your replica set, as follows:
Step 4: Set Up the ReplicaSet Arbiter
We recommend using an Arbiter node in certain cases. What is an Arbiter node? Typically, replication is more reliable if the replica set contains an odd number of nodes. So if you currently have an even number of nodes in your set, you can add an Arbiter node to maintain a quorum as it responds to heartbeat and election requests from other members in the set. Here are some details about Arbiter nodes:
- The Arbiter does not store any data; it just votes in elections in case another node has failed.
- It is very lightweight and does not consume too many resources.
- It exchanged user credentials between encrypted replicas.
- To maintain the highest availability, try running the Arbiter on a separate node.
Here is how you can add an Arbiter node to your replica set:
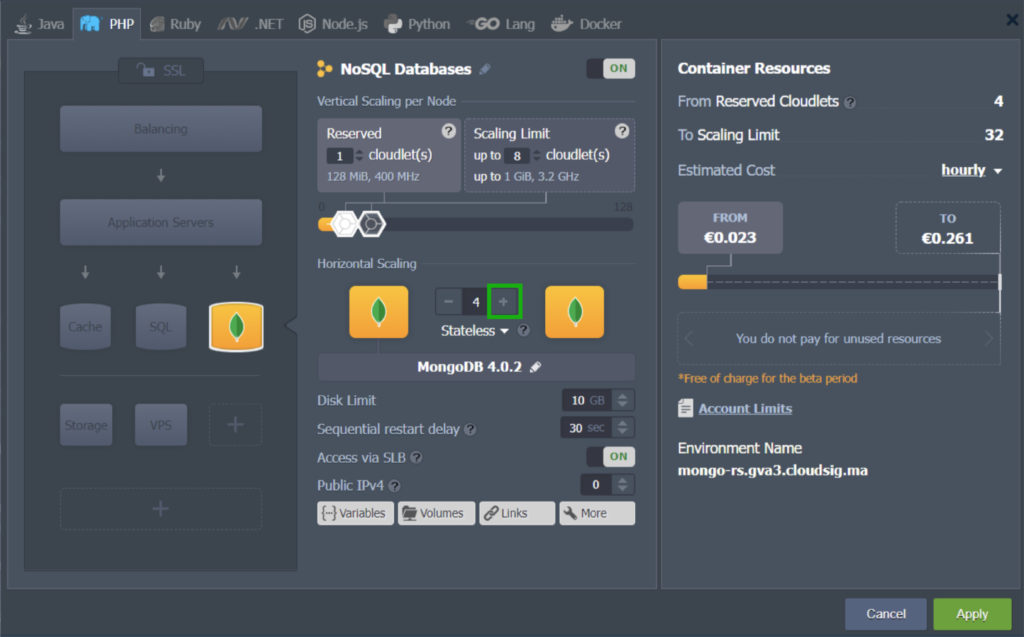
- First, we will perform some horizontal scaling and add an extra node to the cluster:
2. With the node added, we need a new key file. Go to the keys directory and make a key file mongo-set.key. Copy the key contents from any of the previously configured database nodes and paste it all here as we did before.
3. Go to the mongod.conf configuration file. Uncomment the replication section and add repISetName (it is db-replication in our case). Also, head over to the security section and add the keyFile parameter ( /var/lib/jelastic/keys/mongo-set.key in our case).
4. Lastly, restart the new node to apply these new configuration parameters:
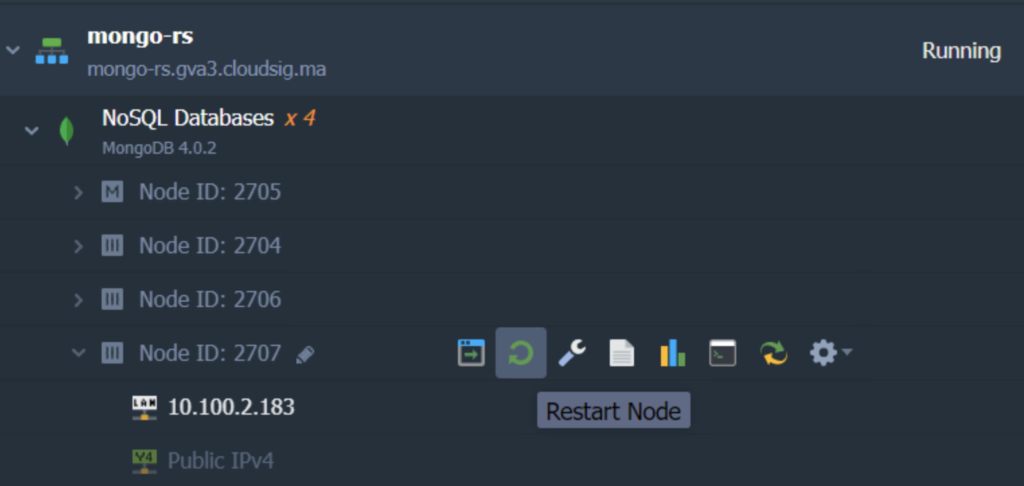
It is important to remember that you do NOT need to restart all the nodes in the cluster at this point. Only restart the newly added Arbiter node. Restarting all nodes will result in a new PRIMARY election (unless you have specified priorities to select a particular database node as PRIMARY).
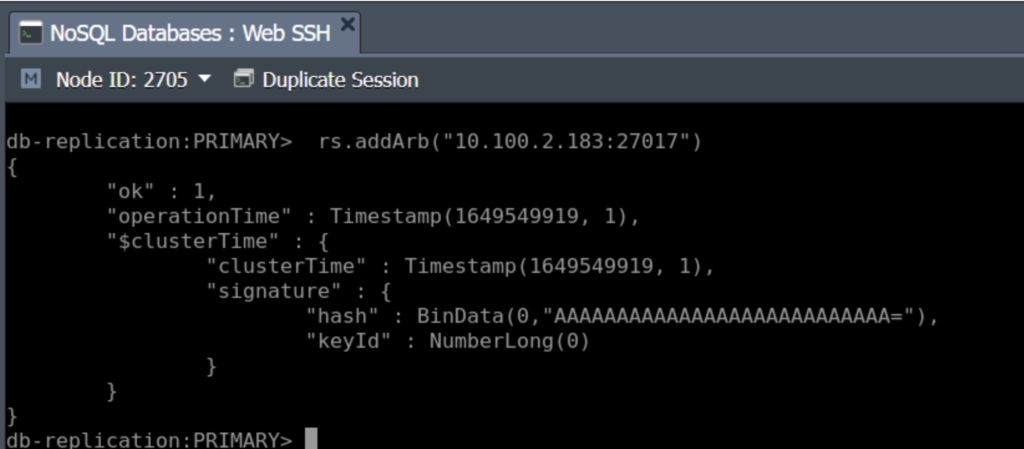
5. Finally, the Arbiter can be added to the replica set. To do so, issue the following command at the PRIMARY node:
|
1 |
rs.addArb("{db_ip}:27017") |
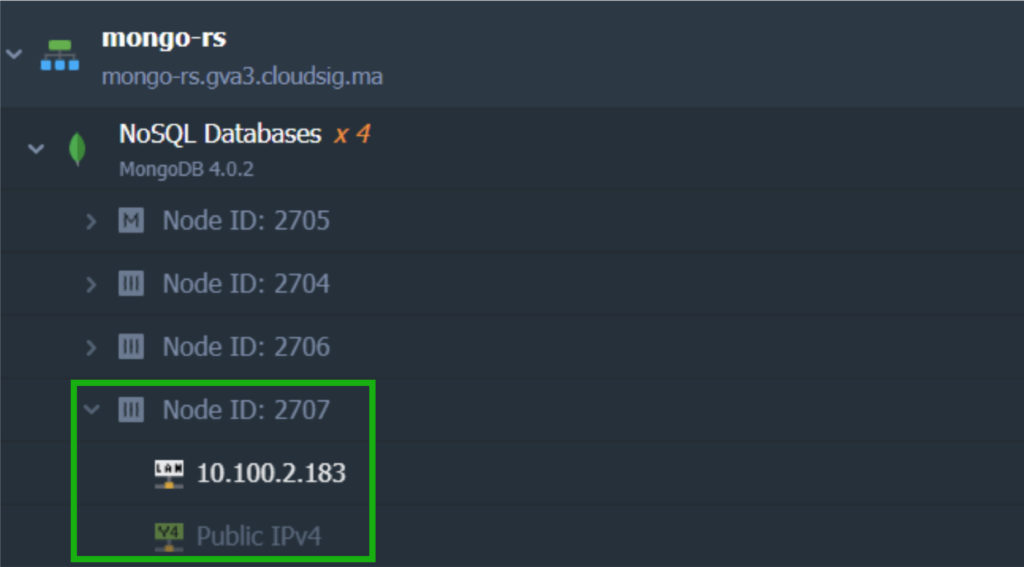
Here, {db_ip} is the IP address of the new node:
6. Now, you can check to confirm whether or not the new node has become the Arbiter. You can do this by logging onto the new node using SSH and connecting to the MongoDB instance with the credentials you received on your email at the time of node creation:
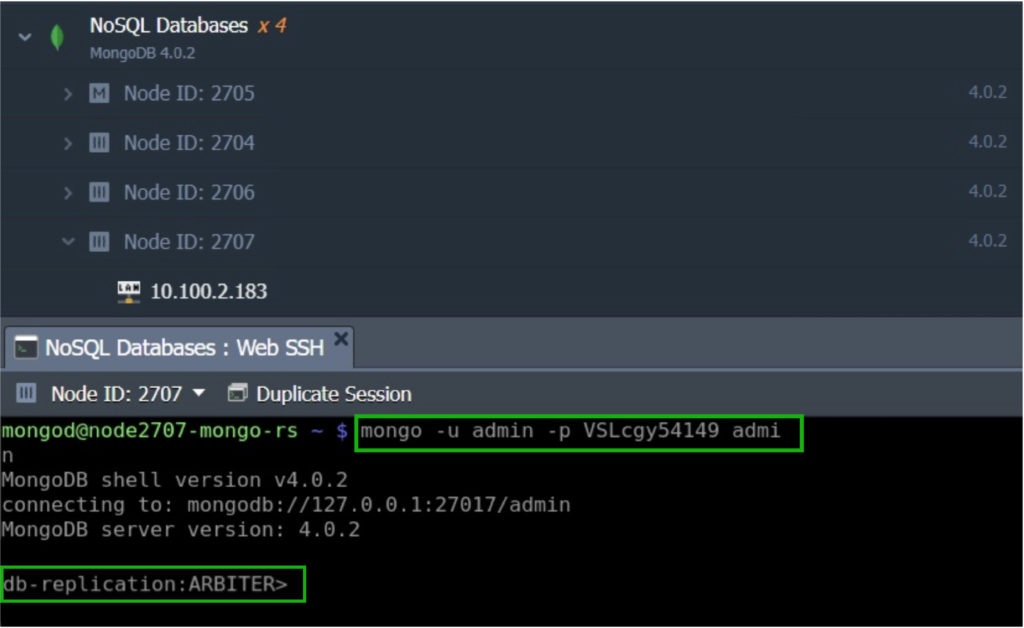
This shows that the new node we just added to the cluster is acting as the Arbiter of db-replication. This ensures a quorum in any given situation, making the replica set more reliable.
Step 5: Test Database Cluster Availability
Next, we can set up our MongoDB cluster to connect and perform operations remotely. In the following example, we will connect and execute a few check-up commands using a simple PHP applet.
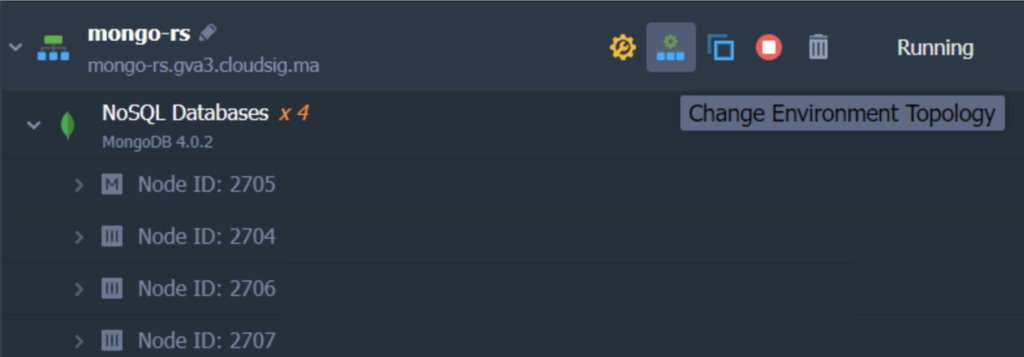
For this purpose, you will need an application server, such as Apache. You can add one to your environment like we did or create a new one in a separate environment.
- Start by clicking on Change Environment Topology and adding the server:

2. Open the Configuration Manager tab for the Apache server by clicking on the Config button as shown below:
3. Locate and open the
index.php file in the
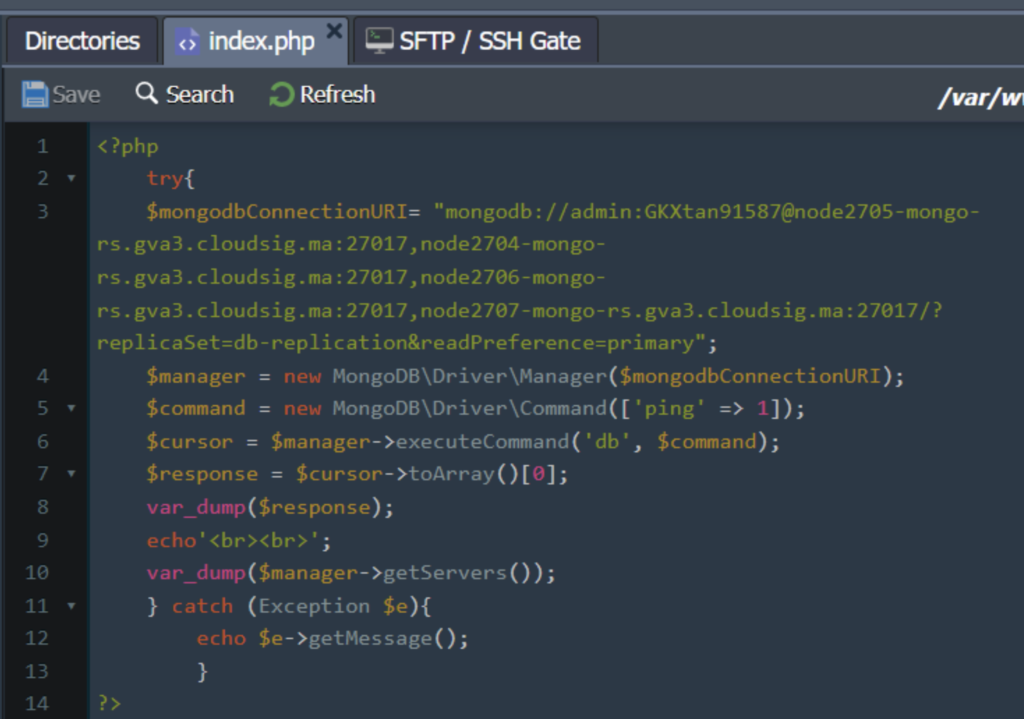
/var/www/webroot/ROOT directory and paste the following code in place of the default content:
|
1 |
<!--?php try{ $mongodbConnectionURI= "mongodb://{db_username}:{db_password}@node{NodeID}-{environment_domain}:27017, node{NodeID}-{environment_domain}:27017,node{NodeID}-{environment_domain}:27017,node{NodeID}-{environment_domain}:27017/?replicaSet={replica_set_name}&readPreference=primary"; $manager = new MongoDB\Driver\Manager($mongodbConnectionURI); $command = new MongoDB\Driver\Command(['ping' => 1]); $cursor = $manager->executeCommand('db', $command); $response = $cursor->toArray()[0]; var_dump($response); echo'<br><br>'; var_dump($manager->getServers()); } catch (Exception $e){ echo $e->getMessage(); } ?--> |
The following values in the above code need to be substituted with your respective data:
- {replica_set_name} – enter your replica set name.
- {db_username} – add the admin user of the chosen primary database (it is admin by default).
- {db_password} – enter the admin user’s password.
- {NodeID} – mention the identification number of the corresponding node. You can find this on the CloudSigma PaaS dashboard.
- {environment_domain} – add the environment domain. You can also find this on the CloudSigma PaaS dashboard:
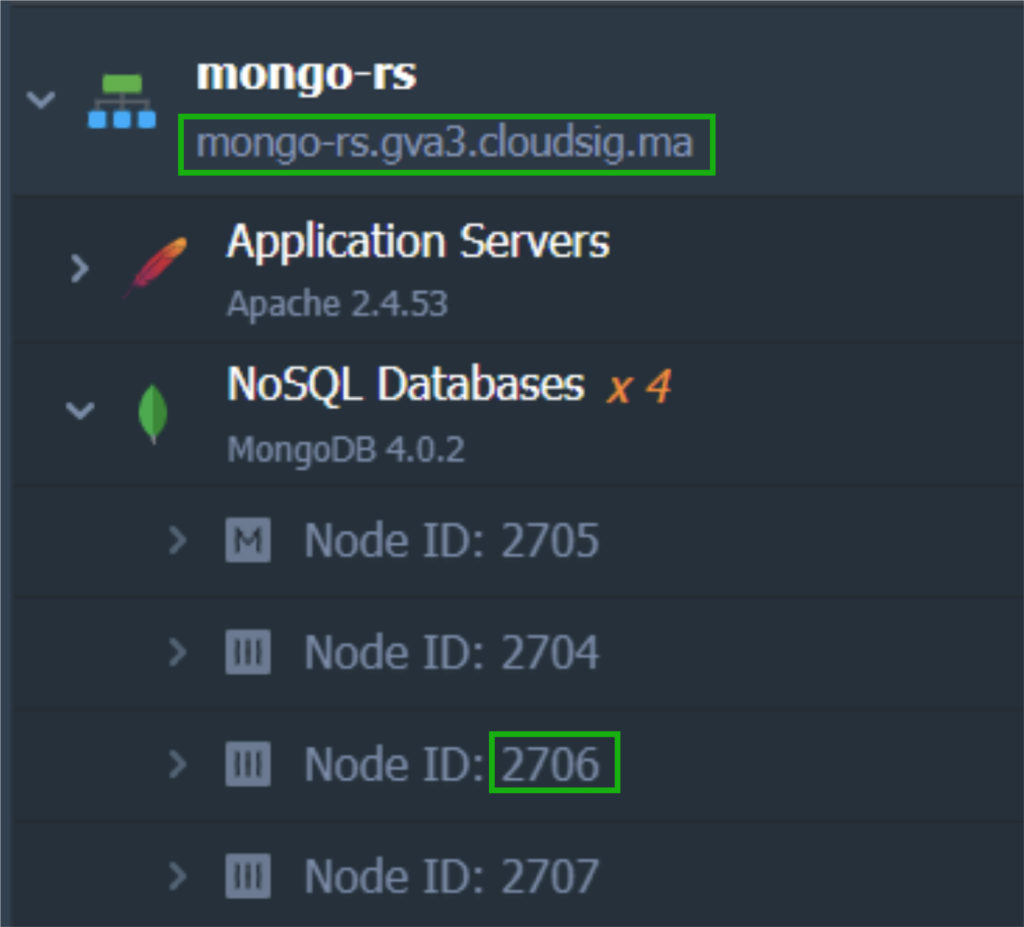
Make sure that you specify the IDs of every node in your replica set in the appropriate mongodbConnectionURI section.
Entering the corresponding values and running the code will show you a set of strings similar to this:
Make sure that you Save the file at this point!
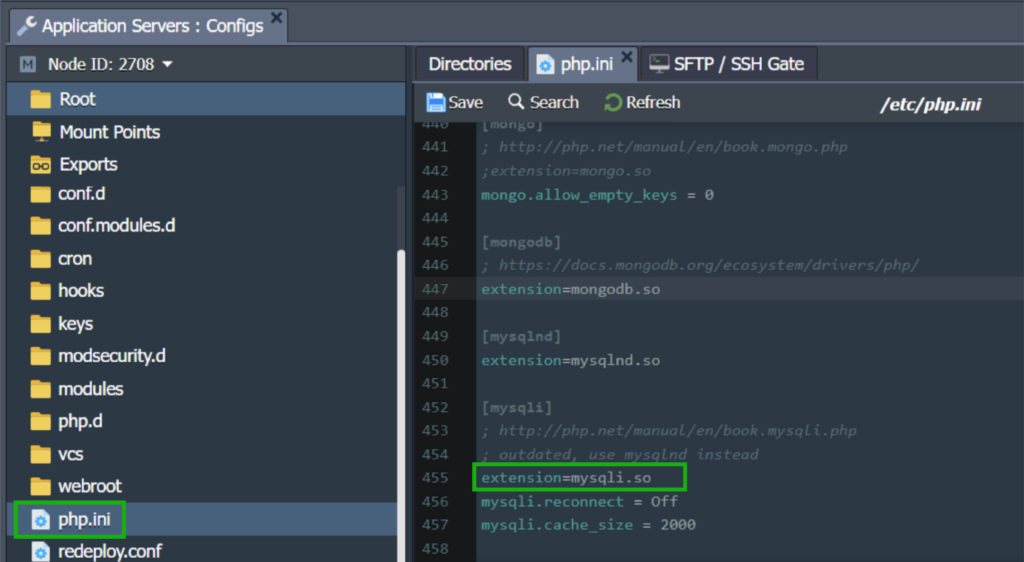
4. In order for Apache to interact with the MongoDB server, it requires a special module. You can add this module within configs. Head over to the etc folder and open the php.ini file. Locate the [mongodb] section. Here, all you need to do is remove the semicolon before the extension=mongodb.so line to enable this extension:
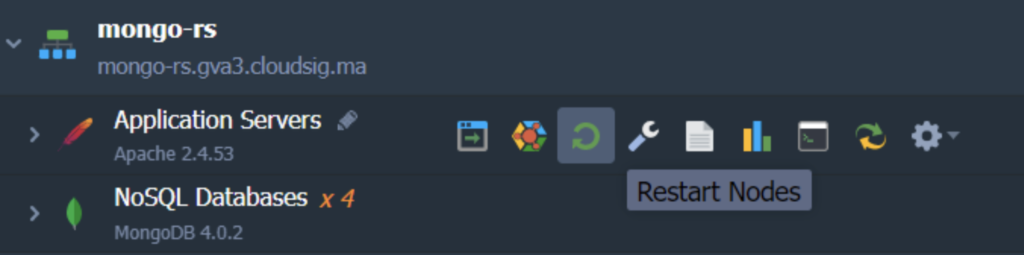
5. Apply the new configurations by clicking Save in the editor window. As always, we need to restart the nodes to apply the changes. Click on the Restart Nodes button next to the Application Server to do so:
6. Now click on the Open in Browser button to test it out:
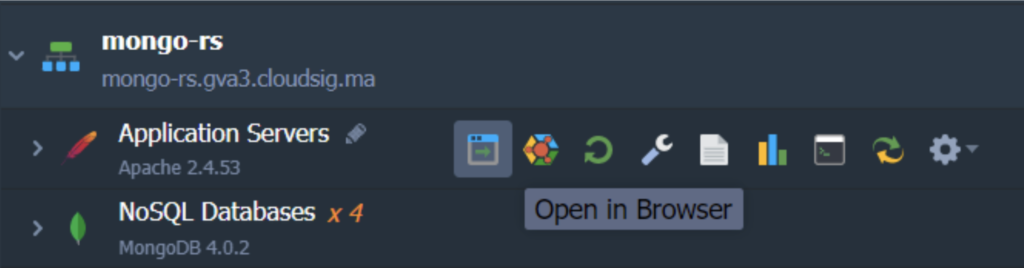
Clicking on this icon will open up a new browser tab which will show all the information about your replica set members/nodes and their accessibility like this:
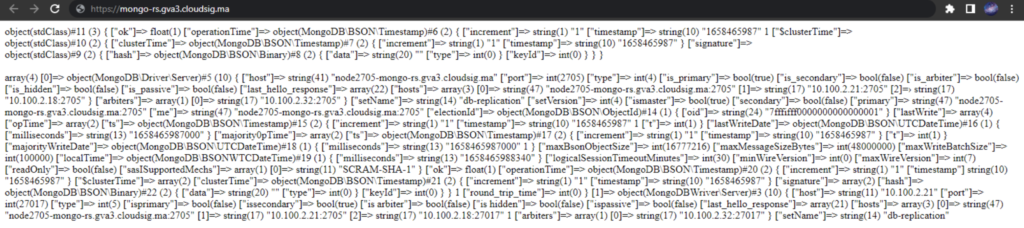
Since we used the command
ping (line 6 of the
index.php ), the first line displays the result to checking the availability of the replica set:
|
1 |
object(stdClass)#11 (3) { ["ok"]=> float(1) } |
This means that the replica set was tested successfully.
The next block in the results shows detailed information about the replica set hosts. This data is acquired thanks to the getServers function (line 11 of the index.php). Similarly, you can also check some values assigned during the process of creating this replica set:
- host – the IP address of a specific database.
- port – this is the port of the current replication member.
- [“is_primary”] and [“is_secondary”] – parameters that indicate the server status. Correspondent values for the chosen primary MongoDB server are true, false and for two other MongoDB servers – false, true respectively.
Additionally, you can start and stop database nodes at any time to track changes. You can also refresh the page to do the same. This allows you to ensure that your MongoDB cluster is always available, up, and running as you configured it.
CloudSigma PaaS allows its users to leverage the benefits of using replica sets without worrying too much about the configuration and back-end side of things. This tutorial shows how straightforward setting up your very own MongoDB cluster can be with just a few simple steps. You can learn more about MongoDB, how to set it up for Ubuntu or public cloud servers, as well as what other advanced features the CloudSigma PaaS has to offer. We also welcome you to take a trial run of the PaaS free of cost to get familiar with the dashboard and marketplace and what they offer.
- 5 Tips to Achieve Optimal Cloud Computing Cost Efficiency - October 31, 2022
- CloudSigma Empowers Blockchain Infrastructure Provider with a Green, Reliable, and Cost-Efficient Cloud Platform - October 27, 2022
- Whitech Launches New Egypt Cloud Computing Offering, Powered by HPE and CloudSigma - October 17, 2022
- Key Aspects of Protecting your Data in the Cloud - September 20, 2022
- How to Configure MongoDB Replication and Automated Failover - September 19, 2022