Kubernetes is now the standard way to deploy applications that are scalable and have high availability. Kubernetes allows developers to quickly bring up and down instances as needed to ensure smooth delivery of content. To learn more about Kubernetes, follow our detailed guide Getting to Know Kubernetes.
Helm is a very popular package manager that is used to install applications on Kubernetes. Helm aims to deploy and manage applications on Kubernetes clusters and simplify the process as we go. It also provides access to ready-to-use applications for Kubernetes that are packaged. These are called Charts. Being familiar with Kubernetes and Helm is an important addition to any DevOps specialist’s arsenal.
WordPress is one of the most popular Content Management systems (CMS). Combining it with the MySQL database results in high performance and highly scalable web applications. Keeping MySQL external will also allow more applications to leverage the same database for their use cases.
In this post, we will be installing WordPress on Kubernetes using the Helm package manager and connecting them to an external MySQL server. Let’s begin!
Prerequisites
The following software setup will be needed for the successful completion of this tutorial:
- An up and running Kubernetes cluster. Follow this tutorial for the steps of installing Kubernetes on Ubuntu.
- The Kubernetes command-line tool
kubectl. - You will need a Helm package manager installed. If you do not have Helm ready to be used you can download it from its official release page on GitHub – helm/helm: The Kubernetes Package Manager. To get started with a step-by-step guide for Helm you can also read Introduction to Helm: Package Manager for Kubernetes.
- You will need to have MySQL installed along with the root user and password. If you are new to MySQL make sure to check out How to setup MySQL on a server and MySQL basics and MySQL User – Create and Grant Permissions.
You also need to have a running Kubernetes cluster connected with MySQL. For users who have multiple clusters, make sure you know the current cluster connected with MySQL. To see all the different clusters configured in your kubectl config file, run the below command:
|
1 |
kubectl config get-contexts |
On your machine, you need to get the below output:
|
Current |
Name |
Cluster |
AuthInfo |
Namespace |
|
* |
docker-desktop |
docker-desktop |
docker-desktop |
Since we are using Docker Desktop to run Kubernetes, you see docker-desktop shown. Your values might be different. The asterisk sign (*) indicates which cluster is currently the default context. In case you need to change the current context, run:
|
1 |
kubectl config use-context context-name |
You are now ready to follow the steps of the tutorial.
Setting Up MySQL
First, we will be creating a dedicated user in MySQL to connect to WordPress. This is necessary because our WordPress installation will live on a separate server inside the Kubernetes cluster. From the MySQL server, log into MySQL with the following command:
|
1 |
mysql -u root -p |
You will be asked the root password. Enter the password and you will be connected.
-
Creating a dedicated database for WordPress
In MySQL there can be any number of databases. Further databases can also be shared among applications. WordPress comes with its own database as well. Here we have to create a dedicated database for WordPress. To create this dedicated database, you can execute the below statement on MySQL bash:
|
1 |
CREATE DATABASE wordpress |
-
Creating dedicated user for Wordpress
After the database has been created, we will create a dedicated user for this database. We will use this user to connect to our newly created database:
|
1 |
CREATE USER wordpress_user IDENTIFIED BY '<password>'; |
Enter a strong password above. While we have created the user for WordPress, we have not added any privileges so far. We need to provide privileges to our users for accessing and DML (Data Manipulation) operations. To keep things simple, we are going to provide our users with all the privileges. Be cautious, this is not recommended in Production. Execute the below command in MySQL shell:
|
1 |
GRANT ALL PRIVILEGES ON wordpress.* TO wordpress_user@'%'; |
To update the internal MySQL tables that manage access permissions, use the following statement:
|
1 |
FLUSH PRIVILEGES; |
Finally, you can close the MySQL client by running the below command in the MySQL shell:
|
1 |
Exit; |
-
Verifying our user and database
Next, we have to verify that our WordPress user can connect to the WordPress database. To do this, open the MySQL shell and run the below command:
|
1 |
mysql -u <wordpress_user> -p |
|
1 |
show databases |
-
Allowing remote connections to our MySQL server
Up until now, we have a working WordPress user and a WordPress database. However, our MySQL server and WordPress database are on separate servers. Hence, we need to ensure that WordPress can connect to the MySQL database. For this, we need to edit our MySQL configuration to allow connections coming from remote hosts. You will need to edit the mysqld.cnf file. On Linux based systems this file is present under:
|
1 |
/etc/mysql/mysql.conf.d/mysqld.cnf |
After that, open the file using any text editor and locate the bind-address. The bind-address specifies the IP MySQL can listen to. By default, MySQL listens only on 127.0.0.1.. To allow connections from external hosts, change the bind-address to 0.0.0.0.. To have these changes take place, restart the MySQL server by running the below command:
|
1 |
systemctl restart mysql |
|
1 |
mysql -h <mysql_server_ip> -u wordpress_user -p |
mysql_server_ip to the above command and execute. If you can connect without errors you can move forward.
Installing and Upgrading WordPress
WordPress by default uses MariaDB as its database. We do not want to use this database, since we want our MySQL database. Along with this change we also need to configure the admin user and password. We will do this by implementing command line parameters.
First, create a new folder called my blog-settings. Inside the folder create a new file called values.yaml file. Enter the below contents in the values.yaml file:
|
1 2 3 4 5 6 7 8 9 10 11 12 13 14 15 |
## WordPress Settings wordpressUsername: my_user wordpressPassword: some_strong_password wordpressEmail: sample@example.com wordpressFirstName: User wordpressLastName: Last wordpressBlogName: My Blog! ## Database Settings externalDatabase: host: <mysql_server_ip> user: wordpress_user password: password database: wordpress ## Enable Maria DB mariadb: enabled: false |
This file is self-explanatory. Notice that below we have disabled MariaDB. Now that our configuration is ready, time to execute helm for a WordPress installation. Run the below command in PowerShell:
|
1 |
helm install myblog -f values.yaml stable/wordpress |
myblog-wordpress. It will take some time before WordPress is ready to be used. To find the services running, execute the below command:|
1 |
kubectl get services |
|
NAME |
TYPE |
CLUSTER-IP |
EXTERNAL-IP |
PORT |
|
myblog-wordpress |
ClusterIP |
10.96.0.1 |
<none> |
80:31403/TCP,443:30879/TCP |
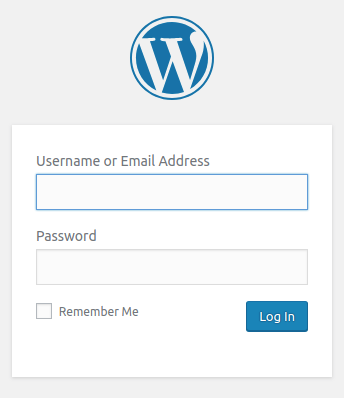
Here we have very helpful information about the services running. We need to pay attention to the external IP and Port. The external IP is the IP on which your WordPress is being served. Since we are using Docker Desktop, we are getting none under external IP. You will get the IP depending upon your system. Open your web browser and enter this IP. You will see the WordPress login page:
These are the credentials we have provided in the above YAML file. Enter those credentials and you will be ready to configure your website on WordPress and store content on our newly created MySQL database.
Upgrading WordPress
WordPress releases updates to fix security vulnerabilities and roll out more features/bug fixes and more. You can upgrade the WordPress installation by running the below command in PowerShell:
|
1 |
helm upgrade |
Before the upgrade, if you want to see the list of releases you can run the below command:
|
1 |
helm list |
You will get the below output like:
|
1 2 3 |
Hang tight while we grab the latest from your chart repositories… …Skip local chart repository …Successfully got an update from the “stable” chart repository |
If you want to see if there is a new version of WordPress repository available you can run the below command:
|
1 |
helm inspect chart stable/wordpress |
Whenever you want to upgrade your WordPress release to the latest WordPress chart, you should run:
|
1 |
helm upgrade -f values.yaml <your_name> stable/wordpress |
We have to use the same configuration file as before so that the configuration values do not change.
Rolling Back a Release
Every time you perform an upgrade using Helm, Helm creates a checkpoint of release. You can come back if things do not work as expected. Releases can be compared and reverted back. If the upgrade process goes wrong due to any issue, you can roll back to the previous release. To roll back execute the below command:
|
1 |
helm rollback release-name revision-number |
In our case, run the below command to roll back to the previous release:
|
1 |
helm rollback myblog 1 |
To verify now that the revert process has been completed successfully, you can execute the helm list command.
Conclusion
In this comprehensive tutorial, we showed you how to set up MySQL and install WordPress with this external MySQL. We installed WordPress on Kubernetes using Helm package manager and also performed upgrades in WordPress.
Now that you are aware of installation on Kubernetes using Helm, do not stop here. Feel free to go through the CloudSigma blog to learn more about Kubernetes:
- Deploy a PHP Application on a Kubernetes Cluster with Ubuntu 18.04
- How To Create a Kubernetes Cluster Using Kubeadm on Ubuntu 18.04
- What is Docker? An Overview of the Docker Ecosystem
Happy Computing!
- How To Enable, Create and Use the .htaccess File: A Tutorial - March 8, 2023
- An Overview of Queries in MySQL - October 28, 2022
- Introduction to Cookies: Understanding and Working with JavaScript Cookies - October 25, 2022
- An Overview of Data Types in Ruby - October 24, 2022
- The Architecture of Iptables and Netfilter - October 10, 2022


