Most websites on the internet today are created using WordPress. However, using a PaaS environment like the one provided by CloudSigma offers a lot of additional functionality. In this tutorial, we will demonstrate how you can easily migrate a WordPress website over to CloudSigma PaaS.
There are several pre-configured WordPress packages in the CloudSigma Marketplace that you can use for this purpose. Using the steps in this guide, you will be able to successfully complete the website migration without any setbacks.
How to Migrate a WordPress Website to CloudSigma PaaS
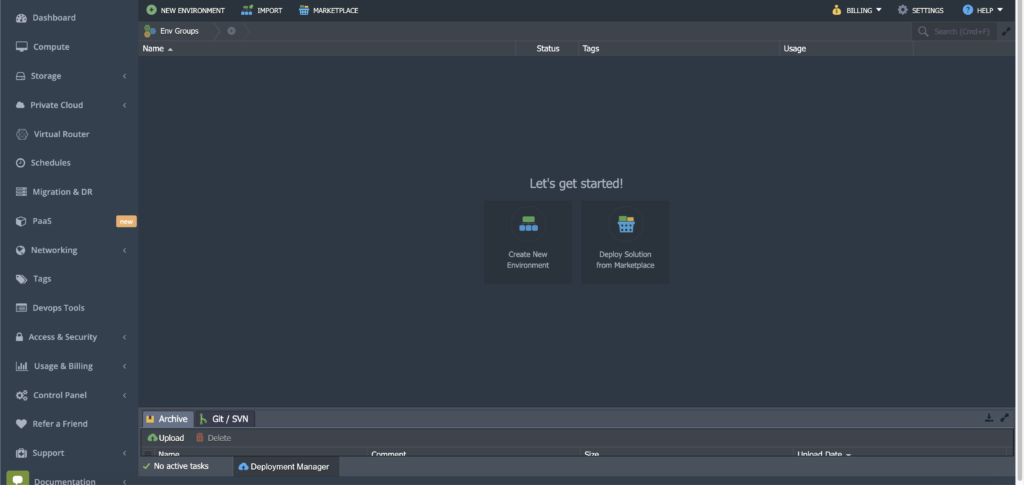
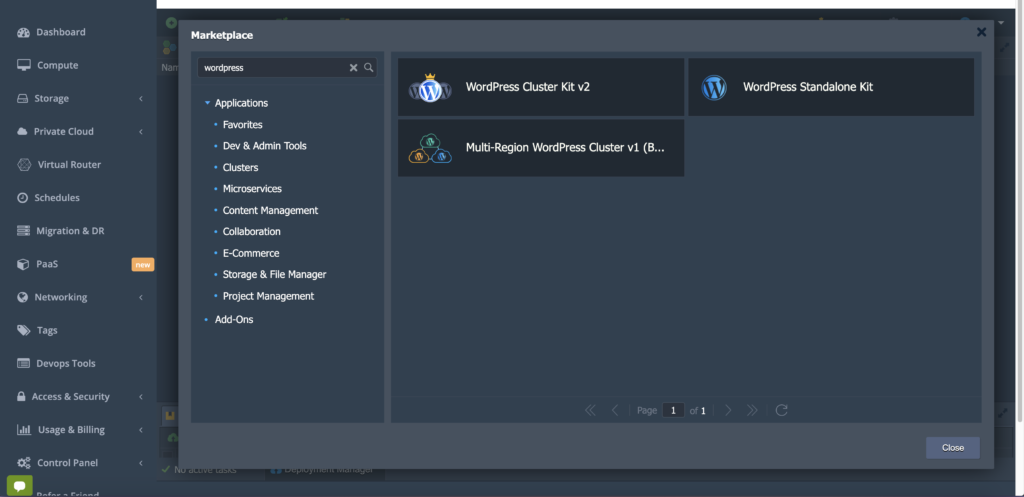
Step 1: Let’s begin by logging into your CloudSigma Dashboard and clicking Deploy Solution from the Marketplace. From there, create a new WordPress environment that can be either cluster or standalone. (Clustered solutions are accessible to billing customers only):
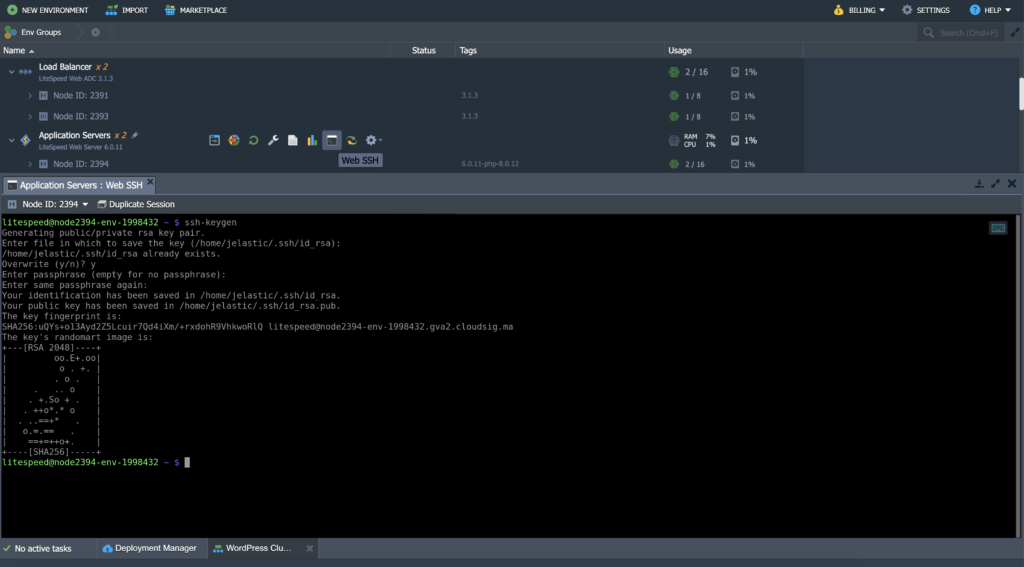
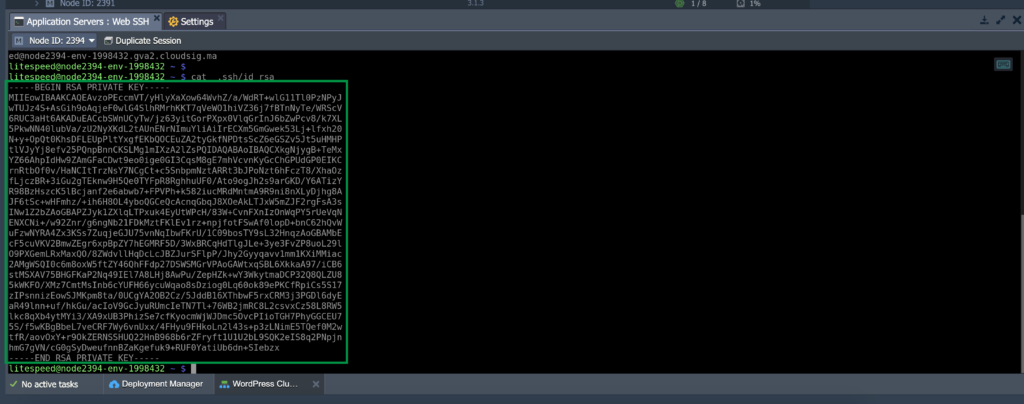
Step 2: Next, log into your application server using SSH. You can generate a keypair using the ssh-keygencommand:
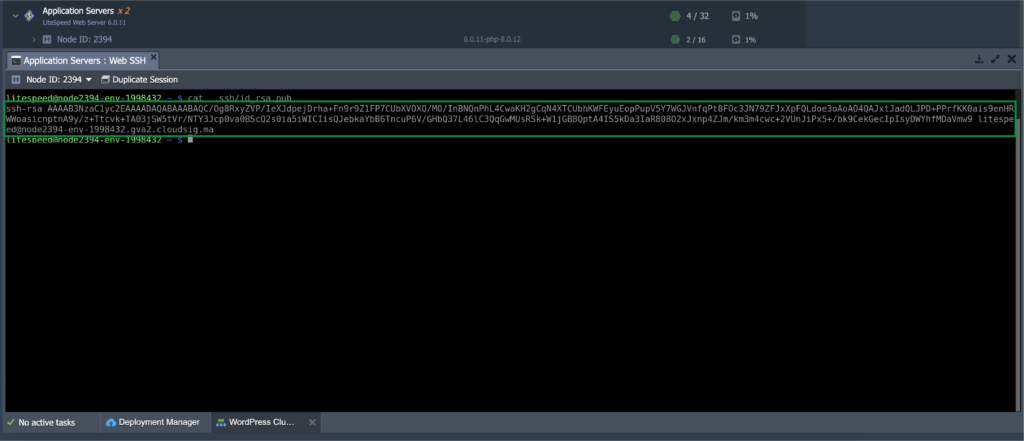
Step 3: The output will show your newly generated public key which can be accessed with the following command:
|
1 |
//cat .ssh/id_rsa.pub |
Next, select the contents of the key and use Ctrl+Shift+C (or Cmd+C on Mac) to copy it:
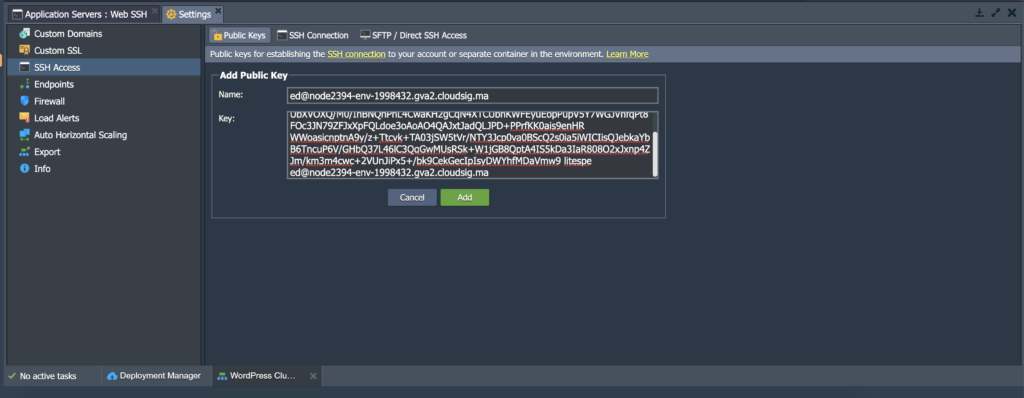
After that, go to Add Public Key in the WordPress environment and paste your copied public key:
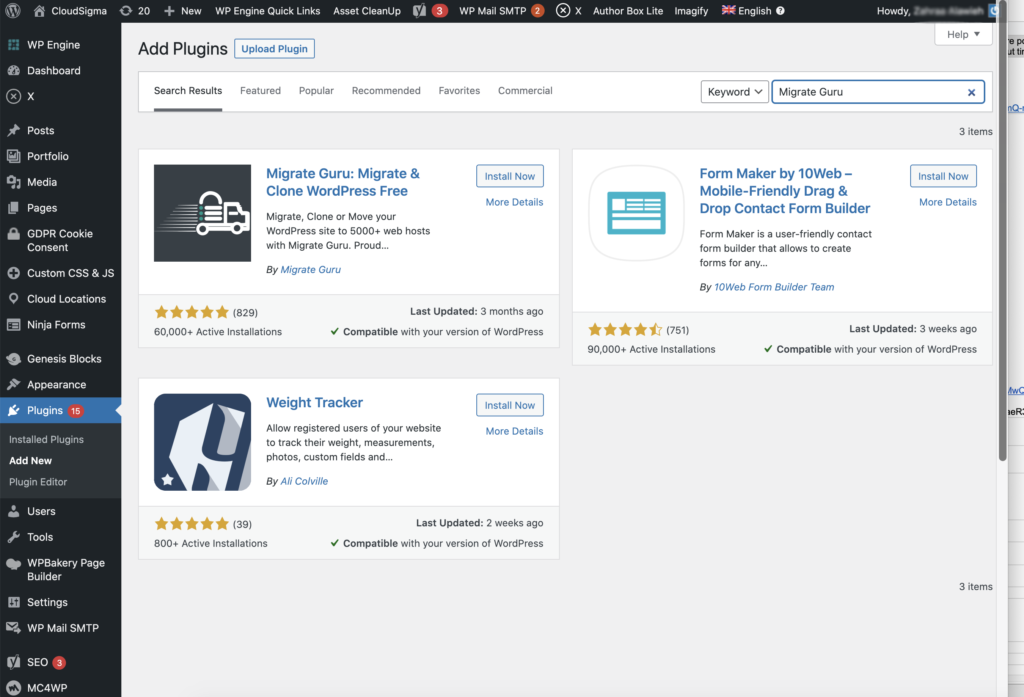
Step 4: The next step is to head over to the admin panel of the WordPress website. Use the Search bar to find, install, and activate the Migrate Guru plugin:
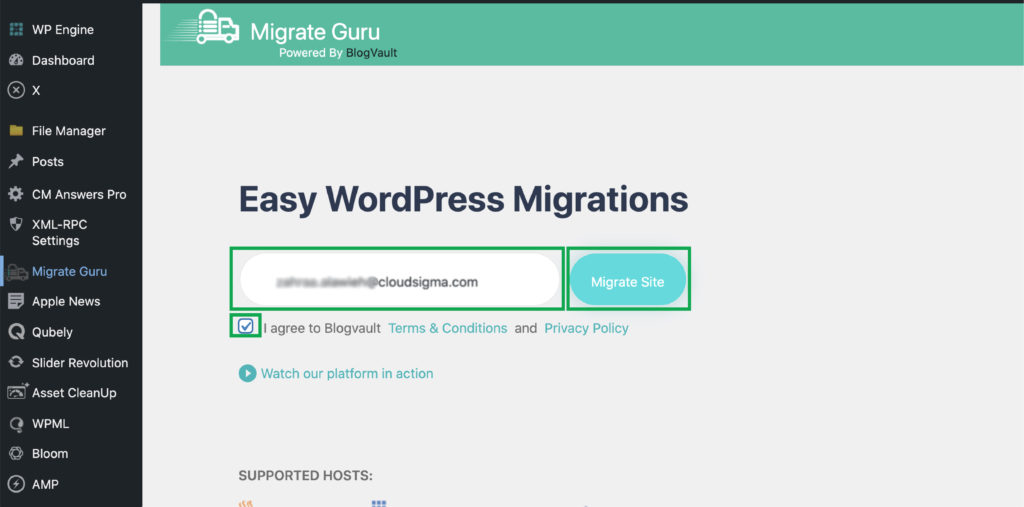
Step 5: You will be asked to enter your email in the Plugins tab. Accept the terms and click on Migrate Site:
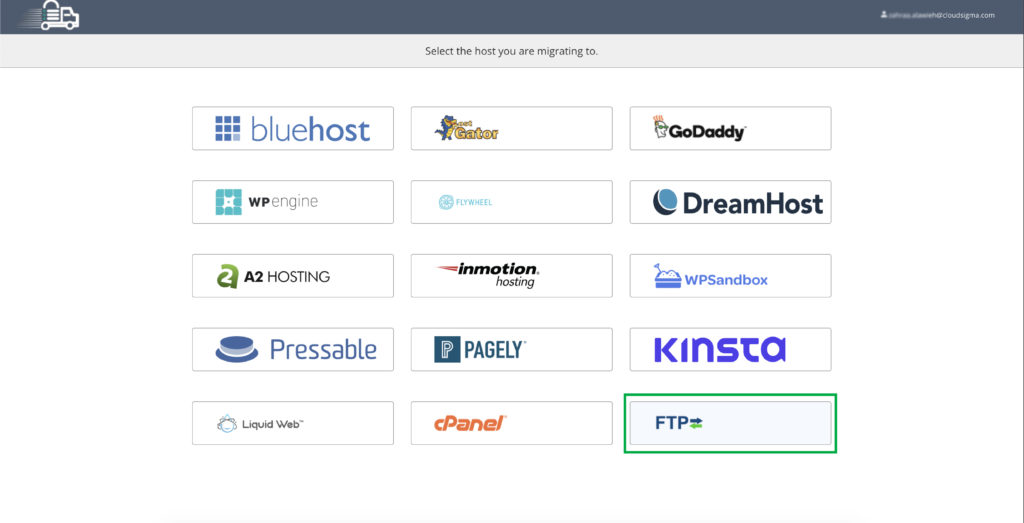
Step 6: On the subsequent page, select your host as the FTP protocol:
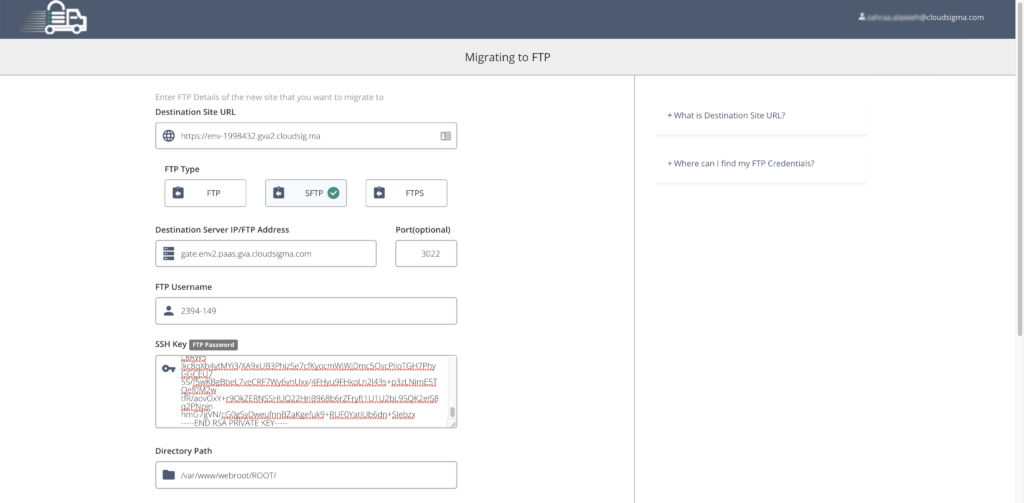
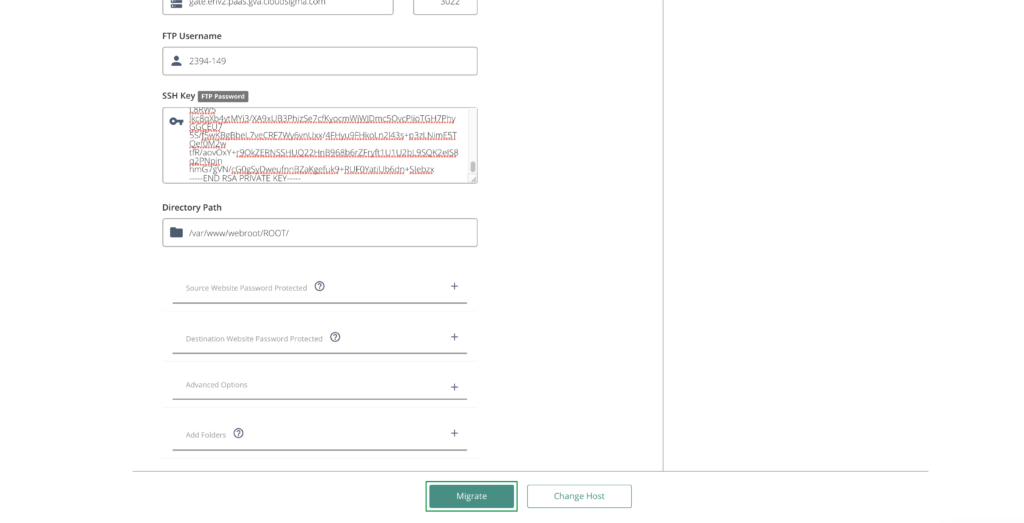
Step 7: You must now fill out the Migrating to FTP form. Here is what to enter in the given fields:
- Destination Site URL: Here, you must provide the link to your new WordPress site. You can use your custom domain or a default domain offered by CloudSigma when you create a new environment.
- FTP Type: Select SFTP (Secure File Transfer Protocol). This will ensure secure migration.
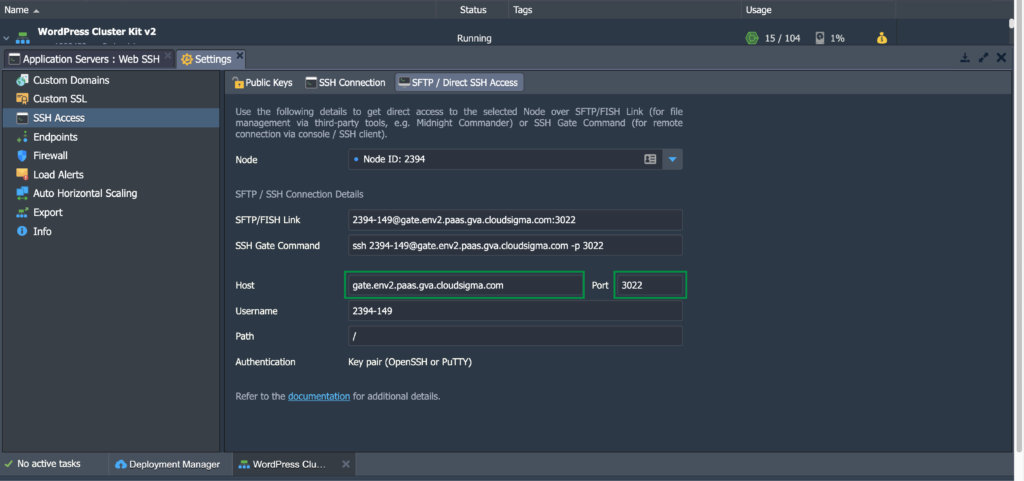
- Destination Server IP/FTP Address: You can find this information under the SSH Access section on the CloudSigma PaaS dashboard.
- Port: You can also pick the Port information from the SSH Access section on the CloudSigma PaaS Dashboard:
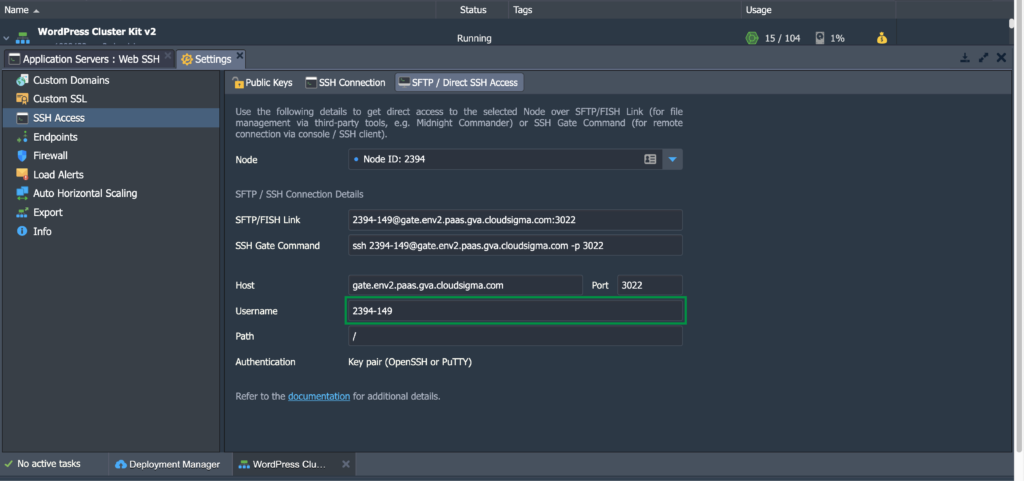
- FTP Username: The SSH Access section will show you the automatically generated Username which you can enter here:
- SSH Key: This is referring to the key we generated in Step 2. Simply select and copy the key from the
.ssh/id_rsafile which will be in the user’s home directory. Then, paste it in this field:
Directory Path: This path is meant to show where your WordPress application has been installed. You can find this in the Directory Path: This path is meant to show where your WordPress application has been installed. You can find this in the /var/www/webroot/ROOT/ directory.
Once all these fields are filled, click on the Migrate at the bottom of the form:
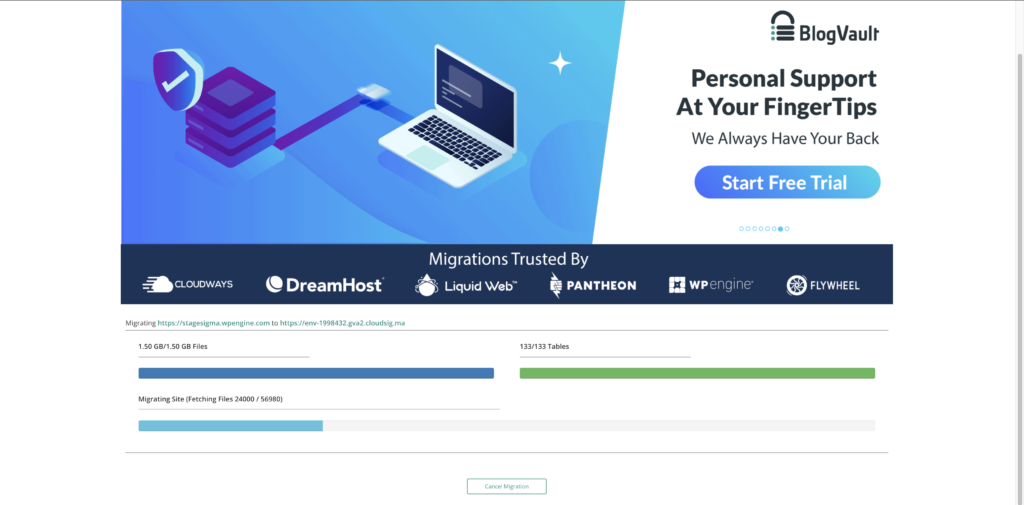
Step 8: Finally, your data will be validated by the system and the migration will begin:
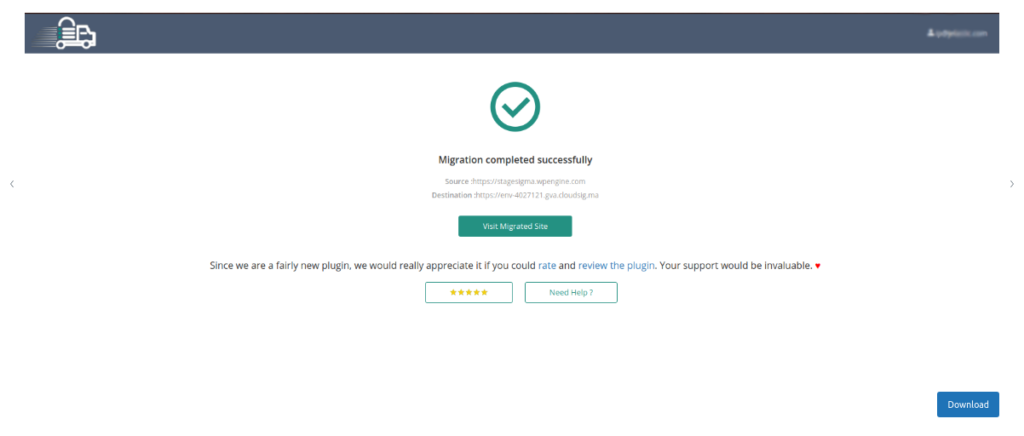
Step 9: You will be notified when the migration has been completed successfully. Clicking on the Visit Migrated Site button will take you to your website:
Voila! You have successfully migrated your WordPress website to CloudSigma PaaS which will improve its performance and availability. If you face any problems or require technical assistance reach out to our support team which is available free of charge 24/7 by chat or email at support@cloudsigma.com.
Take a look at the rest of the one-click packages that CloudSigma PaaS offers here. For a simple step-by-step guide that will walk you through CloudSigma’s PaaS Dashboard check here.
You can learn more about our PaaS service right here. Give CloudSigma’s PaaS a try with our 7-day free trial or contact us if you want us to provide you with more details and a platform demo.
- 5 Tips to Achieve Optimal Cloud Computing Cost Efficiency - October 31, 2022
- CloudSigma Empowers Blockchain Infrastructure Provider with a Green, Reliable, and Cost-Efficient Cloud Platform - October 27, 2022
- Whitech Launches New Egypt Cloud Computing Offering, Powered by HPE and CloudSigma - October 17, 2022
- Key Aspects of Protecting your Data in the Cloud - September 20, 2022
- How to Configure MongoDB Replication and Automated Failover - September 19, 2022


