
Django is a free and open-source web framework built in Python. First published in 2005, Django incorporates the motto of “rapid development and clean, pragmatic design.” The framework, deployed on a web server, can quickly produce a web front-end with rich features, security, and scalability.
Any web app relies on databases for its content. Django, being a modern framework, supports a number of standard database programs, for example, PostgreSQL, SQLite, MySQL, etc. This guide will showcase how to connect a Django app to a database on MySQL.
Prerequisites
To follow this tutorial you need to meet certain pre-conditions before moving to Django and database connection:
- A proper web server. In this guide, we’ll be using an Ubuntu server.
- A properly configured Python 3 development environment.
- A database application. Here’s an in-depth guide on installing and using MySQL.
Installing and Configuring Python 3
Django is written in Python. Running any Python app requires the Python binaries to be installed in the system. Ubuntu comes with Python installed by default. Here, we’ll be using Python 3. From the terminal, run the following commands. First, update the APT cache and upgrade (if available) all the installed packages:
|
1 |
$ sudo apt update && sudo apt upgrade -y |
Python 3 is directly available from the official Ubuntu package servers. The package
python-is-python3 creates a python binary soft link to
python3 for ease of use:
|
1 |
$ sudo apt install python3 python-is-python3 |
Next, verify if the installation was successful:
|
1 2 |
$ python3 --version $ python --version |
After that, we need pip. It’s the standard Python package manager. It’s responsible for managing additional Python libraries that are not part of the standard library. Note that we’re installing pip3 (for Python 3):
|
1 |
$ sudo apt install python3-pip |
Lastly, we need some additional packages for a robust programming environment:
|
1 |
$ sudo apt install build-essential libssl-dev libffi-dev python3-dev |
Installing and Configuring MySQL
This section will briefly demonstrate installing and configuring MySQL. It’s available from the default Ubuntu package repos:
|
1 |
$ sudo apt install mysql-server |
If the installation was successful, then MySQL will start running in the background. Verify if it’s working properly:
|
1 |
$ systemctl status mysql |
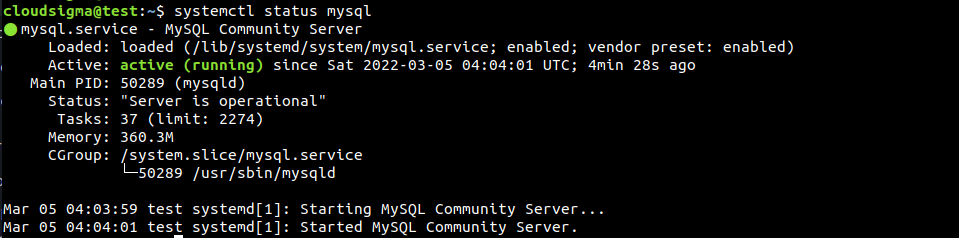
The MySQL server is up and running. We can now safely transition to the development of our Django app.
Working with Django
-
Establishing the sample Django app
The groundwork of our web app requires the Django project skeleton. It contains all the necessary tools and libraries required to create a robust web app. First, we will create a dedicated directory for our Django app. It’s recommended to name the directory something meaningful and consistent with the app we’re about to build. In this demonstration, we will be naming it myDemoApp:
|
1 |
$ mkdir -pv myDemoApp |
We need the Python venv module to create a virtual environment within the directory. Install the module using APT:
|
1 |
$ sudo apt install python3-venv |
Then, navigate to the directory and establish a virtual environment. For clarity, we named the environment demoapp_env:
|
1 |
$ python3 -m venv demoapp_env |
Next, activate the virtual environment by running the activate script:
|
1 |
$ . demoapp_env/bin/activate |

We’ll now install Django inside this dedicated virtual environment. Pip will download and install some additional components:
|
1 |
$ pip install django |
Django is installed and ready to be used. Call the django-admin command to create a new Django project. Аfter that, give the app an appropriate name:
|
1 |
$ django-admin startproject demoapp |
It will create a demo project with the necessary project files and directories in place:
|
1 |
$ ls -l |

The project skeleton is ready. Next, we need to configure it properly to accomplish our goal.
-
Editing Django project settings
All the configurations of the project are stored under the file settings.py. It’s located within the Django project directory. We’ll start by setting a proper time zone and list hosts that can connect to the Django app. Open the configuration file in a text editor:
|
1 |
$ nano ~/myDemoApp/demoapp/demoapp/settings.py |
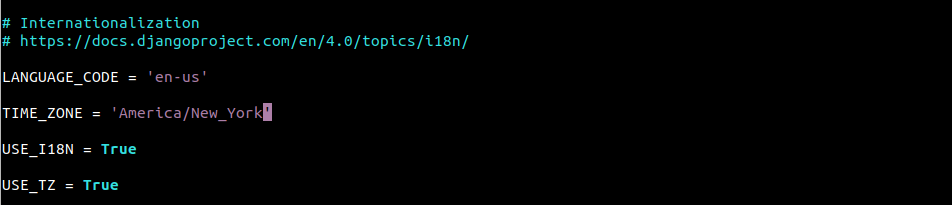
Scroll down the script and find the entry TIME_ZONE. For demonstration, the time zone is set to America/New_York:
|
1 |
$ TIME_ZONE = 'America/New_York' |
For reference, the following command will print all the supported time zones in Linux:
|
1 |
$ timedatectl list-timezones |
Next, scroll to the entry ALLOWED_HOSTS. It controls which machine(s) can access the app. For demonstration, it only contains localhost:
|
1 |
$ ALLOWED_HOSTS = ['localhost'] |
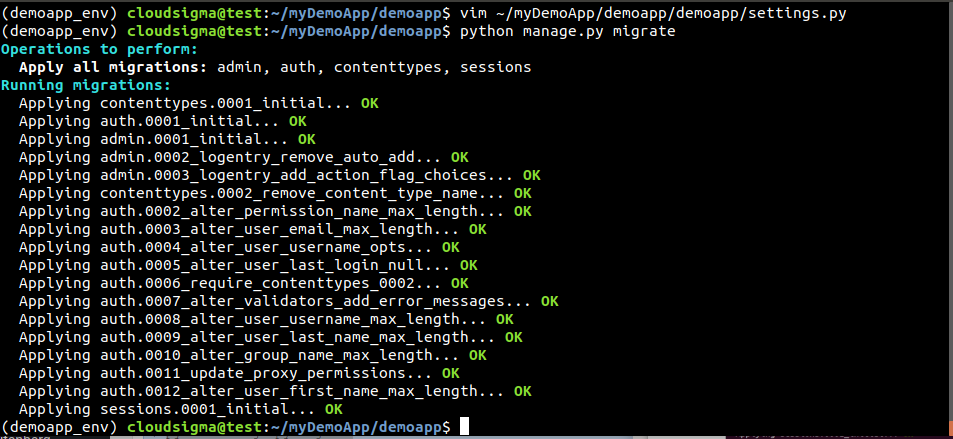
 Then, save the file and close the editor. The next command will apply the changes:
|
1 |
$ python manage.py migrate |
 Now, we need to create an admin account for the web app. This account will be used to access the Django admin interface. Run the following command:
|
1 |
$ python manage.py createsuperuser |
 It will ask for username, email, and password. The app is now ready to connect to the database.
MySQL Connection
-
Installing MySQL connectors and development libraries
To integrate MySQL into the Django app, we need some additional Python 3 libraries that will provide the necessary tools. We’ll be using the database connector mysqlclient. It’s a fork of MySQLdb.
Ensure that we have python3-dev installed:
|
1 |
$ sudo apt install python3-dev |
We also need some additional Python and MySQL headers and libraries:
|
1 |
$ sudo apt install python3-dev libmysqlclient-dev default-libmysqlclient-dev |
After the installation is complete, use pip to install the Python module mysqlclient. It may generate some error messages that can be ignored:
|
1 |
$ pip install mysqlclient |
-
Configuring a dedicated database
The next step is configuring a dedicated database and database user for our Django app. Launch the MySQL shell as the root user:
|
1 |
$ sudo mysql -u root |
To check all the currently available databases, run the following query:
|
1 |
$ SHOW DATABASES; |
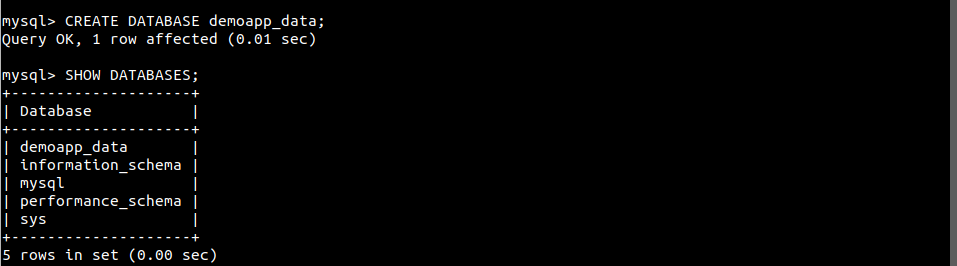
Let’s create a dedicated database for our Django app. Give it an appropriate name that’s consistent with the project name:
|
1 |
$ CREATE DATABASE demoapp_data; |
Then, verify the creation:
|
1 |
$ SHOW DATABASES; |
 Now, create a dedicated MySQL user. We’ll configure this user as the owner of the database. The Django app will use this user’s credentials to work with the MySQL database:
|
1 |
$ CREATE USER 'demoapp_user'@'%' IDENTIFIED WITH mysql_native_password BY 'password123'; |
Give the user demoapp_user full permission over the database demoapp_data:
|
1 |
$ GRANT ALL ON demoapp_data.* TO 'demoapp_user'@'%'; |
To take the permission changes into effect, reload the MySQL grant tables:
|
1 |
$ FLUSH PRIVILEGES; |
 The database is now ready to be connected to the Django app.
-
Connecting the Database to the Django App
Finally, we’ll configure the Django app to use the database for data storage. Open the configuration script settings.py:
|
1 |
$ nano ~/myDemoApp/demoapp/demoapp/settings.py |
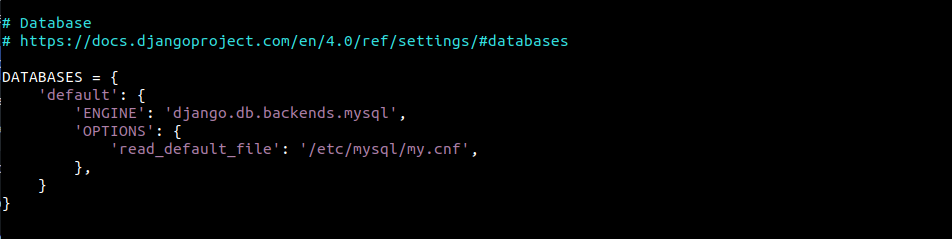
Scroll down to the entry DATABASES and enter the following code:
|
1 2 3 4 5 6 7 8 |
DATABASES = { 'default': { 'ENGINE': 'django.db.backends.mysql', 'OPTIONS': { 'read_default_file': '/etc/mysql/my.cnf', }, } } |
 Save the file and close the editor. The next step is to set the configuration file described in the code before. Use
 sudo to open the text file in the described location:
|
1 |
$ sudo nano /etc/mysql/my.cnf |
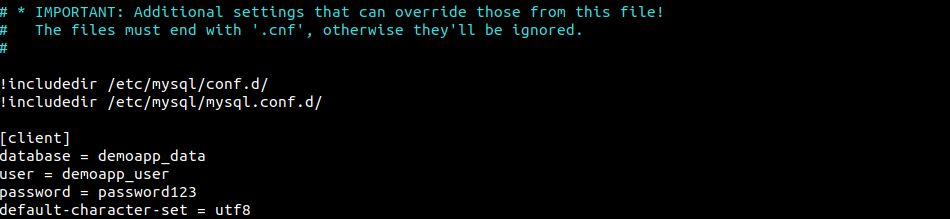
This configuration file will contain info about the Django-dedicated database and the user we created in the MySQL server. Add the following lines at the end of the file:
|
1 2 3 4 5 |
[client] database = demoapp_data user = demoapp_user password = password123 default-character-set = utf8 |
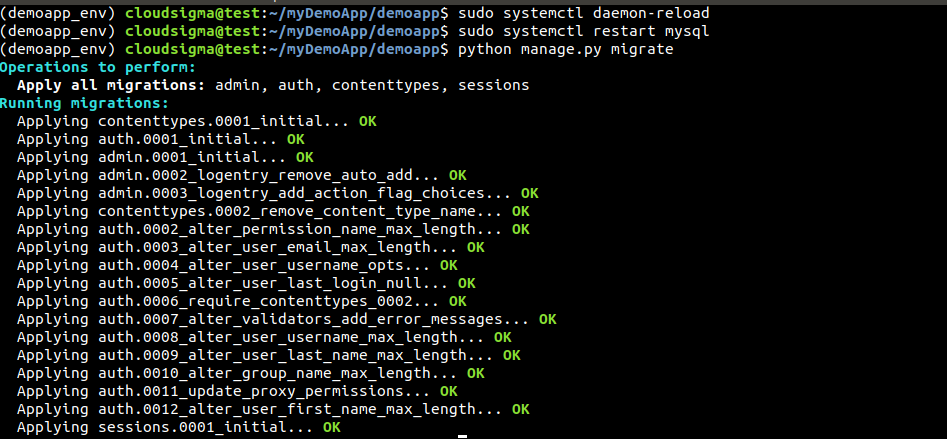
 To take the changes into effect, we have to restart the MySQL server:
|
1 2 |
$ sudo systemctl daemon-reload $ sudo systemctl restart mysql |
-
Testing MySQL connection
It is now time to verify if the MySQL connection is working properly. If the Django server runs without issue, then the connection is working fine. Otherwise, there is something wrong. First, apply all the changes made to the Django project:
|
1 |
$ python manage.py migrate |
 Now, move to the following project directory and start the Django server:
|
1 2 |
$ cd ~/myDemoApp/demoapp $ python manage.py runserver <server_ip_address>:8000 |
 Next, try to access the server from a web browser:
|
1 |
$ http://<server_ip_address>:8000 |
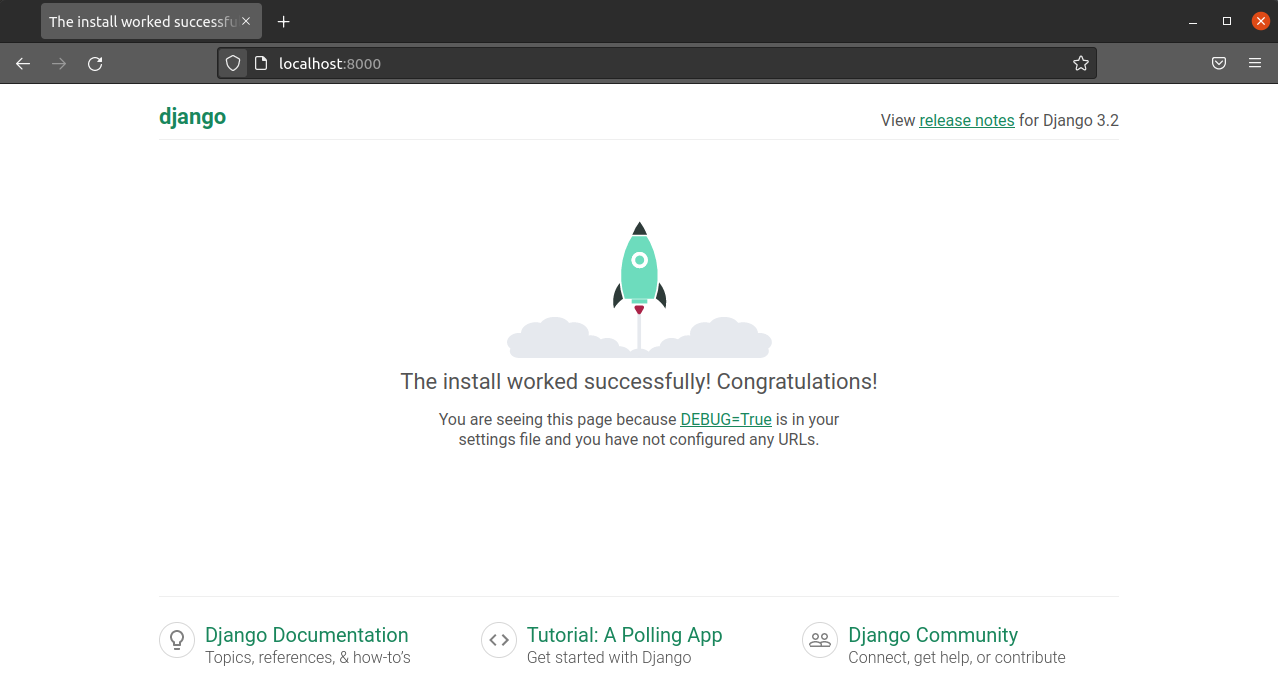
Voila! We’ve successfully landed on the Django success page. It also verifies that the MySQL connection is working properly. After the task is finished, you can safely exit the virtual environment:
|
1 |
$ deactivate |
Final Thoughts
In this guide, you’ve learned the basics of combining Django and MySQL together. We created a Django app and showcased how to connect it with a MySQL database. The magic lies within the Django configuration file settings.py. We also modified some basic settings like ALLOWED_HOSTS and TIME_ZONE. Django is incredibly flexible. Besides MySQL, it also supports other SQL servers like PostgreSQL, server engines like Nginx, etc.
You can also check out our guides on the best practices to install, configure, and work with Django:
- Installing the Django Web Framework on Ubuntu 20.04
- Setting up Django with PostgreSQL, Nginx, and Gunicorn on Ubuntu 20.04
- Creating Django Models: A Tutorial
Happy Computing!
- How To Enable, Create and Use the .htaccess File: A Tutorial - March 8, 2023
- An Overview of Queries in MySQL - October 28, 2022
- Introduction to Cookies: Understanding and Working with JavaScript Cookies - October 25, 2022
- An Overview of Data Types in Ruby - October 24, 2022
- The Architecture of Iptables and Netfilter - October 10, 2022