

A firewall is one of the core components of securing a system. It’s responsible for managing the incoming and outgoing connections over the network. It’s the primary line of defense for your servers and data. This is why it’s paramount to have a well-configured firewall. In this guide, we will walk you through the steps of setting up a firewall with UFW on Ubuntu 18.04.
UFW on Ubuntu
The term UFW stands for “Uncomplicated Firewall.” It’s a default firewall program that comes pre-installed with Ubuntu. UFW is actually an interface to iptables. The goal of UFW is to make configuring and managing a firewall easier. While iptables, by itself, is a solid and flexible option, it’s not welcoming to beginners. UFW makes it easier for both beginners and experienced users.
First, take a look at our all-encompassing guide that will help you familiarize yourself with the basic UFW functions. You can also follow this guide to install your Ubuntu server. Now, let’s get started!
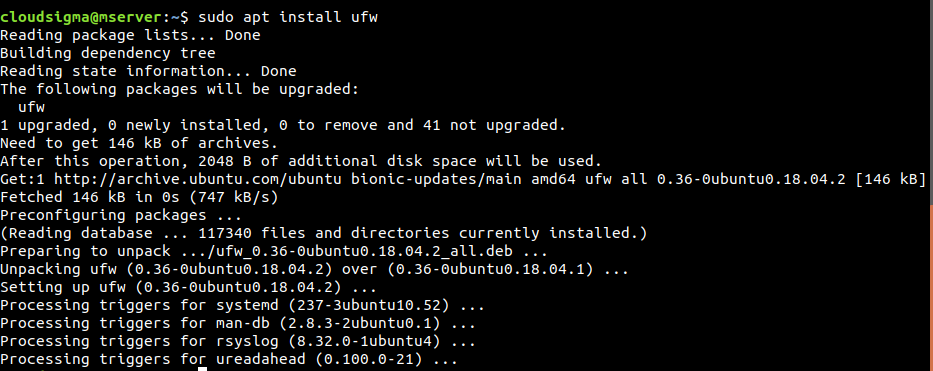
To begin with, if for some reason, your UFW isn’t installed, install it right away:
|
1 |
$ sudo apt install ufw |
Configuring UFW
-
Using IPv6
As of now, IPv4 is still the dominant force. Keeping that in mind, most of this guide also features IPv4. Thankfully, UFW also comes with support for IPv6. All you need to do is enable the feature from the UFW configuration file.
First, open the UFW configuration file in a text editor. To save the changes, the text editor has to be run with sudo privilege:
|
1 |
$ sudo vim /etc/default/ufw |
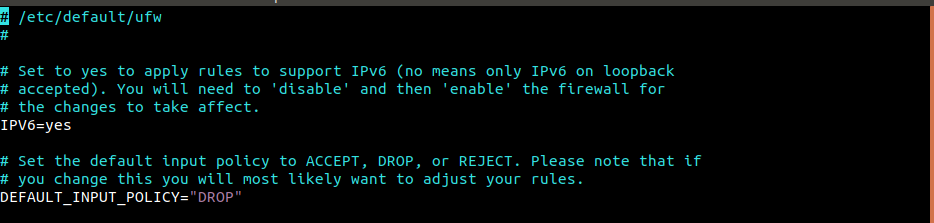
Look out for “IPV6” and make sure that it’s set to “yes”.
-
Default policy
If this is your first time tinkering with a firewall, it’s recommended to define the default policies first. These rules determine how traffic is controlled that doesn’t match any explicit rule. By default, UFW is configured to deny all incoming connections but allow all outgoing connections. It defines that no one can reach the server while an application running on the server can reach outside.
The following commands will just re-define the default behavior of UFW. Note that it’ll change UFW behavior if it was modified before:
|
1 2 |
$ sudo ufw default deny incoming $ sudo ufw default allow outgoing |

For a personal computer, these firewall rules alone would be enough. However, servers require more to properly harden their security.
Allowing SSH Connections
The way UFW is configured now, it’ll deny all the incoming connections. For a remote server, that’s a no-go. Without access to the server, nothing can be done. To avoid this issue, UFW can be configured to allow incoming SSH or HTTP connections.
To allow SSH connections to the server, run the following command. It’ll essentially tell UFW to allow all connections on port 22. It’s the port that the SSH daemon listens on by default:
|
1 |
$ sudo ufw allow ssh |
Instead of this command, it’s possible to directly configure allowing connections to port 22. This port is defined under the /etc/services file:
|
1 |
$ sudo ufw allow 22 |
Because port 22 is the default for SSH daemon, it can be also susceptible to attack. What if the SSH server is configured to listen on a different port? In such a situation, a UFW must allow connection to that port. Assuming the SSH server is listening to port 1234, then use the following command:
|
1 |
$ sudo ufw allow 1234 |
Enabling UFW
While UFW rules are established, they won’t do anything unless UFW is activated. By default, UFW is disabled, meaning despite declaring the rules, it won’t enforce them. To enable UFW, run the following command:
|
1 |
$ sudo ufw enable |
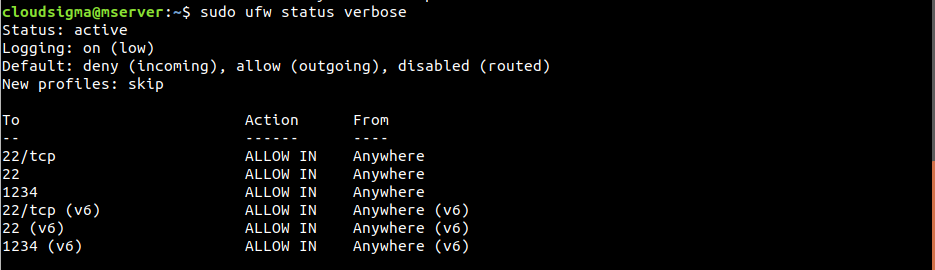
UFW may show a warning message about disrupting the existing SSH connections. Because SSH connections were configured to be allowed, enabling UFW won’t cause any disruption. To see what rules are set, run the following command:
|
1 |
$ sudo ufw status verbose |
Allowing Various Connections
At this point, UFW should be equipped with other rules to have a stable experience. The connections that are to be allowed depend on your specific needs. It’s already demonstrated how to tell UFW to allow connections based on the name of a service or port number.
Here are some other ports that are very common to have open:
- SSH (
port 22): This is the default port configured for SSH connections. - HTTP (
port 80): This is the default port that unencrypted web servers use. - HTTPS (
port 443): This is the default port that encrypted web servers use.
To enable SSH connections, run either of the following commands:
|
1 2 |
$ sudo ufw allow ssh $ sudo ufw allow 22 |
Next, to enable HTTP connections, run either of the following commands:
|
1 2 |
$ sudo ufw allow http $ sudo ufw allow 80 |
To enable HTTPS connections, run either of the following commands:
|
1 2 |
$ sudo ufw allow https $ sudo ufw allow 443 |
Port Range
So far, we demonstrated how to allow a certain port. What if there’s a need for a range of ports? Declaring each port to UFW is quite inefficient. Some applications use multiple ports. Thankfully, UFW allows declaring a range of ports. To do so, use the following command structure:
|
1 |
$ sudo ufw allow <start>:<end>/<protocol> |
The following example enables X11 connections that use ports 6000 to 6007:
|
1 2 |
$ sudo ufw allow 6000:6007/tcp $ sudo ufw allow 6000:6007/udp |

It’s recommended to declare protocols whenever possible. However, in most cases, it isn’t necessary and things would work just fine.
Specific IP Addresses
When using UFW, it’s also possible to filter connections by specific IP addresses. By default, UFW will block connections from any IP address. It’s possible to declare allowing connection from certain IP addresses. To allow connection from an IP address, use the following command structure:
|
1 |
$ sudo ufw allow from <ip_address> |
You can also declare the specific ports the IP address is allowed to connect to. To do so, add to any port followed by the port number to the command:
|
1 |
$ sudo ufw allow from <ip_address> to any port <port> |
Subnets
If you have the necessity to allow a subnet of IP addresses, it’s possible to do so using CIDR notation. In this example, UFW will allow connection from IP addresses ranging from 203.0.113.1 to 203.0.113.254:
|
1 |
$ sudo ufw allow from 203.0.113.0/24 |
Similar to the previous step, it’s also possible to specify the port these IP addresses can connect to:
|
1 |
$ sudo ufw allow from 203.0.113.0/24 to any port <port> |
Connecting to a Specific Network Interface
In a server environment, there may be multiple network interfaces connected to the system. Using UFW, it’s possible to describe that a certain rule only applies to a specific network interface. First, check all the network interfaces connected to the server. The name of the target network interface is the primary focus:
|
1 |
$ ip addr |
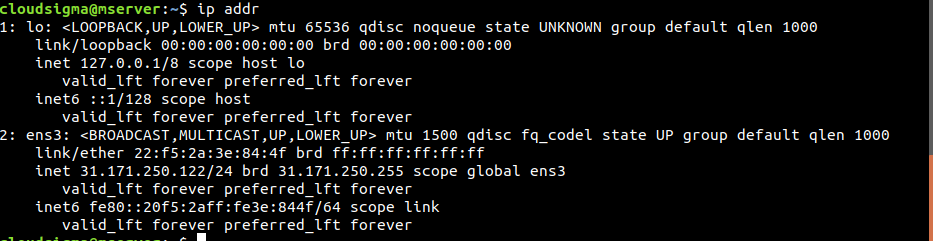
In our case, there’s only one network interface ens3 that connects to the public internet. To allow incoming connections from this network interface, use the following command structure:
|
1 |
$ sudo ufw allow in on <network_interface> |
It’s also possible to define the port that traffic can get to coming from the network interface:
|
1 |
$ sudo ufw allow in on <network_interface> to any port <port> |
Denying Connection
Per the default configuration, UFW will deny connection from any source (except the declared exceptions). This is the recommended way of using UFW. However, it may be required to block specific connections from a certain source IP address or subnet. Maybe the default behavior of UFW is set to allow all connections (not recommended).
To deny a connection from certain IP addresses, UFW requires deny rules. Writing deny rules is quite simple. Take any allow rule, swap the term “allow” with “deny” and voila! It becomes a deny rule.
Take a look at the following example. To deny any HTTP connection, use the following deny rule:
|
1 2 |
$ sudo ufw deny http $ sudo ufw deny 80 |

To deny connection from 203.0.113.1, use the following deny rule:
|
1 |
$ sudo ufw deny from 203.0.113.1 |
Delete Rules
All we’ve learned so far is how to create rules. Just like rules are created, they can also be deleted. In the case of UFW, there are two specific ways of deleting a rule.
-
Deleting a rule by rule number
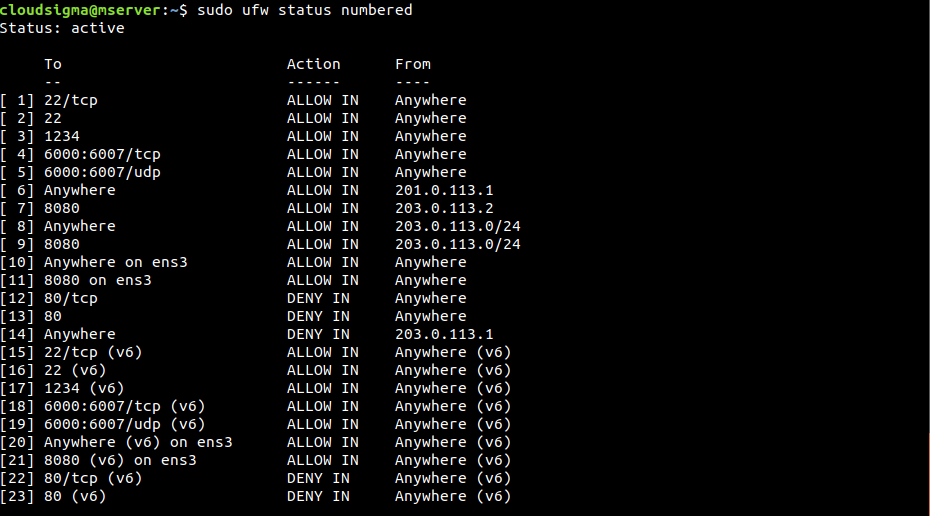
This is the simplest way of deleting a UFW rule. Each rule in UFW has a rule number. The following command will print all the UFW rules along with the rule number:
|
1 |
$ sudo ufw status numbered |
The following command will delete the rule specified by the rule number:
|
1 |
$ sudo ufw delete <rule_number> |

-
Delete rule by actual rule
This is the more difficult method of deleting a rule. It requires manually specifying the actual rule to delete it. In the following example, UFW will delete the rule specified by allow http:
|
1 |
$ sudo ufw delete allow http |
The rule could also have been specified by allow 80. In that case, the following command will delete it:
|
1 |
$ sudo ufw delete allow 80 |
Deleting a rule will delete it for both IPv4 and IPv6.
Checking UFW Status and Rules
It’s essential to ensure whether UFW is active or not. To determine the status of UFW, run the following command:
|
1 |
$ sudo ufw status verbose |
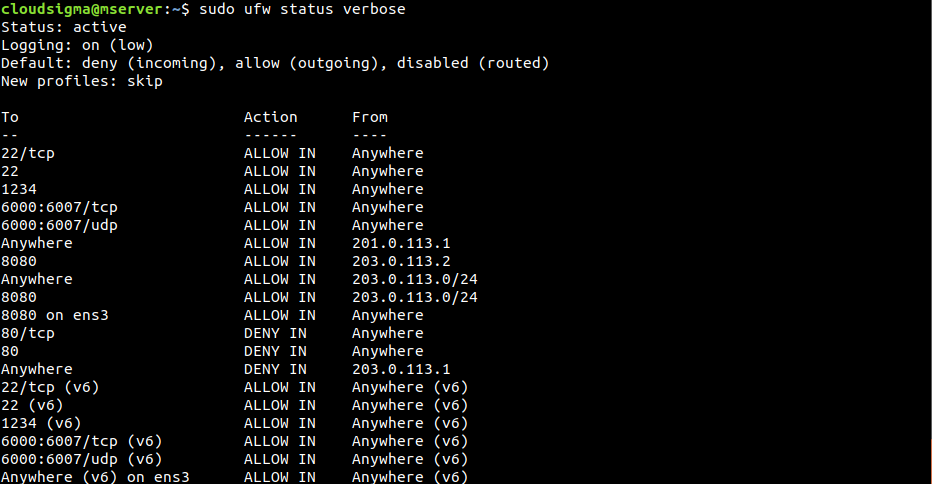
If the status is “inactive, ” then activate it by following the step Enabling UFW above. If it’s active, then UFW will report the status “active” and list all the active rules.
Disabling UFW
If, for some reason, you will not use UFW, then disable it using the following command:
|
1 |
$ sudo ufw disable |
If UFW is disabled, all the rules created are no longer active. However, the rules aren’t deleted. When UFW is reactivated, all the rules will become active again. What if the current UFW configuration is a mess? Instead of deleting the rules, it’s possible to delete all of them in a single command. To reset UFW, run the following command:
|
1 |
$ sudo ufw reset |
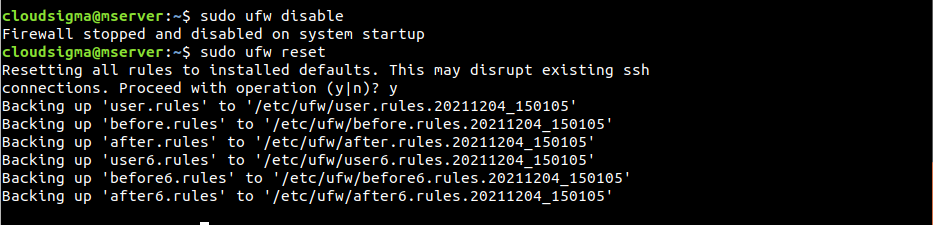
Note that it will not change the default UFW behavior that was configured at the start.
Conclusion
A proper firewall configuration is necessary to ensure security and functionality. It should be configured to allow only the necessary incoming connections while limiting unnecessary connections.
If you want to get acquainted with more firewall solutions take a look at our blog for further resources:
- Setting Up a Firewall with FirewallD on CentOS 7
- Listing and Deleting Iptables Firewall Rules
- How to Build Robust Security Measures to Protect Your Servers
Happy computing!
- How To Enable, Create and Use the .htaccess File: A Tutorial - March 8, 2023
- An Overview of Queries in MySQL - October 28, 2022
- Introduction to Cookies: Understanding and Working with JavaScript Cookies - October 25, 2022
- An Overview of Data Types in Ruby - October 24, 2022
- The Architecture of Iptables and Netfilter - October 10, 2022