

Adding swap space to your server is an excellent option to compensate for out-of-memory errors. Linux allows users to add swap space in their system when the amount of RAM in the system is full. When you create a dedicated space partition, you will allow your physical memory to run smoothly without much worrying about low disk space.
Swap Overview
Swap space in Linux is a part of a machine’s virtual memory used when the physical memory runs out of space. Especially when working with a large program or application where a need for extra memory arises, swap space is an ideal choice to hold temporarily inactive memory pages. Creating a swap space allows users to store data when large programs are running and thus reduces application crashes. That means that if the system needs more memory resources and the RAM is full, all the inactive pages in memory are drifted to the swap space and the programs are able to run uninterrupted.
What Amount of Swap Do I Need?
The amount of swap space depends on several factors. Those include available RAM, the load imposed, and whether the system is required to support the hibernation feature (suspend-to-disk). Refer to the table below to check on the recommended swap space based on the space available in RAM:
|
Sl. No. |
Available RAM Space |
Recommended Swap Space |
|
1. |
1GB |
1GB |
|
2. |
2GB |
1GB |
|
3. |
3GB |
2GB |
|
4. |
4GB |
2GB |
|
5. |
5GB |
2GB |
|
6. |
6GB |
2GB |
|
7. |
8GB |
3GB |
In this tutorial, we will walk you through the steps of adding swap space on Ubuntu 20.04. Let’s start!
Prerequisites
To follow along with this tutorial, you will need:
- Ubuntu installed on your system.
- Non-root user account set up with sudo privileges in your machine.
Step 1: Swap Information Check-up
The size of swap space depends on the system’s RAM. Therefore, it is essential to check swap space availability in your system before creating one. Type the below command to check if the system has any configured swap:
|
1 |
$ sudo swapon --show |
An output displayed means there is space available in your system to create swap space. However, no output is a signal indicating there is not enough available space to add swap space.
Use the free utility to verify that there is no active swap:
|
1 |
$ free -h |
You’ll see the output as a null swap row:

Step 2: Hard Drive Partition Availability Check-up
Similar to checking the system availability, now let’s check our current disk usage to ensure that we have enough space. Use the df command to check the hard disk partition availability:
|
1 |
df -h |
The device with / in the Mounted on column is our disk which is 11% free. You’ll see the output:
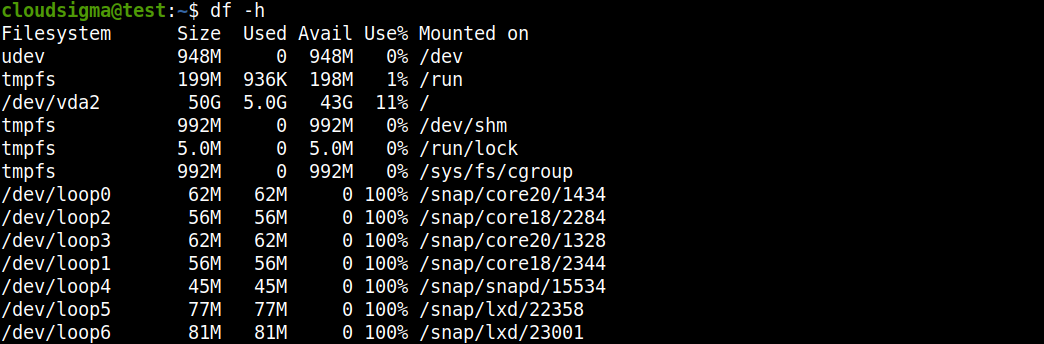
After checking the system’s requirements, let’s move forward and create a swap file on our filesystem.
Step 3: Create a Swap File
To create a swap file on our filesystem, allocate a file name as a swapfile in the root (/) directory using the fallocate program. Allocating a file size depends on your needs. To keep the tutorial simple, and easy to understand, we’re creating a 1G file and dedicating 1G of RAM. Use the sudo command to create a swap file:
|
1 |
sudo fallocate -l 1G /swapfile |
Next, type this command to verify the reserved space:
|
1 |
$ ls -lh /swapfile |
You’ll see the output:
Now that we have created a swap space in our system, let’s enable it in the next step.
Step 4: Enable the Swap File
Once we have the correct size available, let’s convert it into swap space. For security reasons, it is crucial to make our file accessible to root users and prevent accessibility from normal users. We’ll add restrictions so that users with root privileges can view the file and read its contents. Use the following root command to make the file only accessible to root users:
|
1 |
sudo chmod 600 /swapfile |
Then, use the ls command to verify the changes:
|
1 |
$ ls -lh /swapfile |
As you can see, only the root user has the read and write flags enabled:

After that, mark the file as swap space:
|
1 |
sudo mkswap /swapfile |
You’ll see the output:

After that, enable the swap file and permit our system to start using it:
|
1 |
sudo swapon /swapfile |
Next, verify the swap availability:
|
1 |
$ sudo swapon --show |
You’ll see the output:

As we did in Step 1, we’ll check the free utility space once again:
|
1 |
free -h |
You’ll see the output:

Our swap has been set up successfully and our operating system will begin to use it as necessary. In the next step, we will make the swap file permanent.
Step 5: Make the Swap File Permanent
By default, the server will not retain the swap settings automatically whenever we reboot. To change the default settings and play on the safe side, we will add the swap file to our /etc/fstab file. Use the sudo command to back up the /etc/fstab file:
|
1 |
sudo cp /etc/fstab /etc/fstab.bak |
Next, add the swap file information to the end of your /etc/fstab file by typing:
|
1 |
echo '/swapfile none swap sw 0 0' | sudo tee -a /etc/fstab |
After that, let’s review some settings and make modifications so that we can tune our swap space.
Step 6: Swap Settings Modification
In this step, we’ll configure the settings and make some modifications. Let’s adjust the swappiness property and change the change cache pressure.
-
Adjust the Swappiness Property
The swappiness parameter is a tunable kernel parameter. It changes the balance between swapping out runtime memory and accounts for the exchange of data between swaps data out of RAM to the swap space. This parametric value is expressed in percentage, ranging from 0 up to 100.
The vm.swappiness value has a direct influence on the behaviour of system swappiness. The higher the vm.swappiness, the more the system will swap and vice-versa. If the value is close to zero, the kernel will not swap data which may lead to a reduction in performance. Permitting your system not to depend much on the swap is an excellent way to enhance its performance and gain robust responsiveness.
Alternatively, vm.swappiness that is closer towards 100 attempts to put more data in the swap and less on the physical memory. Unlike the low-to-mediocre vm.swappiness value, the high system swapping has very undesirable effects when there are loads of data being swapped actively in-and-out of the RAM.
Check the current swappiness value by typing:
|
1 |
cat /proc/sys/vm/swappiness |
You’ll see the output:
![]()
You can also set the swappiness of your choice using the sysctl command. Let’s set the swappiness value to 15 by typing:
|
1 |
sudo sysctl vm.swappiness = 15 |
You’ll see the output:
![]()
Until the system is rebooted, the settings will remain as is. Add the line to our /etc/sysctl.conf file to set the value automatic at restart/reboot:
|
1 |
sudo nano /etc/sysctl.conf |
You can add the following code at the bottom:
|
1 |
Vm.swappiness = 15 |
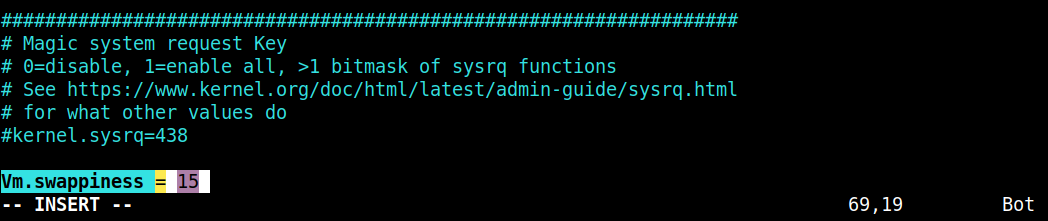
Then, save and close the file.
-
Adjust the Cache Pressure
Next, we are going to modify vfs_cache_pressure that will take care of inode and dentry information over other data. These vfs_cache_pressure settings also control the tendency of the kernel to reclaim the memory used for caching of the directory. Navigate the proc filesystem again to check the current value:
|
1 |
cat /proc/sys/vm/vfs_cache_pressure |
You’ll see the output:

As the configuration is already done, our system will eliminate the inode information from the cache. Let’s set the sysctl vm.vfs_cache_pressure to a more stable setting like this:
|
1 |
sudo sysctl vm.vfs_cache_pressure = 60 |
You’ll see the output:
![]()
Similar to what we did in our swappiness setting, we can change the configuration here as well:
|
1 |
sudo nano /etc/sysctl.conf |
At the bottom, insert a line indicating the new value you created:
|
1 |
Vm.vfs_cache_pressure = 60 |
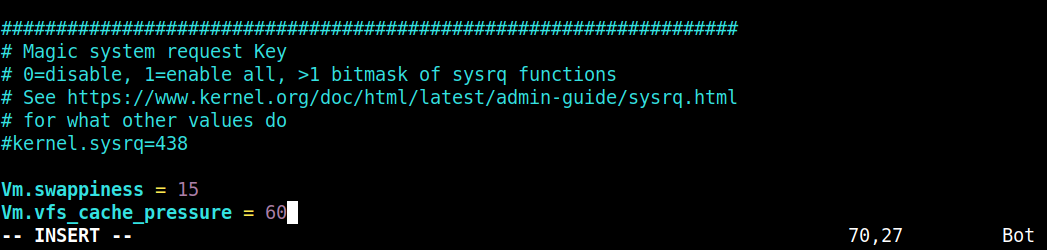
Finally, save and close the file.
Conclusion
You can add swap space as a dedicated swap partition, a swap file, or a combination of both. You can create swap space and leverage its benefits to run applications seamlessly without much worrying about out-of-memory warnings. While creating swap space is an added advantage in systems with limited memory space, it must not be treated as an alternative for more RAM space. Remember, swap space is located on a hard disk therefore you may experience a slightly slow access time compared to physical memory.
Here are more tutorials on our blog that will help you get started with your Ubuntu servers:
- Setting up an NFS mount on Ubuntu 20.04
- Installing Nginx on Ubuntu 18.04
- Configuring a firewall with UFW on Ubuntu 18.04
Happy Computing!
- How To Enable, Create and Use the .htaccess File: A Tutorial - March 8, 2023
- An Overview of Queries in MySQL - October 28, 2022
- Introduction to Cookies: Understanding and Working with JavaScript Cookies - October 25, 2022
- An Overview of Data Types in Ruby - October 24, 2022
- The Architecture of Iptables and Netfilter - October 10, 2022