
Auto-clustering enables you to create a replica set of your entire database. MongoDB is a stack you can use on your CloudSigma PaaS platform to make the process incredibly easy- you can make a reliable replica set with just one click.
There are many benefits to automatic clusterization, some of which include:
- High Data Availability
It is a great strategy to ensure your data is retained in case of potential breaches or data loss. The replica sets can be stored on different servers to increase data availability.
- Increased Scalability
Auto-clusterization allows you to scale horizontally with the addition of new nodes that are configured automatically with the needed adjustments.
- Automated Failover
Site performance is improved with automatic exclusion of database nodes that are either temporarily unavailable or have high latency. The nodes are readded to the cluster once they reconnect.
You can take advantage of these benefits by using the MongoDB stack for your website on the CloudSigma PaaS. To help you implement the solution from the topology wizard, this guide will provide you with the exact steps you need to follow.
What is MongoDB Auto-Clustering?
As mentioned before, using the MongoDB stack for auto-clustering allows you to create a replica set. This replica set consists of at least three instances of MongoDB, each of which is maintaining the same data.
One of the nodes is considered the primary node. The primary node is responsible for all the write operations and it saves the changes in the oplog. This is so all the secondary nodes can reflect the data in the primary. In case the primary node becomes unavailable for any reason, the system automatically determines a new primary from the remaining secondary nodes.
Default Configuration of a Cluster
These are the default values of the automatically configured clusters:
- “chainingAllowed” : true
This allows secondary members to replicate data from other secondary nodes.
- “heartbeatIntervalMillis” : 2000
This value specifies the frequency of the heartbeats in milliseconds.
- “heartbeatTimeoutSecs” : 10
This value indicates the timeout in seconds that replica set members have to wait for a heartbeat before the given node is deemed as inaccessible.
- “electionTimeoutMillis” : 10000
This value indicates the timeout in milliseconds for checking if the primary member is unavailable or unreachable.
- “catchUpTimeoutMillis” : -1
This is the timeout in milliseconds for the new primary member to catch up with the other nodes that may have recent writes. A value of -1 indicates infinite time.
- “catchUpTakeoverDelayMillis” : 30000
This determines the timeout in milliseconds that a secondary member gives to the current primary node for catchup before it starts to select a new primary.
While these are the default settings, you can reconfigure these values manually as well. For this purpose, you must use the rs.reconfig command.
MongoDB Auto-Cluster Features
To make sure that only authenticated members are given access to the replica set, each member is required to identify itself using a unique authentication key file in the internal communication within the system. The key is generated with the required configuration from /etc/mongod.conf and is located at /home/CloudSigma/mongodb.key during the configuration of the cluster. The authentication file will also be added to the redeploy.conf file to make sure that it is sustained throughout the container lifecycle operations.
To minimize resource utilization and ensure high performance, MongoDB uses WiredTiger storage. With the default configurations, WiredTiger runs a single MongoDB instance per server. MongoDB also uses both the internal as well as the filesystem cache of WiredTiger. While the internal cache is 50% the size of total RAM minus 1 GB (no less than 256 MB), the filesystem cache runs on free memory that is not being used by other processes at the moment. You can learn more about the WiredTiger configurations through the official MongoDB documentation manual.
Another important feature of MongoDB auto-clustering is that it starts to detect newly added nodes after horizontal scaling automatically. The system will then include these into the replica set automatically without requiring any action on your part. Similarly, if you are scaling in your operations, nodes will be excluded from the replica set automatically.
How to Enable Auto-Clustering for Your Databases with MongoDB
Here are the steps you need to follow to activate MongoDB auto-clustering on your CloudSigma PaaS:
Step 1: Click on the New Environment button in the top left to open the topology wizard. Select the MongoDB database and click the switcher to On to activate Auto-Clustering:
As you can see, auto-clustering has been supported since the 4.x.x version of MongoDB. Other than that, the system recommends using 32 cloudlets (which is 4 GiB of RAM) for the proper functioning of the replica set nodes. You can change this number. However, the number of cloudlets is added as a dynamic scaling limit. Therefore, you will only be charged for the resources you use:
Take this moment to set values for other parameters such as public IPS, region, etc. as per your requirements. Once you are done configuring, click Create.
Step 2: Give the PaaS some time to perform the configuration and create the cluster:

Step 3: Once the installation has been completed successfully, you will receive an email about your replica set confirmation:
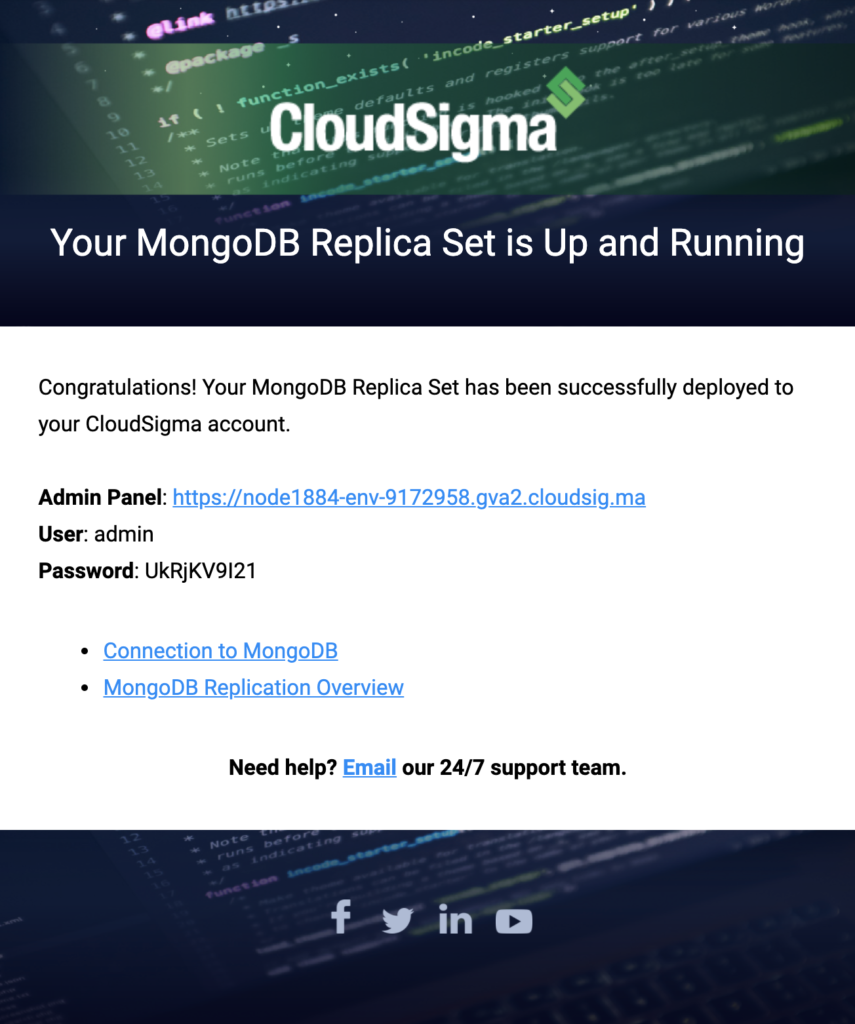
You will get credentials in this email that you can use to access the admin panel. You can also use these credentials to create connections between your applications and the primary node of your replica set.
As mentioned before, if a primary node fails, a secondary member is elected as the new primary. If you retreat your cluster, the election is performed again meaning you may end up with a new primary. In this case, the application connection string will become invalid. To prevent this, make sure the connection string contains the hostnames of all the members, the name of the replica set itself, as well as the read preferences (if needed to unload the primary node or to ensure high availability and failover).
This is what such a connection string would look like for a node.js application:
|
1 2 3 4 |
client = new MongoClient("mongodb://admin:L3tdH8bT64@node254967-mongo- cluster.CloudSigma.com:27017,node254968-mongo-cluster.CloudSigma.com:27017 ,node254969-mongo-cluster.CloudSigma.com:27017/admin", {useUnifiedTopology: true, readPreference:'primaryPreferred',replicaSet:'rs0'}); |
In this string:
useUnifiedTopology: true – makes MongoDB use the new Server Discover and Monitoring engine.
readPreference:’primaryPreferred’ – makes the stack read operations from the primary mainly and the secondaries if the former is unavailable.
replicaSet:’rs0′ – rs0 is the default replica set name. You can find the replica set name at any cluster in the mongodb.conf file or the mongo shell prompt.
If needed, it is possible to make external application connections to the replica set as well using SLB. For this, you must maintain the connection to the primary node for read/writes through CloudSigma Endpoints:

To read from the secondary members, you must customize the application code and add reading from the secondaries in a separate thread like you would for the primary. For example, we will remove the replicaSet parameter from the following connection string:
|
1 2 |
client = new MongoClient( "mongodb://admin:L3tdH8bT64@node254967-mongo-cluster.CloudSigma.com:11035/admin", { useUnifiedTopology: true }); |
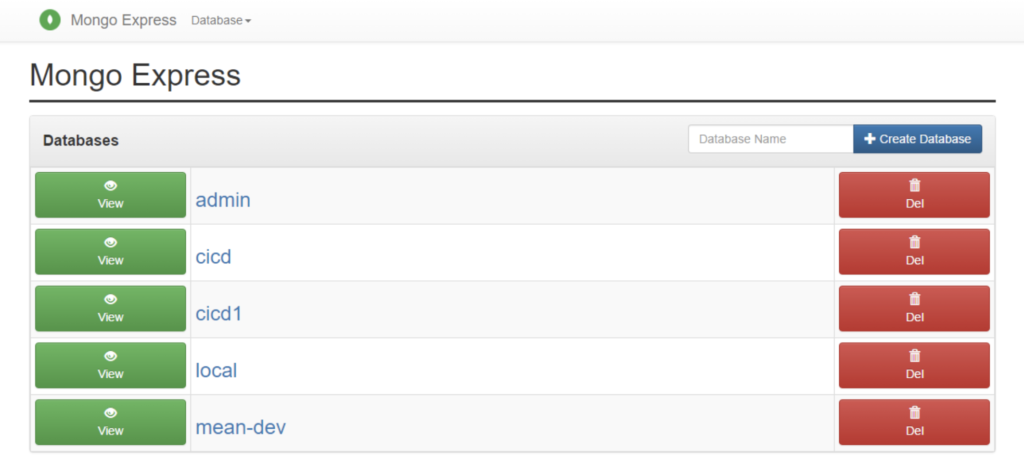
Step 4: The auto-cluster will use the Mongo Express administration panel to support the replica sets by default:
Step 5: It is possible to connect to the database using the mongo shell directly in your terminal. You may even do it using the built-in Web SSH option:
|
1 |
mongo -u {user} -p {password} {DB_name}: |
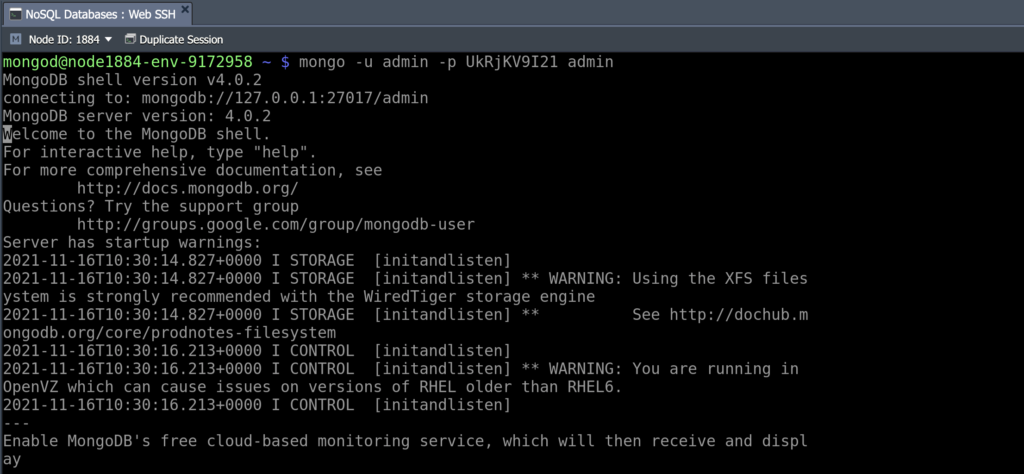
Here:
- {user} – administrator username from the email you received.
- {password} – password of the DB user from the email.
- {DB_name} – the name of the database you want access to.
Step 6: Use the rs.status() command to check the status of your replica set:
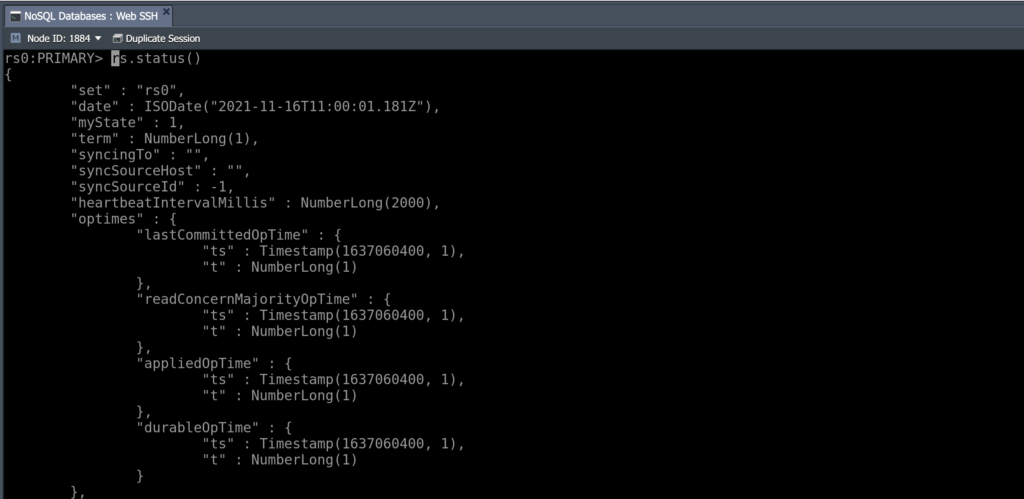
The output shows that the replica set is currently running. Another command that you can run is the rs.conf() operation which shows the replica set configs. You can find more commands for the replica set in the official documentation for MongoDB.
If you want, you can do further reading on how to set up and optimize MongoDB in Ubuntu in the public cloud or on public cloud servers. You can also explore other functions and features of the CloudSigma PaaS Dashboard.
You can learn more about our PaaS service right here. Give it a try with our 7-day free trial or contact us if you want us to provide you with more details and a platform demo.
- 5 Tips to Achieve Optimal Cloud Computing Cost Efficiency - October 31, 2022
- CloudSigma Empowers Blockchain Infrastructure Provider with a Green, Reliable, and Cost-Efficient Cloud Platform - October 27, 2022
- Whitech Launches New Egypt Cloud Computing Offering, Powered by HPE and CloudSigma - October 17, 2022
- Key Aspects of Protecting your Data in the Cloud - September 20, 2022
- How to Configure MongoDB Replication and Automated Failover - September 19, 2022