When it comes to database management, PostgreSQL is one of the most popular open-source programs used all across the board. The CloudSigma PaaS allows you to install either a standalone or clustered PostgreSQL database for your application. Furthermore, CloudSigma PaaS makes connection configuration and scaling an absolute breeze.
So how can you go about connecting your Node.js application to a PostgreSQL server? In this guide, we will give you a step-by-step tutorial on how to make these connections with ease.
Let’s begin!
Connect a Node.js Application to PostgreSQL on CloudSigma PaaS
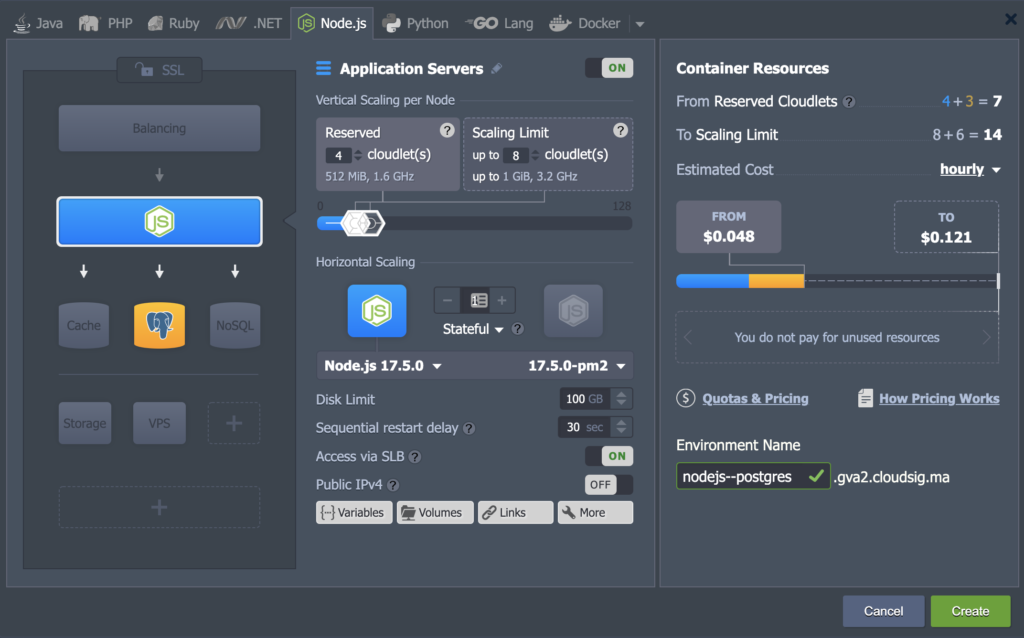
Step 1. First, log into your CloudSigma account and head over to the PaaS dashboard. Create a New Environment with the PostgreSQL database. Then, add a Node.js compute node and set the scaling limits for each server as required:
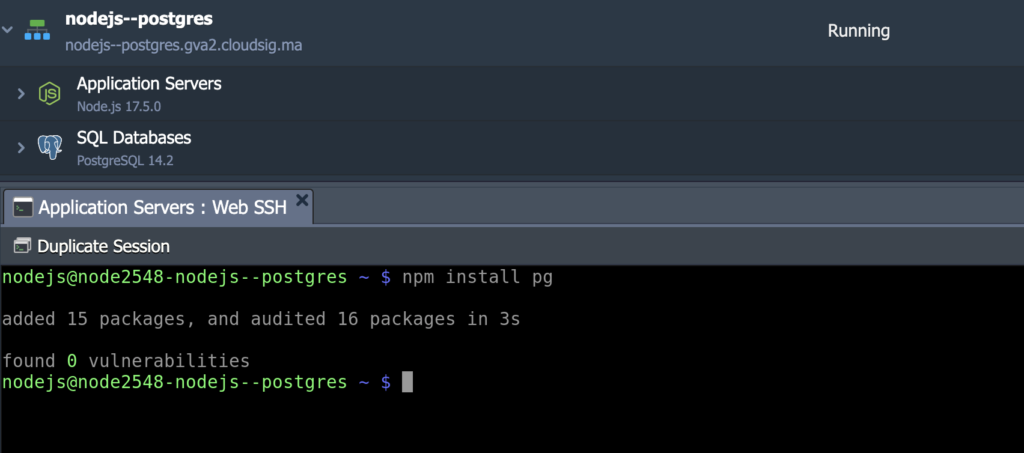
Step 2. Click on the Web SSH icon to access your Node.js server through SSH:
Step 3. Once you connect via the SSH client, install node-postgres. This is a group of Node.js modules that you need to interface with the PostgreSQL database. You can install the modules using this command:
|
1 |
npm install pg |
Wait for node-postgres to finish installation:
Step 4. Next, we need to make a Node.js script in order to verify the connection between the database and your application.
With node-postgres, you can have client as well as pool connections. Client connections are static connections while pools have a dynamic list of client objects which can reconnect automatically. In our example, we will be creating a pool connection so that we can accommodate multiple requests simultaneously.
To start off, make a file with a .js extension in any text editor. Paste the following code into the file to create a connection with the database and perform a query:
|
1 2 3 4 5 6 7 8 9 10 11 12 |
const { Pool } = require('pg') const pool = new Pool({ user: '{user}', host: '{host}', database: '{database}', password: '{password}', port: {port}, }) pool.query('SELECT NOW()', (err, res) => { console.log(err, res) pool.end() }) |
You will need to replace the placeholders in this code with your own connection data. Here are the parameters:
- {user}
The username you use to log into the database.
- {password}
The password for the above-mentioned user.
- {host}
The link to your PostgreSQL container.
- {database}
The database you want to access. In this case, the default database is PostgreSQL.
- {port}
The port number the database server listens to. The default port for PostgreSQL is 5432.
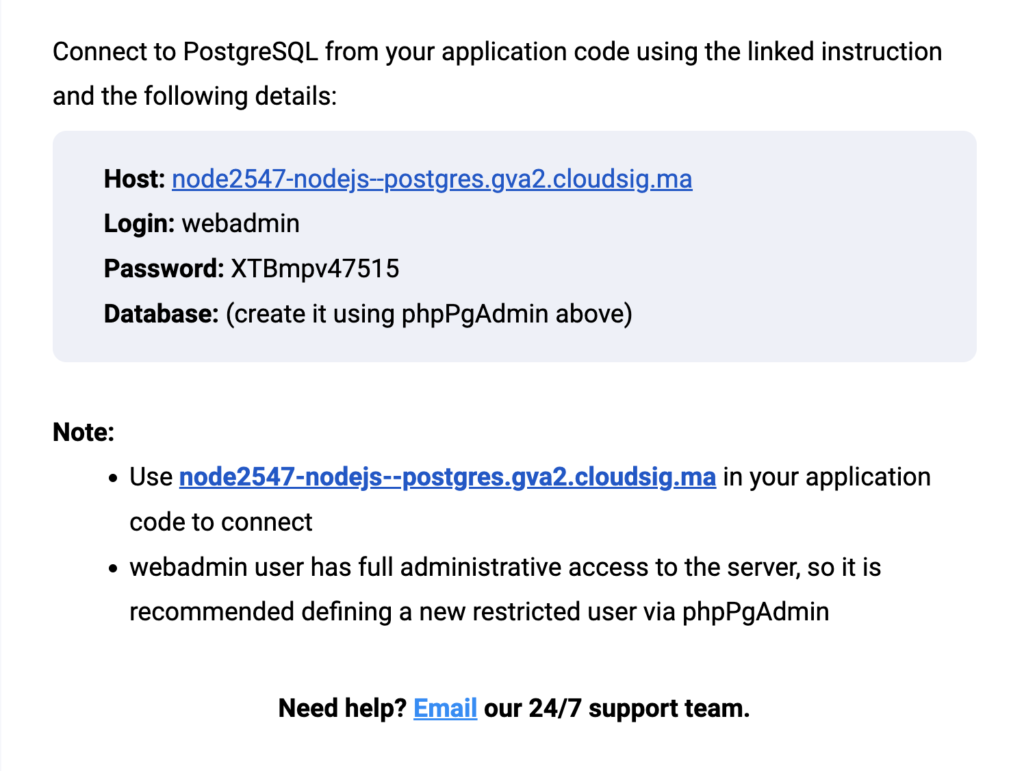
You will receive this connection information in an email after you install PostgreSQL. This is what your email should look like:
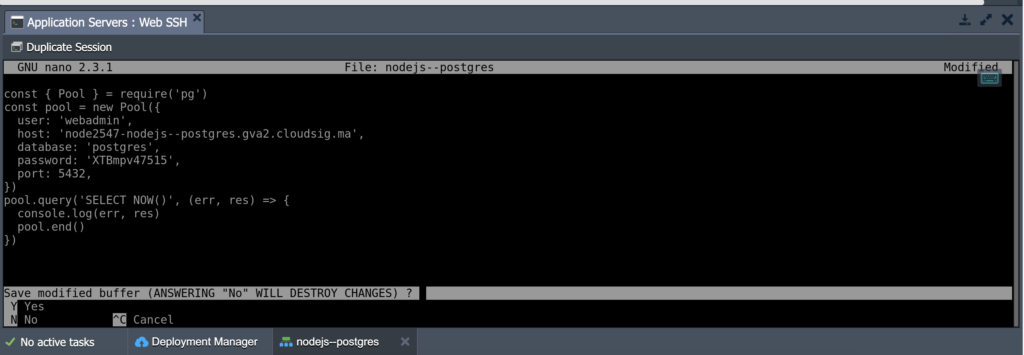
The script will look something like this:
Once you have entered the script, press Ctrl+X to save. Once the system prompts you to save the changes, press Ctrl+Y to save and proceed.
In the body of the script, the node-postgres can use the environment variables for the connection instead of your credentials. They are as follows:
- GUSER={user}
- PGHOST={host}
- PGPASSWORD={password}
- PGDATABASE={database}
- PGPORT={port}
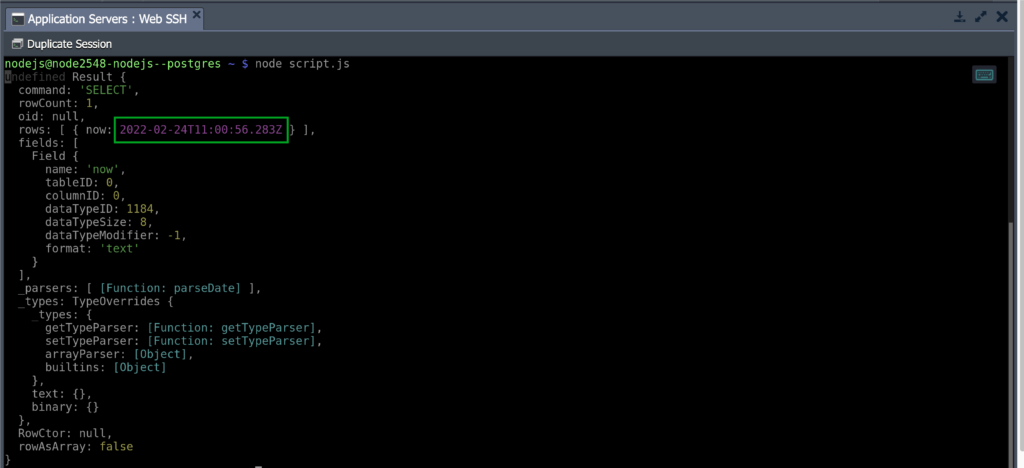
Step 5. You can use this script with a particular command to check the connection to the database from your application server. You can also request the current local time value from the database server node. Use this command to do so:
|
1 |
node script.js |
If the connection is successful, you will see a PostgreSQL server node time like this:
This means that the database container is accessible for your Node.js application!
Open-source solutions like PostgreSQL provide a lot of utility when it comes to app development and database management. Such solutions are also useful for replication and auto-clustering.
CloudSigma PaaS looks to make the process even simpler for Node.js-based applications. If you would like to learn more about what the CloudSigma PaaS can help you achieve, head over here. Give CloudSigma PaaS a try with our 7-day free trial or contact us if you want us to provide you with more details and a platform demo.
- 5 Tips to Achieve Optimal Cloud Computing Cost Efficiency - October 31, 2022
- CloudSigma Empowers Blockchain Infrastructure Provider with a Green, Reliable, and Cost-Efficient Cloud Platform - October 27, 2022
- Whitech Launches New Egypt Cloud Computing Offering, Powered by HPE and CloudSigma - October 17, 2022
- Key Aspects of Protecting your Data in the Cloud - September 20, 2022
- How to Configure MongoDB Replication and Automated Failover - September 19, 2022


