

Linux is a multi-user operating system. Having proper knowledge of user management is crucial to proper system administration. If you are configuring a fresh Linux server, adding and deleting various users is usually one of the first things you have to do. This guide outlines the steps of adding and deleting users on CentOS 8.
Prerequisites
Creating and deleting users on CentOS requires you to work with a user with higher privilege. In Linux, the root user has the highest privilege. However, it’s generally safer to perform such changes with a non-root user with sudo privilege. In any case, the system administrator should be the one managing the user accounts on the system.
User Management
1) Adding a user
First, have a look at how to create a new user. For demonstration, we will be using the username
random_user. The following command will create a new basic user
random_user:
|
1 |
sudo adduser random_user |
![]() Although the user is created, there’s no login credential configured. The next command will set a password to log in to the user:
Although the user is created, there’s no login credential configured. The next command will set a password to log in to the user:
|
1 |
sudo passwd random_user |
 The user is now ready to be accessed.
2) Deleting a user
If the user account is no longer necessary, then it’s safe to delete it from the system. Depending on whether the data from the target user’s home directory is to be retained, there are two ways of deleting the user. If you want to keep the user’s home directory data intact, then run the following command:
|
1 |
sudo userdel random_user |
 If the user’s home directory data isn’t needed, then we can delete it as well. Just add the
-r flag with the previous command:
If the user’s home directory data isn’t needed, then we can delete it as well. Just add the
-r flag with the previous command:
|
1 |
sudo userdel -r random_user |
 After running either of the commands, the user will automatically be removed from any group. If another user with the same name is added later, all the permissions and group assignments have to be re-done.
User Permission
1) Granting sudo privilege
By default, users can’t perform administrative tasks on CentOS. It’s gated only for the root and sudo-permitted users that can use the sudo command to run command(s) with administrative privilege. The default method of managing sudo permission is the wheel group. It’s a built-in user group that grants any user from this group access to the sudo command. It also reduces the necessity of adding each user manually to the sudoers file.
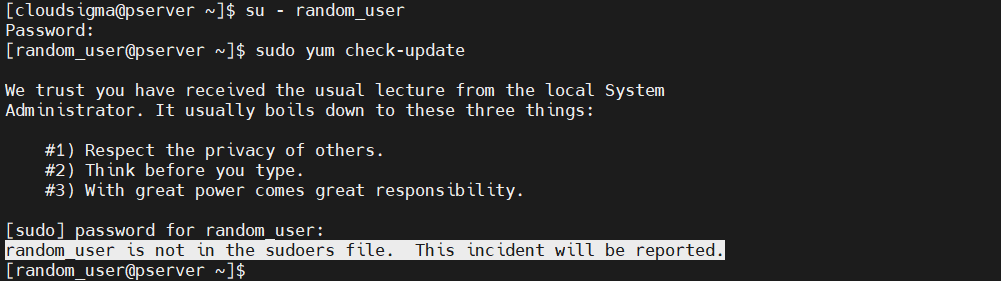
First, try running a
sudo command without having
sudo access as the new user:
|
1 |
su - random_user |
|
1 |
sudo yum check-update |
 If we want the new user to be able to run
sudo commands, add them to the
wheel group:
If we want the new user to be able to run
sudo commands, add them to the
wheel group:
|
1 |
sudo usermod -aG wheel random_user |
![]() Next, verify if the change was successful. Run the following command as the new user:
Next, verify if the change was successful. Run the following command as the new user:
|
1 |
su - random_user |
|
1 |
sudo yum check-update |
 2) Listing users in wheel
 2) Listing users in wheel
The
wheel group grants administrative privileges to its users. Having a look at the
wheel group will help to manage user permissions more effectively. First, we’ll be using the
getent tool. It’s a tool to get entries from supported administrative databases (including
group). The
group database contains the data about various user groups in the system. List the users in
wheel:
|
1 |
getent group wheel |
 Another way to list group users is using the
lid command. It’s a dedicated tool to print user or group info. To list the
wheel users, run the following command:
Another way to list group users is using the
lid command. It’s a dedicated tool to print user or group info. To list the
wheel users, run the following command:
|
1 |
sudo lid -g wheel |
 User Group
 User Group
In the previous section, we demonstrated how to add a user to the wheel group. In this section, we’ll have a look at various basic user group actions.
1) Adding a new group
Groups are effective to organize and administer user accounts. A particular group is generally defined by its set of privileges over various parts of the system, for example, reading, writing, and executing permissions. Managing user groups is only limited to root or user(s) with sudo privilege.
The following command will add a new group to the system:
|
1 |
sudo groupadd <group_name> |
![]() Each group in the system has a specific group ID, also known as
GID. To create a new group with a specific
GID, run the following command:
Each group in the system has a specific group ID, also known as
GID. To create a new group with a specific
GID, run the following command:
|
1 |
sudo groupadd -g <custom_GID> <group_name> |
![]() A system group is a special type of group that’s generally dedicated to special system operations. To create a new system group, run the following command:
A system group is a special type of group that’s generally dedicated to special system operations. To create a new system group, run the following command:
|
1 |
sudo groupadd -r <group_name> |
 2) Adding a user to a group
To add a user to an existing user group, use the following command structure:
|
1 |
sudo usermod -aG <group> <username> |
3) Listing users from a group
There are a couple of ways to list users from a group. The first method is using the
getent tool:
|
1 |
getent group <group> |
 The next method is using the
lid command:
The next method is using the
lid command:
|
1 |
sudo lid -g <group> |
 4) Removing a user from a group
 4) Removing a user from a group
If a user is no longer necessary, we can remove that user from the particular group. Generally, a user group is a way to manage various permissions across the system. In practical scenarios, this means that the user will lose certain permissions and privileges on the system. To remove a user from a specific user group, you need to run the following command:
|
1 |
sudo gpasswd -d <username> <group> |
 5) Removing a group
 5) Removing a group
Just like we created a group, we can also delete a group. If a group has no longer any purpose, then it’s safe to remove the group from the system. If the group serves as the primary group of a specific user, then the group can’t be deleted. So, before deletion, ensure that all the users in the group are properly removed.
To remove a group, run the following command:
|
1 |
sudo groupdel <group_name> |
 Final Thoughts
This guide demonstrates the basics of adding and deleting users on CentOS 8. It also demonstrates the basics of user group management. It’s simple yet important to get it right. You should have a good understanding of user management basics from the guide. Proper user management will grant users access to only the sections of the system to get their job done.
You can now move on to further configuring your CentOS server. Take a look at the following tutorials to help you:
- How To Install Linux, Apache, MySQL, PHP (LAMP) stack on CentOS 7
- How to Install MySQL on CentOS 7
- Installing Node.js on CentOS 8: a Complete Guide
Happy Computing!
- How to Deploy WordPress with Persistent Volume on Kubernetes Cluster - March 17, 2023
- Deploying Applications on Kubernetes Using Argo CD and GitOps - October 26, 2022
- Using Node.js Modules with npm and package.json: A Tutorial - October 6, 2022
- Using Ansible to Install and Configure WordPress with LAMP on Ubuntu - September 23, 2022
- Creating Views in the Django Web Application Framework - September 22, 2022