
Django is a well-known web framework that streamlines the process of creating robust, scalable, secure, and high-performance web apps. It’s an open-source project written in Python. You can check out more detailed information on Django here.
Any web app requires a database as the backend to manage data. Django supports various database engines as the backend, for example, MySQL, PostgreSQL, SQLite etc. PostgreSQL is a powerful, open-source object-relational database system. It’s famous for its reliability, scalability, security, and robust feature set. You can learn more about PostgreSQL here.
In this guide, we will showcase integrating PostgreSQL as the backend on a sample Django app.
Prerequisites
Working with Django requires certain system configurations.
- A properly-configured Ubuntu 21.04 server. Learn more about setting up an Ubuntu server.
- A Python development environment. Django is written in Python, so it requires the Python environment to run.
- PostgreSQL installed, as we’re going to use it as the database server for our Django app. Learn more about installing and configuring PostgreSQL on Ubuntu here.
This guide will also showcase how to use various Python modules and libraries that are necessary for a functional Django app.
Step 1. Installing the Necessary Components
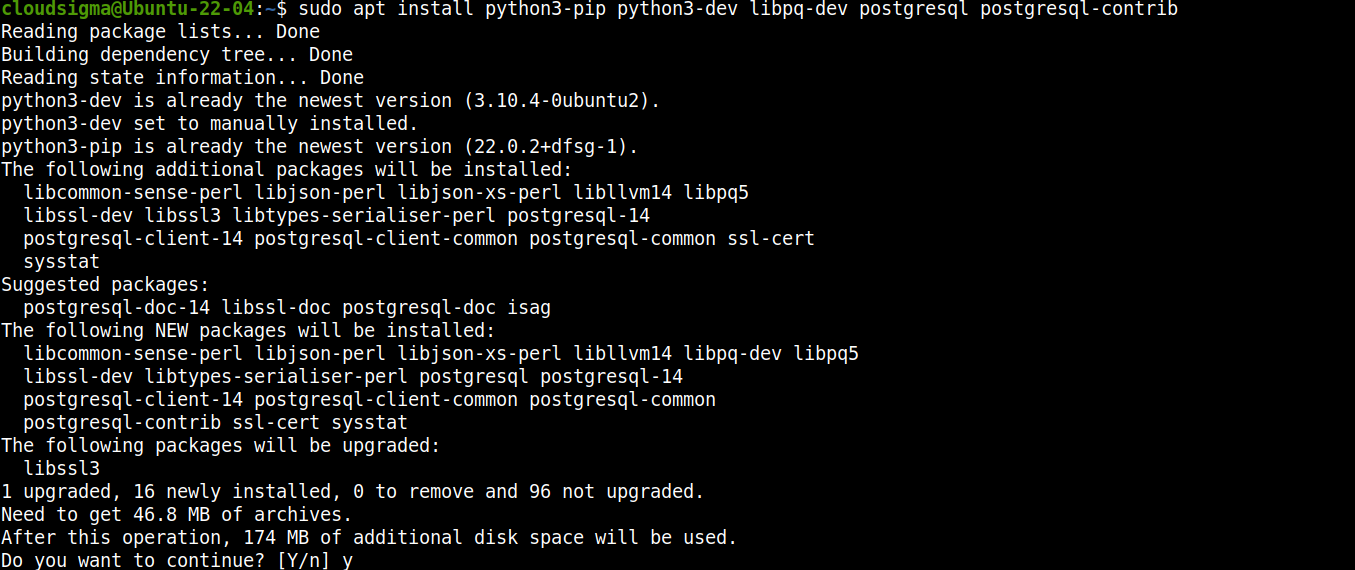
For our project to work, we need a bunch of important packages installed on our Ubuntu system. Thankfully, all of them are directly available from the official Ubuntu package repositories. These packages include Python components and database (PostgreSQL) components.
First, launch the terminal and update the APT package cache:
|
1 |
sudo apt update |

Next, install the packages:
|
1 |
sudo apt install python3-pip python3-dev libpq-dev postgresql postgresql-contrib |
Step 2. Preparing the Database
PostgreSQL is now installed and ready to use. Next, we are going to create a dedicated database and a user for our Django app. Having a dedicated user is beneficial for database and permission management.
During the installation, PostgreSQL creates a dedicated user postgres. It holds the permission to perform any administrative task on PostgreSQl. Access the postgres account:
|
1 |
sudo su – postgres |

You should land on a new shell session under the user postgres. Then, open a PostgreSQL shell:
|
1 |
psql |

We’ll now create a dedicated database for our Django app. It’s recommended to give it a matching name to the Django app:
|
1 |
CREATE DATABASE <database_name>; |

Next, we’ll create a dedicated database user. We’ll use this user to access the Django-dedicated database:
|
1 |
CREATE USER <username> WITH PASSWORD '<password>'; |

The next step is to tweak a couple of connection parameters for the new user. It helps speed up the database operations as it won’t require querying the values every time a connection is established. Run the following commands:
|
1 2 3 |
ALTER ROLE <username> SET client_encoding TO 'utf8'; ALTER ROLE <username> SET default_transaction_isolation TO 'read committed'; ALTER ROLE <username> SET timezone TO '<timezone>'; |

Let’s have a quick breakdown of these commands:
-
We’re setting the default encoding to UTF-8. It’s what Django expects when interacting with databases.
-
The default transaction scheme is set to “read committed,” so that reads from uncommitted transactions are blocked.
-
The time zone should be set according to the location.
If you’re not sure about the name of the time zone, the following command will list all the time zones supported by PostgreSQL:
|
1 |
SELECT * FROM pg_timezone_names; |

Finally, grant the new user full permission on the Django-dedicated database:
|
1 |
GRANT ALL PRIVILEGES ON DATABASE <database_name> TO <username>; |

Our work with PostgreSQL is now done. Exit the psql shell and log out of the postgres session.
Step 3. Installing Django
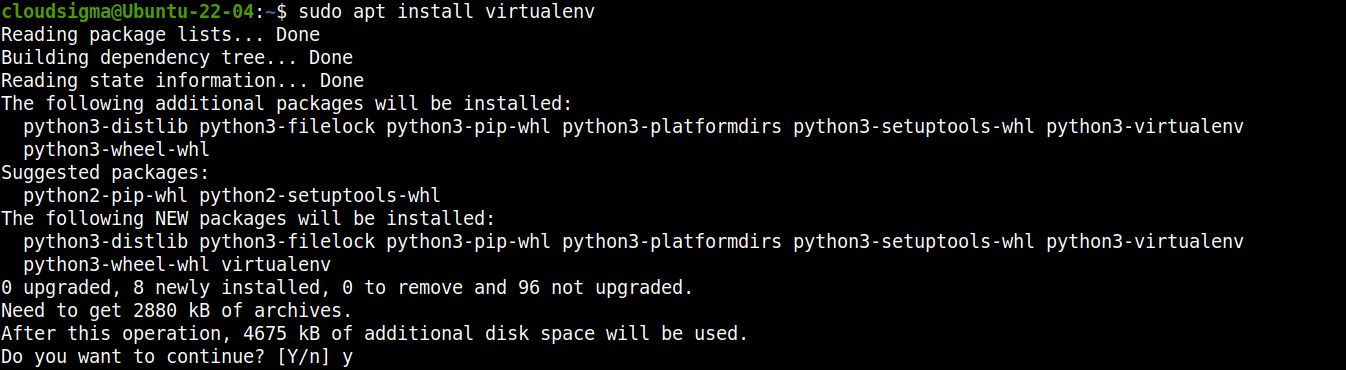
We have configured the necessary database server for our Django app. Now, we’ll install and configure the dedicated Django app. While Django is directly available from the official Ubuntu repo, we don’t recommend to use this method. It will install Django system-wide. For better flexibility and ease of management, we’ll install Django in a virtual environment instead. It’s a standard practice to install and configure Django within a virtual Python environment.
Python has a module virtualenv that creates a virtual Python environment in a target location. The environment gets its copy of Python binaries and configurations. Making changes within the virtual environment will have no impact on the rest of the system.
Install virtualenv:
|
1 |
sudo apt install virtualenv |
Next, our goal is to have a dedicated directory to establish the Python virtual environment. It will serve as the foundation for our Django app. For demonstration, our app name will be sample_app. Create a new directory:
|
1 |
mkdir -pv <dir_name> |

Change the current active directory and establish the virtual environment:
|
1 2 |
cd sample_app/ virtualenv sample_app_env |

After that, activate the virtual environment:
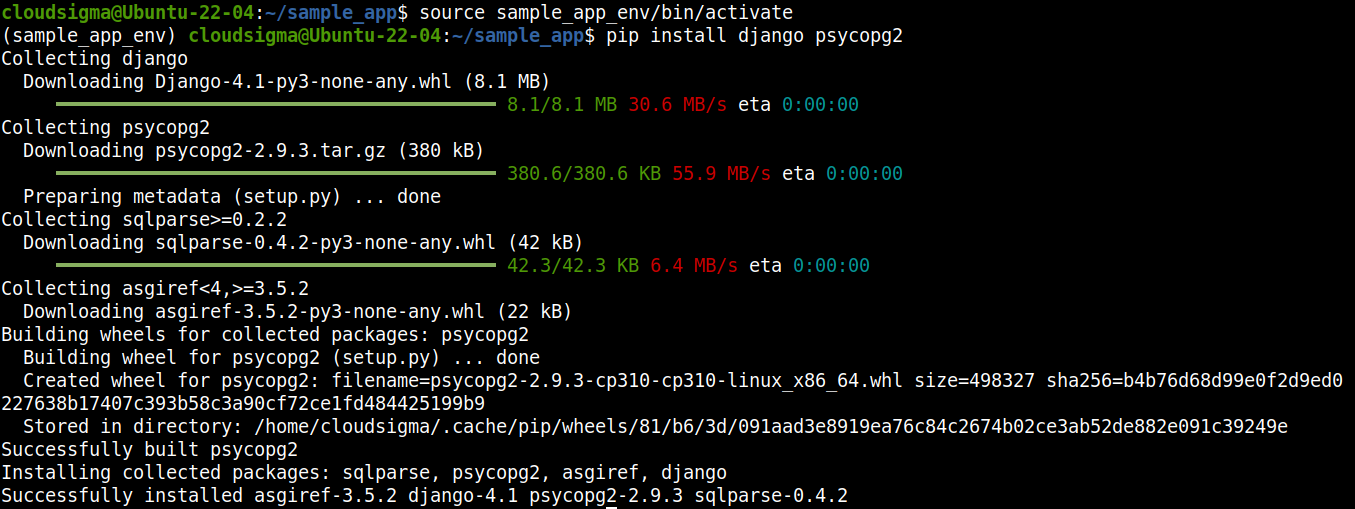
|
1 |
source sample_app_env/bin/activate |

The virtual environment is now ready and functional. Then, we’ll use pip to install Django and psycopg2 (a Python adapter for PostgreSQL):
|
1 |
pip install django psycopg2 |
Finally, we can create a new Django project using the Django tools. It will generate a child directory of the same name hosting all the codes and a management script in the current directory:
|
1 |
django-admin startproject <project_name> . |

Step 4. Configuring the Django Project
The Django project has all the barebones tools to function as a web app. To integrate it with our database, we’ll need to perform some tweaks in its configuration files.
Open the file settings.py in a text editor:
|
1 |
nano settings.py |
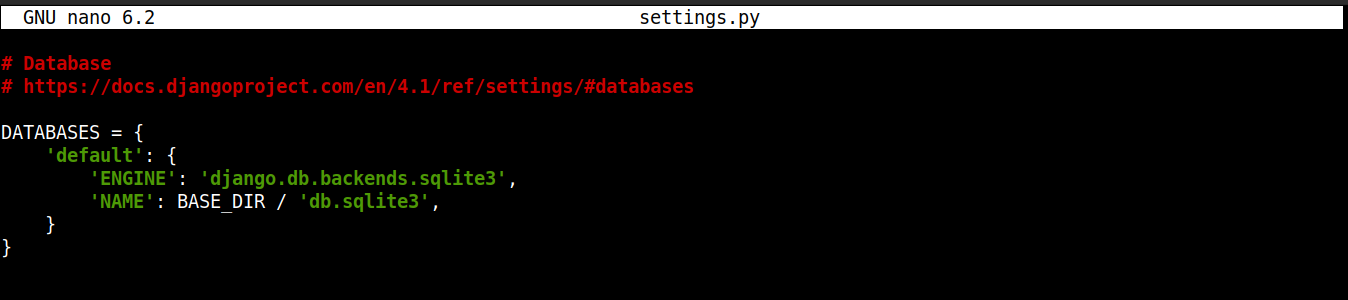
Scroll down to the DATABASES section. By default, it’s configured to use SQLite:
For our purpose, change the code as follows:
|
1 2 3 4 5 6 7 8 9 10 |
DATABASES = { 'default': { 'ENGINE': 'django.db.backends.postgresql_psycopg2', 'NAME': '<db_name>', 'USER': '<db_user>', 'PASSWORD': '<db_user_password>', 'HOST': 'localhost', 'PORT': '', } } |
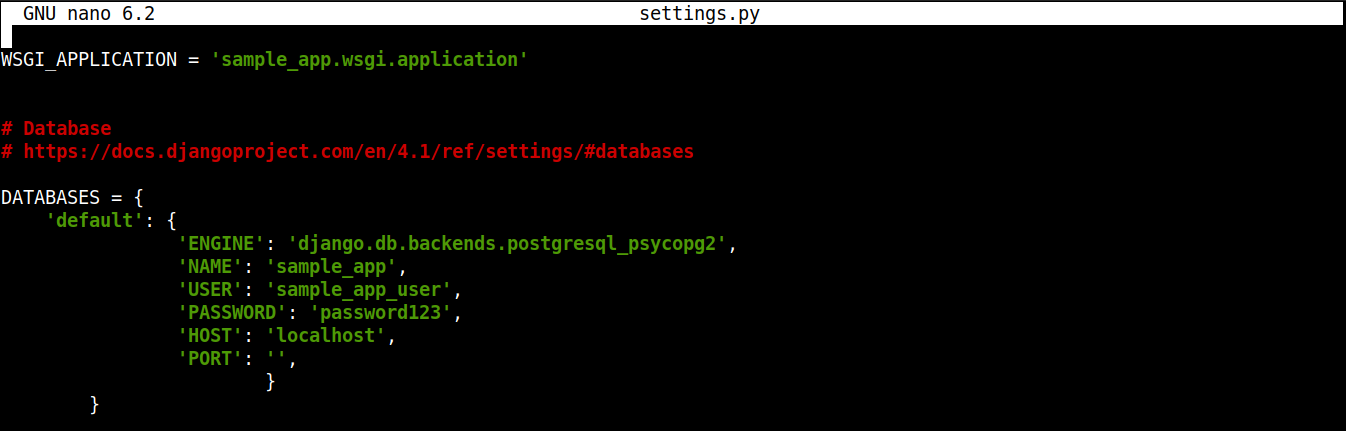
Here, we tell Django to use the psycopg2 adapter for database communication. We also declare all the necessary database info like the database name along with the username and password of the dedicated user.
Once finished, save the file and close the editor.
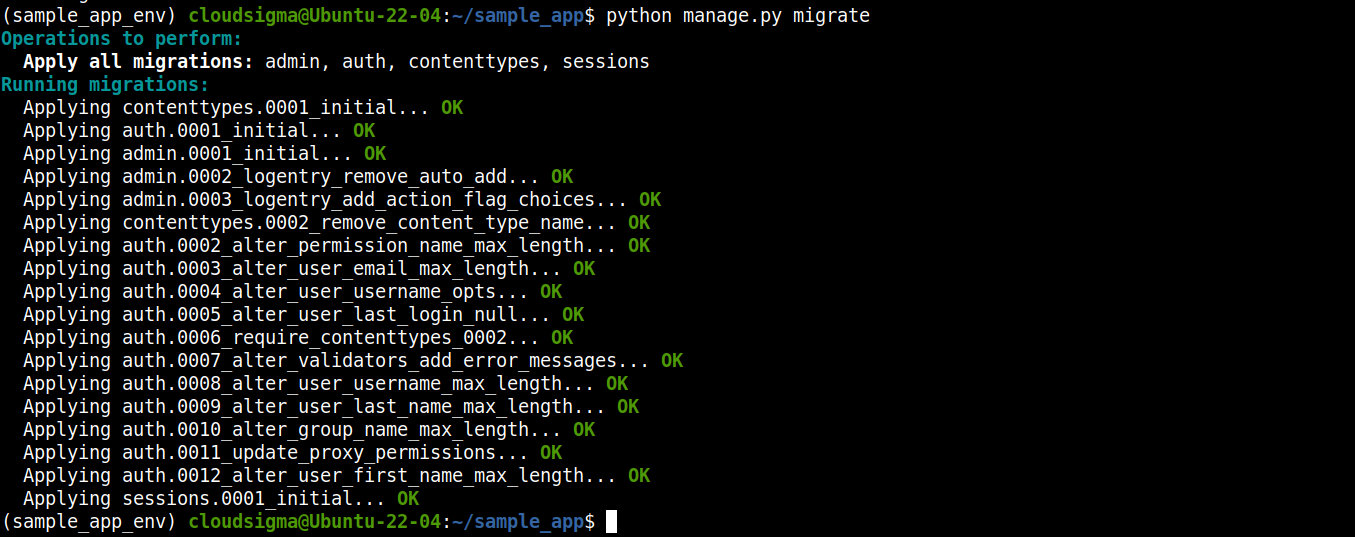
Step 5. Migrating the Database
Django is configured to access our PostgreSQL database. We can now migrate the data structure to our database. In Django, it’s known as migration.
To migrate the database changes, invoke the management script manage.py:
|
1 |
python manage.py makemigrations |

|
1 |
python manage.py migrate |
Next, create a superuser for our Django app:
|
1 |
python manage.py createsuperuser |

This superuser account will act as the admin account for our Django app.
Step 6. Testing the Changes
So far, we’ve made multiple tweaks to our Django app. Time to check if everything is working as intended. We’ll verify this by launching the app and accessing the admin panel.
As we’re locally developing the Django app, we’ll start the server on localhost. As a tradition, we’ll launch it on port 8000. If you have a firewall configured, then it needs to permit traffic to port 8000. Learn more about the basics of UFW here.
Launch the Django server:
|
1 |
python manage.py runserver localhost:8000 |

Access the URL on a browser:
|
1 |
http://localhost:8000 |
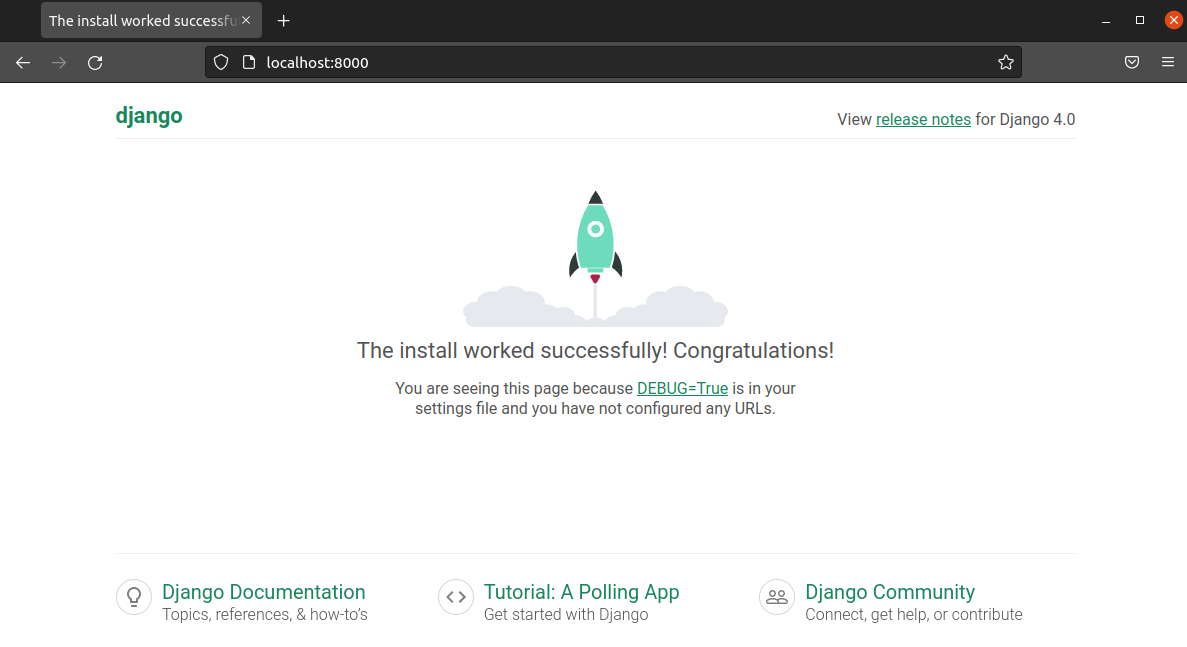
You should land on the Django installation success page. To access the Django admin page, go to the following URL:
|
1 |
http://localhost:8000/admin |
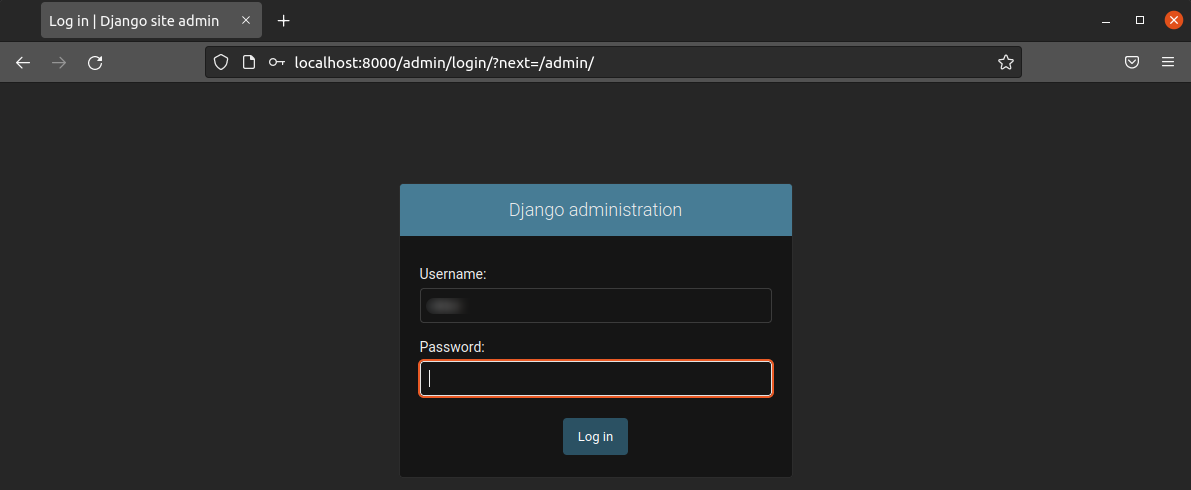
You need to use the superuser we created to log in:
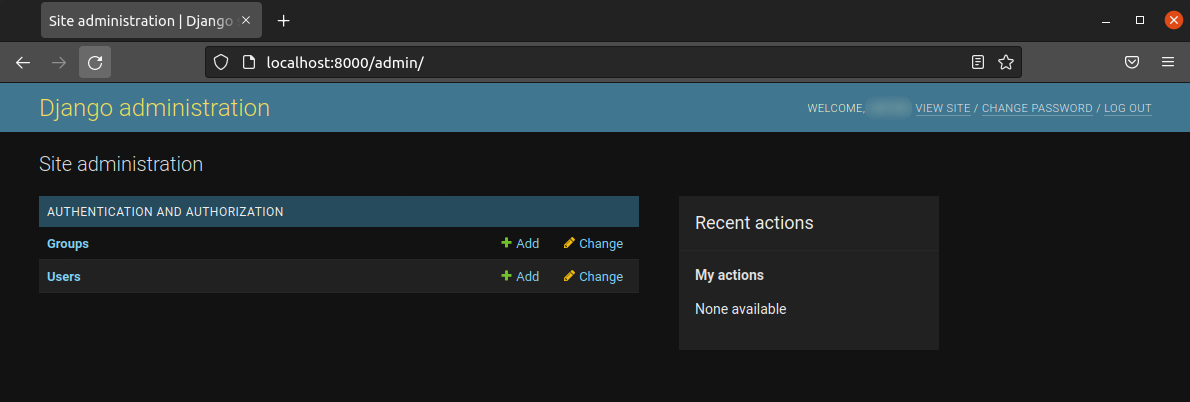
Voila! We’ve successfully landed on the admin panel!
Once you’ve finished exploring, press Ctrl + C from the console to stop the Django server.
Final Thoughts
In this guide, we’ve successfully demonstrated establishing a sample Django app and configuring PostgreSQL as its backend. While SQLite is generally more than enough to satisfy the needs during the development (and light production use), most projects will heavily benefit by switching to a more full-featured DBMS. PostgreSQL is a great option for performance and scalability.
Django is a versatile web framework that can work with numerous technologies. Take a look at more cloud guides that demonstrate using Django:
- Setting up Django with PostgreSQL, Nginx, and Gunicorn on Ubuntu 20.04
- Building a Django and Gunicorn Application with Docker on Ubuntu
- How To Secure and Scale a Django Application with Docker, Nginx, and Let’s Encrypt
- Creating a Django App with Database Connection: A Tutorial
Happy Computing!
- How To Enable, Create and Use the .htaccess File: A Tutorial - March 8, 2023
- An Overview of Queries in MySQL - October 28, 2022
- Introduction to Cookies: Understanding and Working with JavaScript Cookies - October 25, 2022
- An Overview of Data Types in Ruby - October 24, 2022
- The Architecture of Iptables and Netfilter - October 10, 2022