Iptables is the primary firewall that comes with most of the Linux distros by default. It’s responsible for handling network security. It works by comparing the data packets against a set of rules, instructing the system to accept, refuse, or forward a connection according to the rules. In this tutorial, we will show you how to list and delete rules, check and clear packet and byte counters, and flush chains. Ready? Let’s get started!
Prerequisites
Before jumping into the tutorial, let’s make something clear. All the tips and tricks demonstrated in this guide are performed on a separate virtual machine. It’s a good idea that you do that too as it eliminates any possibility of turning your system into an utter mess. Only after you’ve mastered these processes, you should try to implement them in real-life situations.
For this tutorial, we’ll be using Ubuntu for demonstrating all the steps. However, they should work in a similar fashion irrespective of the distro.
List rules
List rules by specification
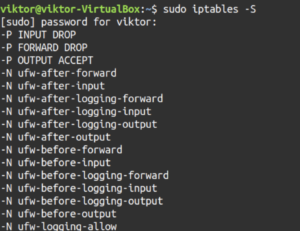
First, let’s check out all the active rules by the specification. Run the following command:
|
1 |
sudo iptables -S |
If you’ve worked with iptables rule creation before, you may have noticed the similarity. The outputs resemble the commands that were used to create them except the “iptables” part. They also share a similar structure to iptables rules configuration files.
List specific chain
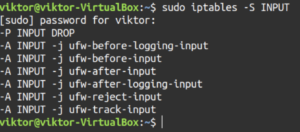
Let’s try something more precise. Instead of reporting all the iptables rules, tell iptables to report rules of a specific chain. For example, TCP, INPUT, OUTPUT, etc. To do so, specify the chain name after the “-S” flag:
|
1 |
sudo iptables -S <chain> |
List rules as tables
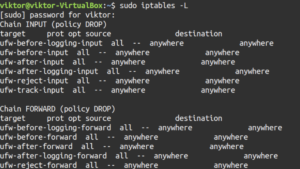
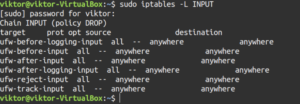
The table view is useful when comparing different rules. Use the “-L” flag to tell iptables to report all the active rules in a table format:
|
1 |
sudo iptables -L |
The output contains all the current rules sorted by the chain. Similar to the previous section, it’s also possible to filter the list output by a specific chain like INPUT, TCP, and OUTPUT, etc. To do so, specify the chain after the “-L” flag:
|
1 |
sudo iptables -L <chain> |
Let’s break down the output a little bit. In our case, because of the rules, the output will appear a bit messy. The first line of the output declares the chain name (INPUT) with its default policy (DROP). The next line specifies the headers of the table columns. The rest is the chain’s rules. Let’s have a look at what the headers indicate:
- target: If a packet matches against the rule, this section defines what action should be performed. It can be accepting the packet, dropping, logging, or sending it to another chain.
- prot: Defines the protocol, for example, udp, tcp, icmp, or all.
- opt: This column indicates IP options. It’s rarely used.
- source: Origin of the packet (IP address or subnet). Value can be specific or anywhere.
- destination: Destination of the packet (IP address or subnet). Value can be specific or anywhere.
If you’ve noticed, the last column isn’t labeled. That’s because it’s used to indicate the options of a rule. It will contain all the parts of the rule that didn’t fit in the previous fields. It may contain anything from the source/destination ports to the packet connection state, etc.
Packet counts and aggregate size
Clear package and byte counters
When we’re listing the iptables rules, we can also check the number of packets, and the aggregate size of the packets in bytes that matched against each particular rule. It’s a useful metric when you need to have a rough picture of which rules are being matched against packets.
In this example, we’ll be using the INPUT chain. This time, add the “-v” flag that stands for verbose mode:
|
1 |
sudo iptables -L INPUT -v |
You’ll notice that the table output now includes two additional fields: pkts and bytes.
Reset packet counts and aggregate size
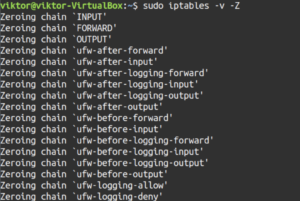
In some situations, you may want to reset the counters we demonstrated before. If the system is rebooted, the counters will clear automatically. You can also manually force a reset. We’ll be using the “-Z” flag to reset the packet counts and aggregate size:
|
1 |
sudo iptables -v -Z |
Note that this command will reset the counters of all the chains. Like other commands, it’s possible to reset the counter for specific chains. For example, the next command will reset the counters for the INPUT chain:
|
1 |
sudo iptables -v -Z <chain> |
It’s possible to make the counter reset action more precise. You can reset the counter for a specific rule under a specific chain. To do so, add the rule number under the chain name:
|
1 |
sudo iptables -v -Z <chain> <rule_number> |
Delete rules
Delete rules by specification
There are multiple ways to approach deleting iptables rules. The first method of deleting rules is by rule specification. For deletion, we’ll be using the “-D” flag followed by the rule specification:
|
1 |
sudo iptables -v -D INPUT -s 172.217.194.113 -j DROP |
If you’ve added any iptables rule before, you’ll notice the similarity. The only thing that changed here is the “-D” flag instead of the “-A” flag.
Delete rules by chain and number
Deleting rules by its specification requires a bit more effort, right? What if we could delete them without having to remember the rule specification? Let’s delete the rules by its chain and number! Compared to the first method (deleting by the specification), this one is relatively easier as you don’t have to have the entire specification in your hand.
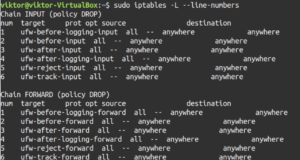
This method requires the chain and line number of the target rule. Where do we get the line number? Run the following command to determine that:
|
1 |
sudo iptables -L --line-numbers |
You’ll have a big output with all the rules and their line numbers. To narrow down the output, use the chain name after the “-L” flag:
|
1 |
sudo iptables -L <chain> --line-numbers |
In the output, you’ll notice the extra column num. It indicates the line number for each rule. Once we’ve determined the target number, perform the deletion:
|
1 |
sudo iptables -v -D <chain> <line_number> |
Flush chains
In the case of iptables, what is flushing a chain? It’s the process of deleting all the rules under a certain chain. If you need mass deleting rules, then you can use this method. Before performing chain flush, we strongly recommend that you make a backup of the existing rules using iptables-save. It’s a built-in iptables tool that will output all the current chains and rules. The output can be exported to a text file:
|
1 |
sudo iptables-save > ~/Desktop/iptables-backup.txt |
Flush a single chain
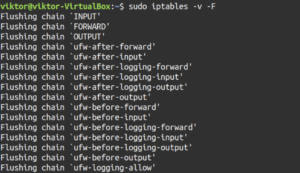
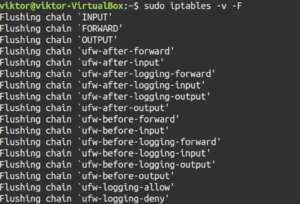
Let’s check out how to flush a chain. Use the “-F” flag followed by the target chain:
|
1 |
sudo iptables -v -F <chain> |
Flush all chains
Before flushing all the chains, make sure that you understand what you’re doing. This will delete all the rules for the iptables firewall. You should make sure to create an iptables rule backup beforehand.
Ready? Flush all the iptables chains by running the following command:
|
1 |
sudo iptables -v -F |
Flush rules, delete chains, and accept all
Performing the steps described under this section will effectively disable the firewall, allowing unrestricted network traffic. Similar to the prior section, we recommend having an iptables backup before proceeding. First, we’ll be changing the default policy of each of the built-in chains to ACCEPT. This is to ensure that iptables doesn’t lock you out of your server via SSH:
|
1 |
sudo iptables -v -P INPUT ACCEPT && sudo iptables -v -P FORWARD ACCEPT && sudo iptables -v -P OUTPUT ACCEPT |
Now, flush nat and mangle tables:
|
1 2 |
sudo iptables -v -t nat -F sudo iptables -v -t mangle -F |
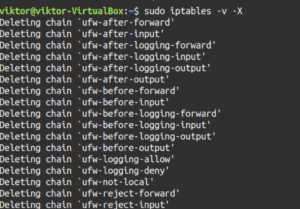
Flush all the chains and delete all the non-default chains:
|
1 2 |
sudo iptables -v -F sudo iptables -v -X |
Next, let’s check out the result:
|
1 |
sudo iptables -L --line-numbers |
Final thoughts
Iptables is a powerful firewall. Hopefully, this guide was useful in teaching you how to list and delete iptables firewall rules. And don’t forget to practice them before you apply them in the real world.
Happy Computing!
- Removing Spaces in Python - March 24, 2023
- Is Kubernetes Right for Me? Choosing the Best Deployment Platform for your Business - March 10, 2023
- Cloud Provider of tomorrow - March 6, 2023
- SOLID: The First 5 Principles of Object-Oriented Design? - March 3, 2023
- Setting Up CSS and HTML for Your Website: A Tutorial - October 28, 2022


