WordPress is one of the most popular content management systems used to deploy blogs and websites on the internet. It is also available as a Docker image on the DockerHub registry. You can use this Docker image to build a reliable and scalable website platform on the Kubernetes cluster. Deploying WordPress on Kubernetes will help you to implement CI/CD pipeline and reduces the time it takes to release new updates. You can also enable horizontal scaling of the WordPress website to handle website traffic surges.
This guide will show you how to deploy WordPress and MySQL with a Persistent Volume on the Kubernetes cluster.
Prerequisites
- A basic understanding of Kubernetes (k8s) and its objects. Refer to this guide for a detailed overview of the Kubernetes ecosystem.
- A Kubernetes cluster is up and running. Follow this tutorial to install the Kubernetes cluster on Ubuntu 20.04.
Verify Kubernetes Cluster
Before starting, it is recommended to verify the status of the Kubernetes cluster. You can use the kubectl command to verify the Kubernetes.
|
1 |
kubectl get nodes |
If everything is fine, you should get the following output.
Create a Secret for MySQL
A Secret is an object that allows you to store sensitive data like a password or key. In this post, we will use Secret to store the MySQL password.
First, create a base64 encoded password using the following command.
|
1 |
echo -n 'your_secure_password' | base64 |
You will get your secret password in the following output.
|
1 |
eW91cl9zZWN1cmVfcGFzc3dvcmQ= |
Next, create a
secret.yaml file for MySQL and WordPress.
|
1 |
nano secret.yaml |
Add the following configuration.
|
1 2 3 4 5 6 7 |
apiVersion: v1 kind: Secret metadata: name: mysql-pass type: Opaque data: password: eW91cl9zZWN1cmVfcGFzc3dvcmQ= |
Save and close the file. Then, apply the above configuration to the Kubernetes cluster using the following command.
|
1 |
kubectl apply -f secret.yaml |
You will get the following output.
|
1 |
secret/mysql-pass created |
Create a PersistentVolume for MySQL and WordPress
You will also need to create a PersistentVolume to store MySQL and WordPress data.
Let’s create a
pvc-mysql-wp.yaml file.
|
1 |
nano pvc-mysql-wp.yaml |
Add the following configurations.
|
1 2 3 4 5 6 7 8 9 10 11 12 13 14 15 16 17 18 19 20 21 22 23 24 25 |
apiVersion: v1 kind: PersistentVolumeClaim metadata: name: mysql-pv-claim labels: app: wordpress spec: accessModes: - ReadWriteOnce resources: requests: storage: 40Gi --- apiVersion: v1 kind: PersistentVolumeClaim metadata: name: wp-pv-claim labels: app: wordpress spec: accessModes: - ReadWriteOnce resources: requests: storage: 40Gi |
Save and close the file when you are done.
Next, create PersistentVolumes for both MySQL and WordPress on the Kubernetes cluster using the following command.
|
1 |
kubectl apply -f pvc-mysql-wp.yaml |
You should see both PersistentVolumes in the following output.
|
1 2 |
persistentvolumeclaim/mysql-pv-claim created persistentvolumeclaim/wp-pv-claim created |
You can now verify both PersistentVolumes using the following command.
|
1 |
kubectl get pv |
You should see the following output.
|
1 2 3 |
NAME CAPACITY ACCESS MODES RECLAIM POLICY STATUS CLAIM STORAGECLASS REASON AGE pvc-873a458352594103 40Gi RWO Delete Bound default/wp-pv-claim your-block-storage 3s pvc-de7d7de5e53a40e8 40Gi RWO Delete Bound default/mysql-pv-claim your-block-storage 3s |
Create MySQL Deployment
Next, create a MySQL deployment configuration file to download the MySQL docker image, create a container and mount the PersistentVolume at
/var/lib/mysql.
|
1 |
nano mysql-deployment.yaml |
Add the following configuration.
|
1 2 3 4 5 6 7 8 9 10 11 12 13 14 15 16 17 18 19 20 21 22 23 24 25 26 27 28 29 30 31 32 33 34 35 36 37 38 39 40 41 42 43 44 45 46 47 48 49 50 51 52 |
apiVersion: v1 kind: Service metadata: name: wordpress-mysql labels: app: wordpress spec: ports: - port: 3306 selector: app: wordpress tier: mysql clusterIP: None --- apiVersion: apps/v1 kind: Deployment metadata: name: wordpress-mysql labels: app: wordpress spec: selector: matchLabels: app: wordpress tier: mysql strategy: type: Recreate template: metadata: labels: app: wordpress tier: mysql spec: containers: - image: mysql:5.6 name: mysql env: - name: MYSQL_ROOT_PASSWORD valueFrom: secretKeyRef: name: mysql-pass key: password ports: - containerPort: 3306 name: mysql volumeMounts: - name: mysql-persistent-storage mountPath: /var/lib/mysql volumes: - name: mysql-persistent-storage persistentVolumeClaim: claimName: mysql-pv-claim |
Save and close the file when you are done. Then, deploy the above configuration to the Kubernetes cluster.
|
1 |
kubectl apply -f mysql-deployment.yaml |
You should see the following output.
You can verify the MySQL deployment using the following command.
|
1 |
kubectl get deployments |
You should see the status of the MySQL deployment in the following output.
Create WordPress Deployment
Now, create a WordPress deployment configuration file to download the WordPress image, create a container, and mounts the PersistentVolume at
/var/www/html for website data files. This file will also creates the
WORDPRESS_DB_HOST and
WORDPRESS_DB_PASSWORD environment variables to access the database.
|
1 |
nano wordpress-deployment.yaml |
Add the following configuration.
|
1 2 3 4 5 6 7 8 9 10 11 12 13 14 15 16 17 18 19 20 21 22 23 24 25 26 27 28 29 30 31 32 33 34 35 36 37 38 39 40 41 42 43 44 45 46 47 48 49 50 51 52 53 54 |
apiVersion: v1 kind: Service metadata: name: wordpress labels: app: wordpress spec: ports: - port: 80 selector: app: wordpress tier: frontend type: LoadBalancer --- apiVersion: apps/v1 # for versions before 1.9.0 use apps/v1beta2 kind: Deployment metadata: name: wordpress labels: app: wordpress spec: selector: matchLabels: app: wordpress tier: frontend strategy: type: Recreate template: metadata: labels: app: wordpress tier: frontend spec: containers: - image: wordpress:4.8-apache name: wordpress env: - name: WORDPRESS_DB_HOST value: wordpress-mysql - name: WORDPRESS_DB_PASSWORD valueFrom: secretKeyRef: name: mysql-pass key: password ports: - containerPort: 80 name: wordpress volumeMounts: - name: wordpress-persistent-storage mountPath: /var/www/html volumes: - name: wordpress-persistent-storage persistentVolumeClaim: claimName: wp-pv-claim |
Save the file after you finish. Then, apply the above configuration to the Kubernetes cluster using the following command.
|
1 |
kubectl apply -f wordpress-deployment.yaml |
You should see a successful deployment message in the following output.
|
1 2 |
service/wordpress created deployment.apps/wordpress created |
To verify the WordPress deployment, run the following command.
|
1 |
kubectl get deployments |
You should see the status of the WordPress deployment in the following output.
Access WordPress Web UI
To access the WordPress dashboard, you will need the external IP and port number of the LoadBalancer. You can retrieve this information using the following command.
|
1 |
kubectl get svc |
You will get the LoadBalancer IP and Port in the following output.
|
1 2 3 4 |
NAME TYPE CLUSTER-IP EXTERNAL-IP PORT(S) AGE kubernetes ClusterIP 10.96.0.1 <none> 443/TCP 29m wordpress LoadBalancer 10.100.80.70 78.141.194.181 80:31624/TCP 3m6s wordpress-mysql ClusterIP None <none> 3306/TCP 4m14s |
To get detailed information about your WordPress pods, run the following command.
|
1 |
kubectl describe svc wordpress |
You should get detailed information of WordPress in the following output.
|
1 2 3 4 5 6 7 8 9 10 11 12 13 14 15 16 17 |
Name: wordpress Namespace: default Labels: app=wordpress Annotations: <none> Selector: app=wordpress,tier=frontend Type: LoadBalancer IP Family Policy: SingleStack IP Families: IPv4 IP: 10.100.80.70 IPs: 10.100.80.70 LoadBalancer Ingress: 78.141.194.181 Port: <unset> 80/TCP TargetPort: 80/TCP NodePort: <unset> 31624/TCP Endpoints: 10.244.23.66:80 Session Affinity: None External Traffic Policy: Cluster |
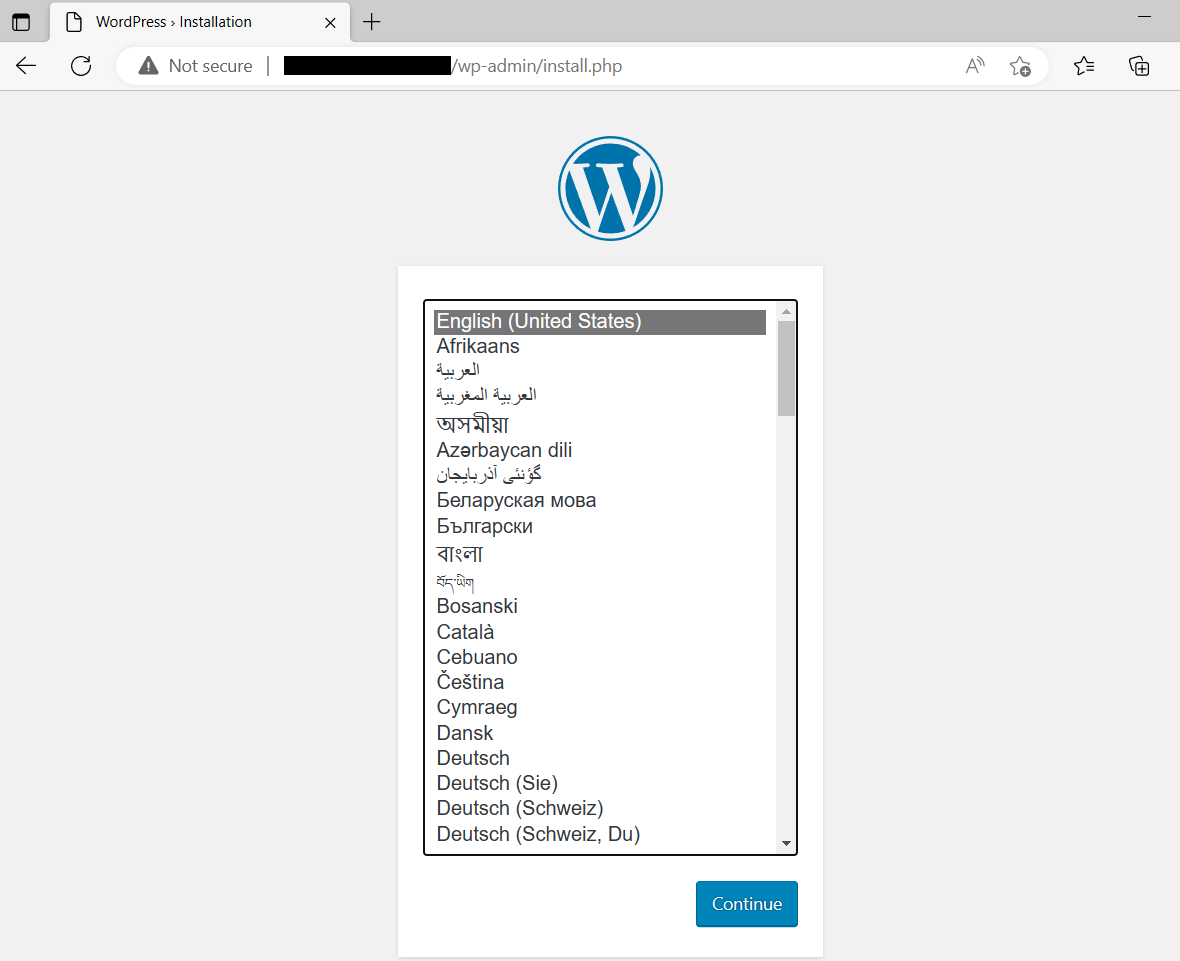
Now, open your web browser and access the WordPress installation page using the URL http://78.141.194.181:3162. You should see the WordPress installation page on the following screen.
Select your language and complete the required steps to finish the installation process.
Conclusion
In this post, we explained how to deploy MySQL and WordPress with the persistent volume on the Kubernetes cluster. You can also scale your WordPress deployment based on your website traffic. You can now use the above deployment depending on your development needs.
Furthermore, take a look at our other tutorials focusing on Docker and Kubernetes that you can find on our blog:
- Deploying Applications on Kubernetes Using Argo CD and GitOps
- Exploring CloudSigma PaaS: How to Access Kubernetes Application via Public IP
- Kubernetes DNS Service: A Beginner’s Guide
- Installing Jenkins on Kubernetes
- How to Deploy WordPress with Persistent Volume on Kubernetes Cluster - March 17, 2023
- Deploying Applications on Kubernetes Using Argo CD and GitOps - October 26, 2022
- Using Node.js Modules with npm and package.json: A Tutorial - October 6, 2022
- Using Ansible to Install and Configure WordPress with LAMP on Ubuntu - September 23, 2022
- Creating Views in the Django Web Application Framework - September 22, 2022


