

Web scraping, web crawling, web harvesting, or web data extraction are synonyms referring to the act of mining data from web pages across the Internet. Web scrapers or web crawlers are tools that go over web pages programmatically extracting the required data. These data, which is usually large sets of text can be used for analytical purposes, to understand products, or to satisfy one’s curiosity about a certain web page.
If you are wondering how you can go about web crawling, we will be showing you the basics of web scraping through a simple data set. You should be able to follow along with the tutorial regardless of your level of programming expertise. For the practical example, we will be using our CloudSigma blog. We will try to get information about the tutorials on our blog page. By the time you are reading this tutorial’s conclusion, you will be having a functioning web scraper made with Python 3 that crawls several pages on our blog section, then displays the data on your screen.
Using the knowledge from creating this basic web scraper, you can expand on it and create your own web scrapers. This should be fun, let’s begin!
Prerequisites
This is a hands-on tutorial, so you should have a local development environment for Python 3 to follow along well. First, you can refer to our tutorial on how to install Python 3 and set up a local programming environment on Ubuntu.
Scrapy
Web scraping involves two steps: the first step is finding and downloading web pages, the second step is crawling through and extracting information from those web pages.
There are a number of ways and libraries that can be used to build a web scraper from scratch in many programming languages. However, this may bring issues in the future when your web scraper becomes complex, or when you need to crawl multiple pages with different settings and patterns at a time. It may be quite a heavy task figuring out how to transform your scraped data between different formats such as CSV, XML, or JSON.
While some may appreciate the challenge of building their own web scraper from scratch, it’s better if you do not reinvent the wheel and rather build it on top of an existing library that handles all those issues. We will be using Scrapy, a Python library, together with Python 3 to implement the web scraper in this tutorial. Scrapy is an open-source tool and one of the most popular and powerful Python web scraping libraries. Scrapy was built to handle some of the common functionalities that all scrapers should have. This way you don’t have to reinvent the wheel whenever you want to implement a web crawler. With Scrapy, the process of building a scraper becomes easy and fun.
Scrapy is available from PyPi, commonly known as pip – the Python Package Index. PyPi is a community-owned repository that hosts most Python packages. When you install and set up Python 3 on your local development environment, it installs pip too, which you can use to install Python packages.
Step 1: How to Build a Simple Web Scraper
First, to install Scrapy, run the following command:
|
1 |
pip install scrapy |
Optionally, you may follow the Scrapy official installation instructions from the documentation page. If you have successfully installed Scrapy, create a folder for the project using a name of your choice:
|
1 |
mkdir cloudsigma-crawler |
Navigate into the folder and create the main file for the code. This file will hold all the code for this tutorial:
|
1 |
touch main.py |
If you wish, you can create the file using your text editor or IDE instead of the above command.
Next, open the file, and let’s start by creating a basic scraper that uses Scrapy. We will create a Python class that extends scrapy.Spider, a basic spider class from Scrapy. These class will have two required attributes as defined below:
- name — a string name to identify the spider (you may enter a name of choice).
- start_urls — an array containing a list of URLs to crawl from. We will start with one URL.
Add the following code snippet in the opened file to create the basic spider:
|
1 2 3 4 5 |
import scrapy class CloudSigmaCrawler(scrapy.Spider): name = "cloudsigma_crawler" start_urls = ['https://blog.cloudsigma.com/blog'] |
Below is an explanation of each line of code:
The first line imports Scrapy, allowing us to use the various classes that the package provides.
In the next line, we extend the Spider class provided by Scrapy and create a subclass called CloudSigmaCrawler. By extending a Class(Spider), we get access to the Class’ properties which we can now use in our code. In this case, the Spider class has methods and behaviors that define how to follow URLs and extract data from web pages. However, it doesn’t know which URLs to follow or what data to extract. By extending it, we can provide the required information to the methods. To understand more on subclassing and extending, read on Object-Oriented programming principles.
In our CloudSigmaCrawler, we define the required attributes. First, we name our spider cloudsigma_crawler. Then, we provide a single URL to start from: https://blog.cloudsigma.com/blog/. Opening this URL will take you to the CloudSigma blog page 1 that contains some of the many tutorials.
Time to test the scraper. You have a few options. If you are using an IDE, for example, the PyCharm community edition from JetBrains, it probably comes with a button that you can just click to run the script. Another option is following the typical way of running Python files from the command line: python path/to/file.py, or py path/to/file.py. Another option is Scrapy’s command-line interface. Scrapy comes with its own command-line interface to help in starting a scraper. Enter the following command to start the scraper:
|
1 |
scrapy runspider main.py |
Depending on the library version of Scrapy that you installed, you should see an output that is something like the following:
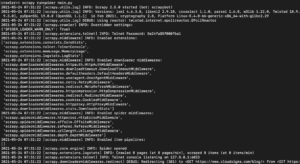
As you can see, the output is quite long so we just picked some parts. Here is what happened when you executed the command:
- The scraper was initialized. Hence, it loaded additional components and extensions it needs to use in following and reading data from URLs.
- By using the URL provided in the start_urls list, it grabbed the HTML from the page. This is a similar process that the browser follows when opening web pages.
- After grabbing the HTML, it’s passed to the parse method which we haven’t defined yet. For now it doesn’t do anything, hence the spider just exits without doing any processing. We will define the behavior of the parse method in the next step.
Step 2: How to Extract Data from a Page
In step 1, we only implemented a basic scraper that grabs an HTML page but does nothing after. In this section, we will provide instructions for extracting data. On the CloudSigma Blog page, we want to extract data from, there are some things you can notice such as:
- The header, present on all pages.
- The navigation menu and search filter box.
- The actual list of the tutorials in a grid format.
Viewing the source code of the HTML page you intend to scrap gives you a general idea of the structure of the page. This helps you in writing a scraper. You can view the source code by right-clicking on the page and selecting View Source Code, or pressing Ctrl + U. Here is a snippet of the source code:
|
1 2 3 4 5 6 7 8 9 10 11 12 13 14 15 16 17 18 19 20 21 22 23 24 25 26 |
<body> <div id="x-iso-container" class="x-iso-container x-iso-container-posts cols-3"> <article id="post-51691" class="post-51691 post type-post status-publish format-standard has-post-thumbnail hentry category-blog-posts category-tutorials tag-apache tag-certbot tag-cloud-guide tag-cloud-tutorial tag-https tag-lets-encrypt tag-ssl tag-ssl-certification tag-tutorial tag-ubuntu"> <div class="entry-wrap"> <header class="entry-header"> <h2 class="entry-title"> <a href="https://blog.cloudsigma.com/securing-apache-with-lets-encrypt-on-ubuntu-18-04/" title="Permalink to: "Securing Apache with Let’s Encrypt on Ubuntu 18.04"">Securing Apache with Let’s Encrypt on Ubuntu 18.04</a> </h2> </header> <div class="entry-content excerpt"> <p>Website and data security are topics that cannot be taken lightly. Highly sensitive information which includes financial records and customers’ private information is always in transit between the user’s computer and your website. When you consider this fact, it’s not hard to see why unsecured websites could result in a breach that could seriously damage your business. There are a … </p> <div><a href="https://blog.cloudsigma.com/securing-apache-with-lets-encrypt-on-ubuntu-18-04/" class="more-link">Read More</a></div> </div> </div> ... </article> </div> </body> |
As you can see each blog tutorial is enclosed within an HTML tag called <article>. Scraping the page will involve two steps. The first step will be grabbing each blog tutorial by looking at the parts of the page containing the data we want. The next step is to pull the data we want from each tutorial identified by the HTML tag.
Scrapy identifies the data to grab based on the selectors you provide. We can use selectors to find one or more elements on a page and get the data within the elements. Scrapy has support for XPath and CSS selectors.
From the source we viewed earlier, CSS selectors seem to be easier. Hence, this will be the option we will go with as it will help us find all the tutorials on the page. From the HTML source code, each tutorial is specified within the CSS class called post. CSS class names are usually identified with .class_name (dot class_name). Thus, we will use .post for our CSS selector. Inside our main.py scraper source code, we will pass the .post class to the response object, so that your file will now look this:
|
1 2 3 4 5 6 7 8 9 10 |
import scrapy class CloudSigmaCrawler(scrapy.Spider): name = "cloudsigma_crawler" start_urls = ['https://blog.cloudsigma.com/blog'] def parse(self, response): SET_SELECTOR = '.post' for tutorial in response.css(SET_SELECTOR): pass |
This code snippet will grab all tutorials on the page with the specified start_urls, and loop through the tutorials to extract data. In the next step you will want to extract and display this data. If you examine the source code of the CloudSigma blog again, you will see that the title of each tutorial is stored within a <a> tag that is within a <h2> tag, for example:
|
1 2 3 4 5 |
<h2 class="entry-title"> <a href="https://blog.cloudsigma.com/securing-apache-with-lets-encrypt-on-ubuntu-18-04/" title="Permalink to: "Securing Apache with Let’s Encrypt on Ubuntu 18.04"">Securing Apache with Let’s Encrypt on Ubuntu 18.04</a> </h2> |
Each tutorial object we are looping over contains a CSS method that we can pass in a selector to locate and extract child elements. For this example, we want to extract the title which is enclosed inside the <a> tag. This tag is inside the <h2> tag inside the .entry-header class inside the .entry-wrap class. We can pass these CSS selectors to the object method to extract the title, modify the code to look like this:
|
1 2 3 4 5 6 7 8 9 10 11 12 13 |
import scrapy class CloudSigmaCrawler(scrapy.Spider): name = "cloudsigma_crawler" start_urls = ['https://blog.cloudsigma.com/blog'] def parse(self, response): SET_SELECTOR = '.post' for tutorial in response.css(SET_SELECTOR): NAME_SELECTOR = '.entry-wrap .entry-header > h2 > a ::text' yield { 'title': tutorial.css(NAME_SELECTOR).extract_first(), } |
The trailing comma after extract_first() is not a typo as we will be adding more code below the section.
Some points to note from the source code above include:
- ::text appended to the selector – this is a CSS pseudo-selector that instructs the code to fetch the text inside the tag and not the tag itself.
- extract_first() method call within the object – instructs the code to only pick the first element that matches the selector. Hence, we get a string rather than a list of elements.
Next, save the file and run the code by entering the following command in your terminal:
|
1 |
scrapy runspider main.py |
In the output, you should see the titles of the tutorials:
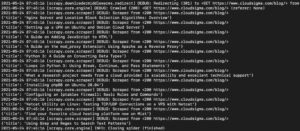
We can keep expanding on this by adding more selectors to get other details about a tutorial, such as the tutorial’s URL, featured image, and caption.
Let’s examine the HTML code for a single tutorial again:
|
1 2 3 4 5 6 7 8 9 10 11 12 13 14 15 16 17 18 19 20 21 22 23 24 25 26 27 28 29 30 31 32 33 34 35 36 37 38 39 40 41 |
<body> <div id="x-iso-container" class="x-iso-container x-iso-container-posts cols-3"> <article id="post-51691" class="post-51691 post type-post status-publish format-standard has-post-thumbnail hentry category-blog-posts category-tutorials tag-apache tag-certbot tag-cloud-guide tag-cloud-tutorial tag-https tag-lets-encrypt tag-ssl tag-ssl-certification tag-tutorial tag-ubuntu"> <div class="entry-featured"> <a href="https://blog.cloudsigma.com/securing-apache-with-lets-encrypt-on-ubuntu-18-04/" class="entry-thumb" title="Permalink to: "Securing Apache with Let’s Encrypt on Ubuntu 18.04""> <img width="1000" height="522" src="data:image/svg+xml,%3Csvg%20xmlns='http://www.w3.org/2000/svg'%20viewBox='0%200%201000%20522'%3E%3C/svg%3E" class="attachment-entry-fullwidth size-entry-fullwidth wp-post-image" alt="Let’s Encrypt" loading="lazy" data-lazy-srcset="https://blog.cloudsigma.com/wp-content/uploads/How-To-Secure-Apache-with-Lets-Encrypt-on-Ubuntu-18.04.jpg 1000w, https://blog.cloudsigma.com/wp-content/uploads/How-To-Secure-Apache-with-Lets-Encrypt-on-Ubuntu-18.04-300x157.jpg 300w, https://blog.cloudsigma.com/wp-content/uploads/How-To-Secure-Apache-with-Lets-Encrypt-on-Ubuntu-18.04-768x401.jpg 768w, https://blog.cloudsigma.com/wp-content/uploads/How-To-Secure-Apache-with-Lets-Encrypt-on-Ubuntu-18.04-610x318.jpg 610w, https://blog.cloudsigma.com/wp-content/uploads/How-To-Secure-Apache-with-Lets-Encrypt-on-Ubuntu-18.04-100x52.jpg 100w" data-lazy-sizes="(max-width: 1000px) 100vw, 1000px" data-lazy-src="https://blog.cloudsigma.com/wp-content/uploads/How-To-Secure-Apache-with-Lets-Encrypt-on-Ubuntu-18.04.jpg"/> </a> </div> <div class="entry-wrap"> <header class="entry-header"> <h2 class="entry-title"> <a href="https://blog.cloudsigma.com/securing-apache-with-lets-encrypt-on-ubuntu-18-04/" title="Permalink to: "Securing Apache with Let’s Encrypt on Ubuntu 18.04"">Securing Apache with Let’s Encrypt on Ubuntu 18.04</a> </h2> </header> <div class="entry-content excerpt"> <p>Website and data security are topics that cannot be taken lightly. Highly sensitive information which includes financial records and customers’ private information is always in transit between the user’s computer and your website. When you consider this fact, it’s not hard to see why unsecured websites could result in a breach that could seriously damage your business. There are a … </p> <div><a href="https://blog.cloudsigma.com/securing-apache-with-lets-encrypt-on-ubuntu-18-04/" class="more-link">Read More</a></div> </div> </div> </article> </div> </body> |
We want to try and extract the highlighted pieces, i.e. the tutorial’s URL, featured image, and caption.
- From the code snippet above, the image for the blog is stored inside the data-lazy-src attribute of an img tag inside an <a> tag inside a div tag at the start of the blog tutorial. We can use a CSS selector to grab the value like we did with the tutorial titles.
- Getting the tutorial’s URL is straightforward, as we have the <a> tag inside the <div> element.
- The caption is enclosed inside the <p> tag which is inside the <div> tag.
We will be using the CSS classes to get what we want. Let’s modify the code so that it looks like this:
|
1 2 3 4 5 6 7 8 9 10 11 12 13 14 15 16 17 18 19 |
import scrapy class CloudSigmaCrawler(scrapy.Spider): name = "cloudsigma_crawler" start_urls = ['https://blog.cloudsigma.com/blog'] def parse(self, response): SET_SELECTOR = '.post' for tutorial in response.css(SET_SELECTOR): NAME_SELECTOR = '.entry-wrap .entry-header > h2 > a ::text' URL_SELECTOR = '.entry-featured > a ::attr(href)' IMG_SELECTOR = 'img ::attr(data-lazy-src)' CAPTION_SELECTOR = '.entry-content > p::text' yield { 'title': tutorial.css(NAME_SELECTOR).extract_first(), 'image': tutorial.css(IMG_SELECTOR).extract_first(), 'url': tutorial.css(URL_SELECTOR).extract_first(), 'caption': tutorial.css(CAPTION_SELECTOR).extract_first(), } |
Save the changes and run the code with the following command:
|
1 |
scrapy runspider main.py |
You will see more data in the output, like the URL, image, and caption that we added:
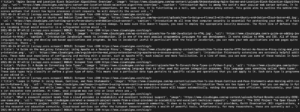
That’s all for crawling a single page. Next, let’s see how we can create a scraper that follows links.
Step 3: How to Crawl Multiple Pages
Up to this point, we have created a scraper that can get data from a single page. However, we want more than that. You want a spider that can follow links and extract data from multiple pages of a website programmatically.
If you go to the bottom of the CloudSigma blog page, you will notice the pagination links, and a small arrow pointing to the right indicating the next page. Here’s the HTML code snippet:
|
1 2 3 4 5 6 7 8 9 10 11 12 |
<div class="x-pagination"> <ul class="center-list center-text"> <li><span class="pages">Page 1 of 45</span></li> <li></li> <li><span class="current">1</span></li> <li><a href="https://blog.cloudsigma.com/blog/page/2/" class="single_page" title="2">2</a></li> <li><a href="https://blog.cloudsigma.com/blog/page/3/" class="single_page" title="3">3</a></li> <li><span class="expand">...</span></li> <li><a href="https://blog.cloudsigma.com/blog/page/45/" class="last" title="Last Page">45</a></li> <li><a href="https://blog.cloudsigma.com/blog/page/2/" class="prev-next hidden-phone">→</a></li> </ul> </div> |
The snippet shows several page navigation links within <li> tags, under the <div> tag with the .x-pagination CSS class. Our focus is on the link pointing to the next page. It is in the <a> tag of the last <li> in the <ul> tag.
The link pointing to the next page has the .prev-next class within the <a> tag as seen in the snippet above. However, if you move to the next page, you will also notice that the links to the previous and next page have this CSS class. Consider this snippet for Page 2:
|
1 2 3 4 5 6 7 8 9 10 11 12 |
<div class="x-pagination"> <ul class="center-list center-text"> <li><span class="pages">Page 2 of 45</span></li> <li><a href="https://blog.cloudsigma.com/blog/" class="prev-next hidden-phone">←</a></li> <li><a href="https://blog.cloudsigma.com/blog/" class="single_page" title="1">1</a></li> <li><span class="current">2</span></li> <li><a href="https://blog.cloudsigma.com/blog/page/3/" class="single_page" title="3">3</a></li> <li><span class="expand">...</span></li> <li><a href="https://blog.cloudsigma.com/blog/page/45/" class="last" title="Last Page">45</a></li> <li><a href="https://blog.cloudsigma.com/blog/page/3/" class="prev-next hidden-phone">→</a></li> </ul> </div> |
If we use the Scrapy extract_first() method, it will work on the first page. When it reaches the next page, it will pick the first link with the .prev-next class, which in the above snippet, points to the first page. This will result in a loop. Hence, we will use the Scrapy extract() method. This method extracts all elements matching a use-case and puts them in an array. From this array, we can pick the last element which will contain the actual link pointing to the next page. Modify your code to look like this:
|
1 2 3 4 5 6 7 8 9 10 11 12 13 14 15 16 17 18 19 20 21 22 23 24 25 26 |
import scrapy class CloudSigmaCrawler(scrapy.Spider): name = "cloudsigma_crawler" start_urls = ['https://blog.cloudsigma.com/blog'] def parse(self, response): SET_SELECTOR = '.post' for tutorial in response.css(SET_SELECTOR): NAME_SELECTOR = '.entry-wrap .entry-header > h2 > a ::text' URL_SELECTOR = '.entry-featured > a ::attr(href)' IMG_SELECTOR = 'img ::attr(data-lazy-src)' CAPTION_SELECTOR = '.entry-content > p::text' yield { 'title': tutorial.css(NAME_SELECTOR).extract_first(), 'image': tutorial.css(IMG_SELECTOR).extract_first(), 'url': tutorial.css(URL_SELECTOR).extract_first(), } NEXT_PAGE_SELECTOR = '.x-pagination > ul.center-list > li > a.prev-next::attr("href")' next_page = response.css(NEXT_PAGE_SELECTOR).extract() if next_page: yield scrapy.Request( response.urljoin(next_page[-1]), callback=self.parse ) |
Let’s walk through the code for the next_page selection.
We first define a selector for the next and previous page links. We then use the extract() method to extract the URLs and put them in an array. The next_page variable will be an array with two elements like:
|
1 |
next_page = [prev_page_url, next_page_url] |
Since we are navigating to the next page, we will pick the last element in the array. Next_page[-1] picks the last element in the array.
The if block checks if the next_page variable has something then it calls the scrapy.Request() method. In our code, we instruct this method to crawl the page with the provided URL and pass it back to the parse() method so that we can parse it to extract the data and repeat the process for the next page. This process is repeated until it doesn’t find a link to the next page, or rather if the block fails, then it stops.
Save your code and run it. You will notice that the iteration continues looping through the pages as it finds more pages to scrape. This is how you would define a scraper that follows links on a website. Our example is quite straightforward. We are only going to a page, finding the link to the next page, and repeating the process. In other use cases, you may want to follow tags or links that point to external sources and more. Here is the completed source code for the Python 3 basic web scraper:
|
1 2 3 4 5 6 7 8 9 10 11 12 13 14 15 16 17 18 19 20 21 22 23 24 25 26 27 |
import scrapy class CloudSigmaCrawler(scrapy.Spider): name = "cloudsigma_crawler" start_urls = ['https://blog.cloudsigma.com/blog'] def parse(self, response): SET_SELECTOR = '.post' for tutorial in response.css(SET_SELECTOR): NAME_SELECTOR = '.entry-wrap .entry-header > h2 > a ::text' URL_SELECTOR = '.entry-featured > a ::attr(href)' IMG_SELECTOR = 'img ::attr(data-lazy-src)' CAPTION_SELECTOR = '.entry-content > p::text' yield { 'title': tutorial.css(NAME_SELECTOR).extract_first(), 'image': tutorial.css(IMG_SELECTOR).extract_first(), 'url': tutorial.css(URL_SELECTOR).extract_first(), 'caption': tutorial.css(CAPTION_SELECTOR).extract_first(), } NEXT_PAGE_SELECTOR = '.x-pagination > ul.center-list > li > a.prev-next::attr("href")' next_page = response.css(NEXT_PAGE_SELECTOR).extract() if next_page: yield scrapy.Request( response.urljoin(next_page[-1]), callback=self.parse ) |
Conclusion
In this tutorial, we built a basic web scraper that can crawl the CloudSigma blog directory and display some information about the blog tutorials in about 27 lines of code only.
Of course, this is possible because we built it on top of the Scrapy Python library. This is only a foundation that should help you build more complex scrapers that follow more tags, search results of websites, and more. You can check out Scrapy’s official docs for more information on working with Scrapy.
Happy Computing!
- Removing Spaces in Python - March 24, 2023
- Is Kubernetes Right for Me? Choosing the Best Deployment Platform for your Business - March 10, 2023
- Cloud Provider of tomorrow - March 6, 2023
- SOLID: The First 5 Principles of Object-Oriented Design? - March 3, 2023
- Setting Up CSS and HTML for Your Website: A Tutorial - October 28, 2022