We are happy to announce the ability to share infrastructure between accounts in a secure way. You can also define what actions you can take against those shared resources giving you fine grain control. This new functionality will allow you to share various sets of resources with one or more other accounts. We call each policy an Access Control List or ACL for short. You can have as many ACLs as you want depending on your needs and changes you make are live so they take effect immediately. Not to mention, all ACLs are completely free to use.
The framework is designed to be simple, transparent and easy to maintain. Real security comes from tools that people actually use and actively maintain so we’ve used that principle for the sharing of cloud infrastructure.
I’m including below a very easy to follow howto to get you up and running with your first ACL as well as a YouTube video runthrough. I use them myself in my account to share resources with colleagues so I’m sure you’ll have no problems getting going with them as well. Also, at the end I’ve cited a couple of examples of how you might use the new ACLs framework.
Three Simple Steps to Secure Sharing
So, let’s begin. We’ve made a simple three step process to getting started with ACLs. You’ll fine the new section already live in your account in the webapp:
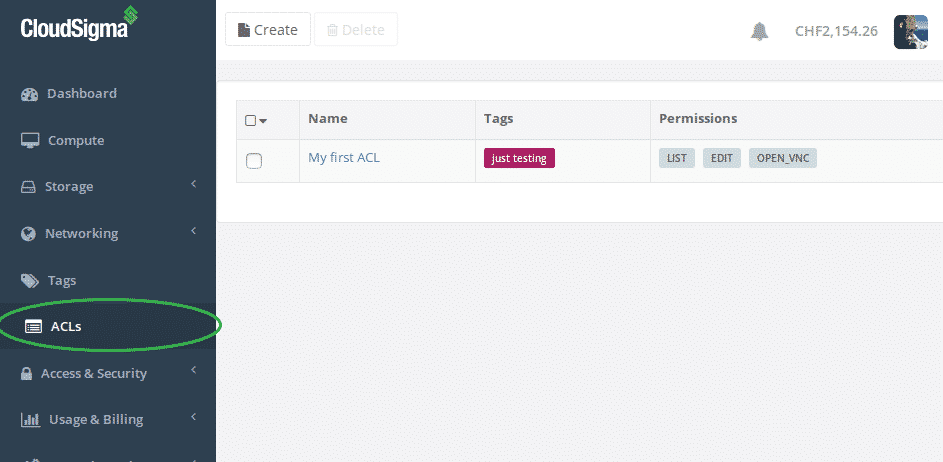
Cloud ACLs: share cloud resources securely
Step 1: Create a Tag
Firstly, we need to set up a tag to identify which resources we want to share. Navigate to the Tags section of the webapp and click the ‘create’ button. Let’s assume we are wanting to share database servers and create a tag called database:
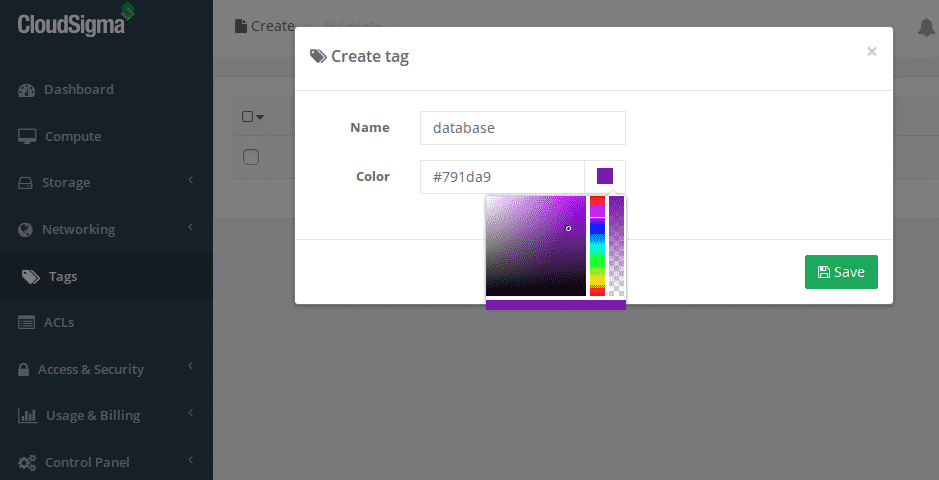
Create a new cloud infrastructure tag
We’ve now got our first tag created and you’ll notice it says ‘0’ under the resources column, this means we haven’t tagged any resources yet:
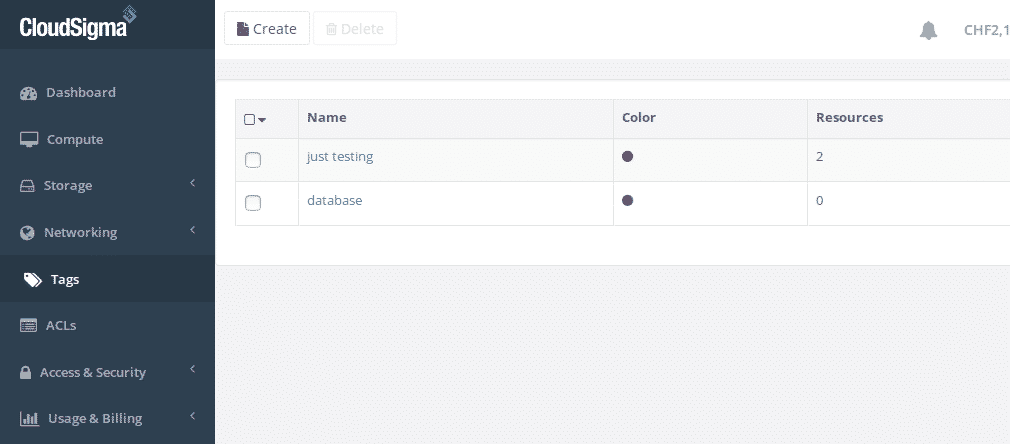
Cloud infrastructure tags
Step 2: Tag Cloud Infrastructure
Now navigate to the compute section to select the database servers you want to add the tag to (please note that if you tag a server, we’ll automatically tag any drives and networking policies associated with it):
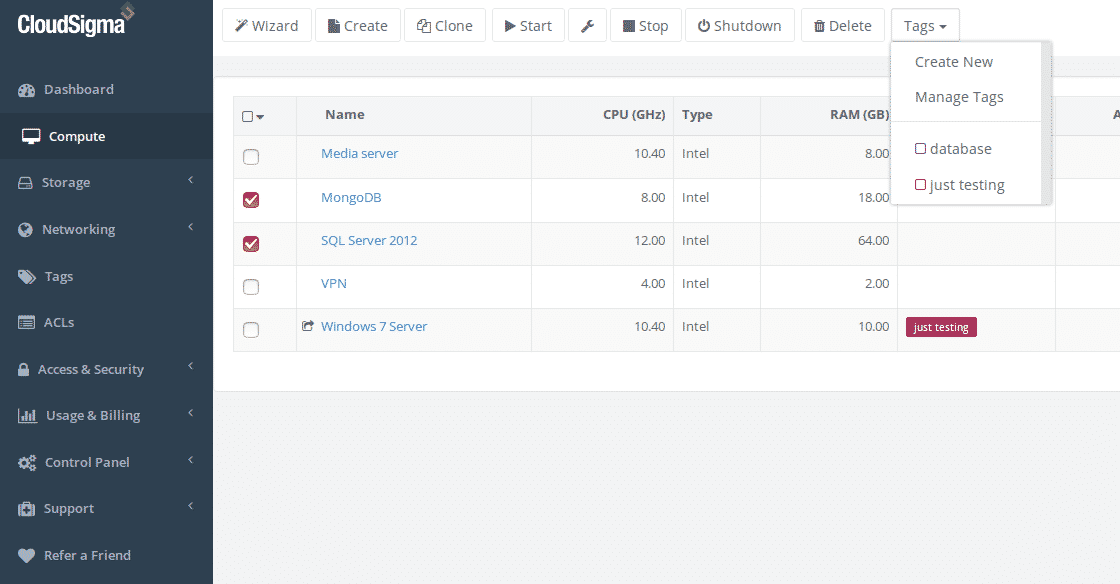
Organise your cloud servers with tags
You can now see that the two database servers have the tag added successfully:
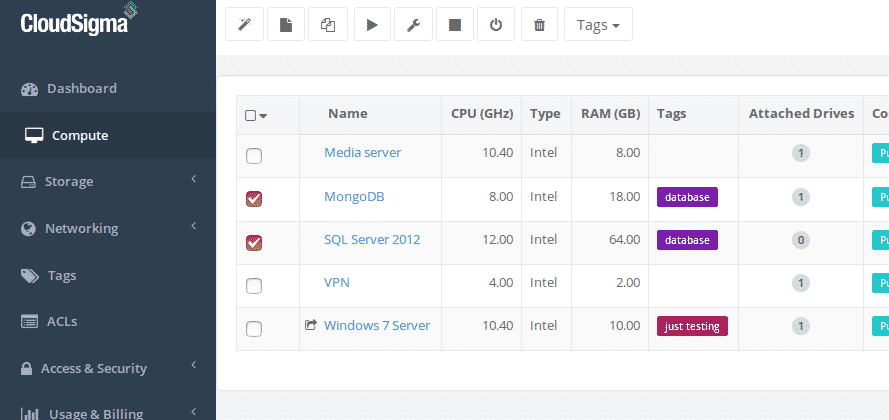
Database cloud servers with new tag
Step 3: Create the Access Control List
Now we’ve got our infrastructure tagged we are ready to share the resources. We can now go back to the ACLs section and click create to add a new ACL:
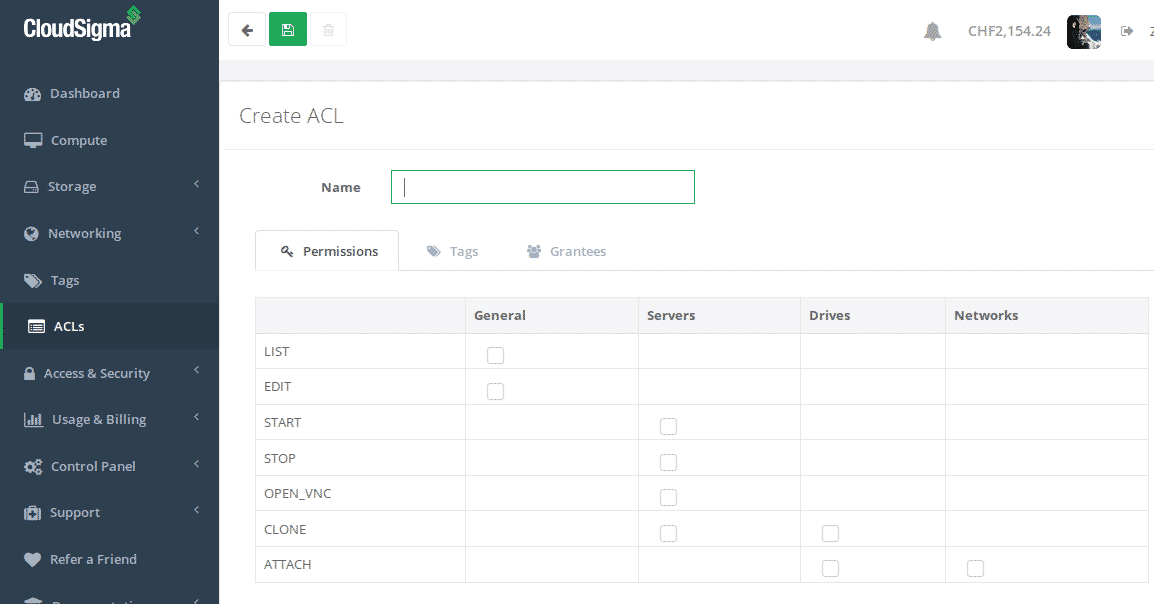
Create an ACL for your cloud infrastructure
Give your access control policy a name and set up the permissions you want to grant. I’m going to allow start/stop, open VNC (useful for system recovery) and edit (which needs list permission also). I’m not going to allow attach or clone so the policy is more about managing the server as is rather than scaling or making large changes to the cloud server setup:
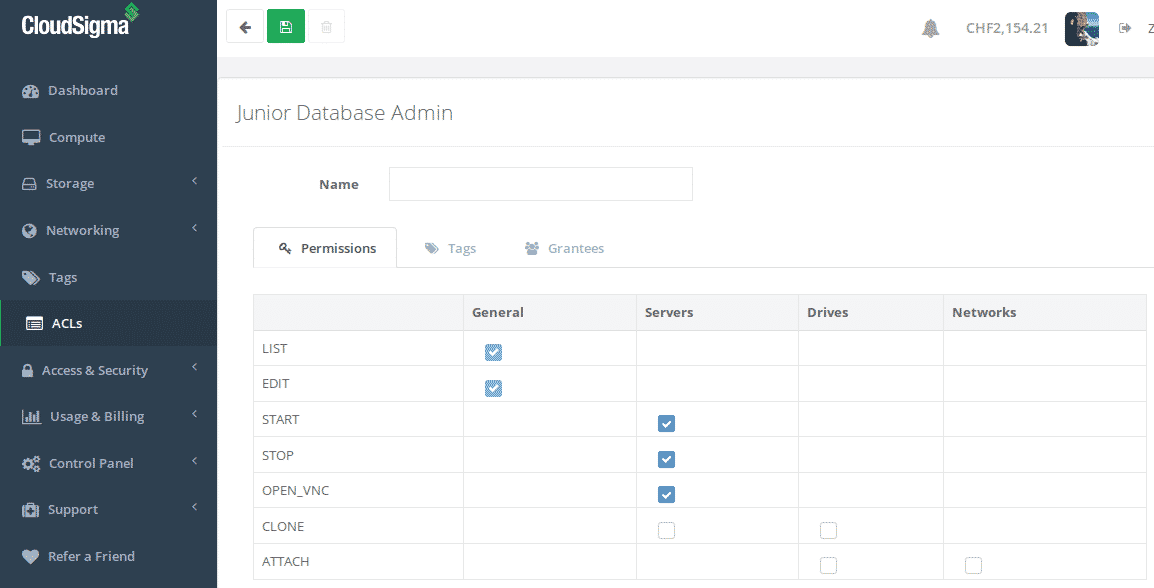
Junior database administrator ACL
Now, let’s add the database tag to this ACL:
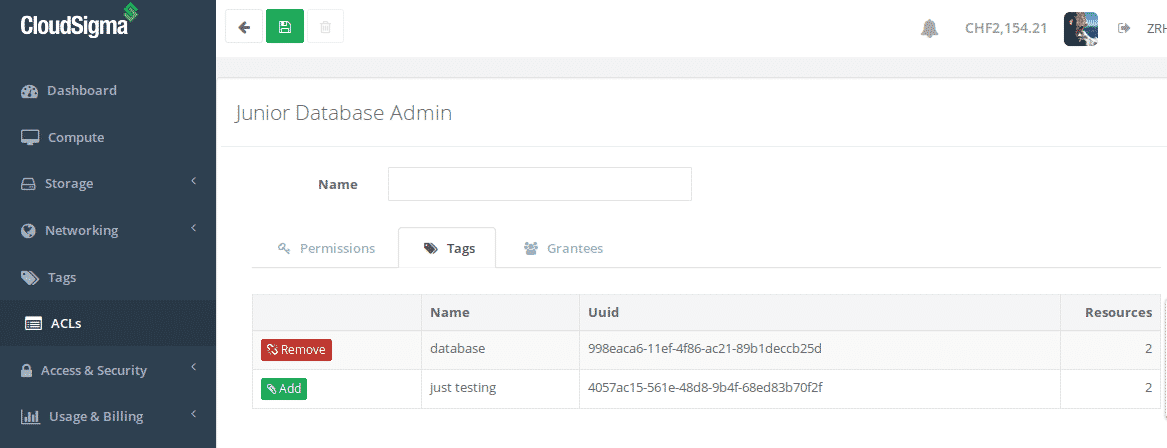
Attaching a tag to an ACL
Lastly, we need to add our database administrator to the policy and of course save the policy:
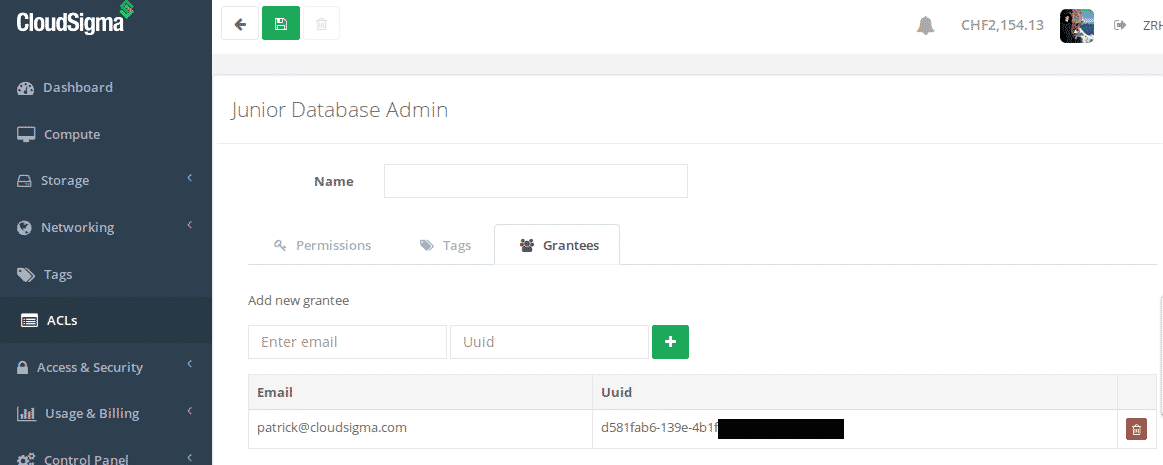
Adding people to your ACL
Note: We’ve obfuscated the UUID for security reasons.
Our ACL is now active and sharing the resources we’ve set up. Returning to my server list you’ll now notice an icon has appeared before the name of the database servers indicating it’s being actively shared at the moment:

Cloud servers with active sharing
Of course at the other end the shared cloud infrastructure should now appear in the account of our database administrator (in this case the other co-founder of CloudSigma Patrick!):

Shared cloud servers now visible
Next, you will notice the different icon depicting resources that are shared with your account as oppose to resources you are sharing with others. You can also see the drives associated with the servers in Patrick’s storage section also:
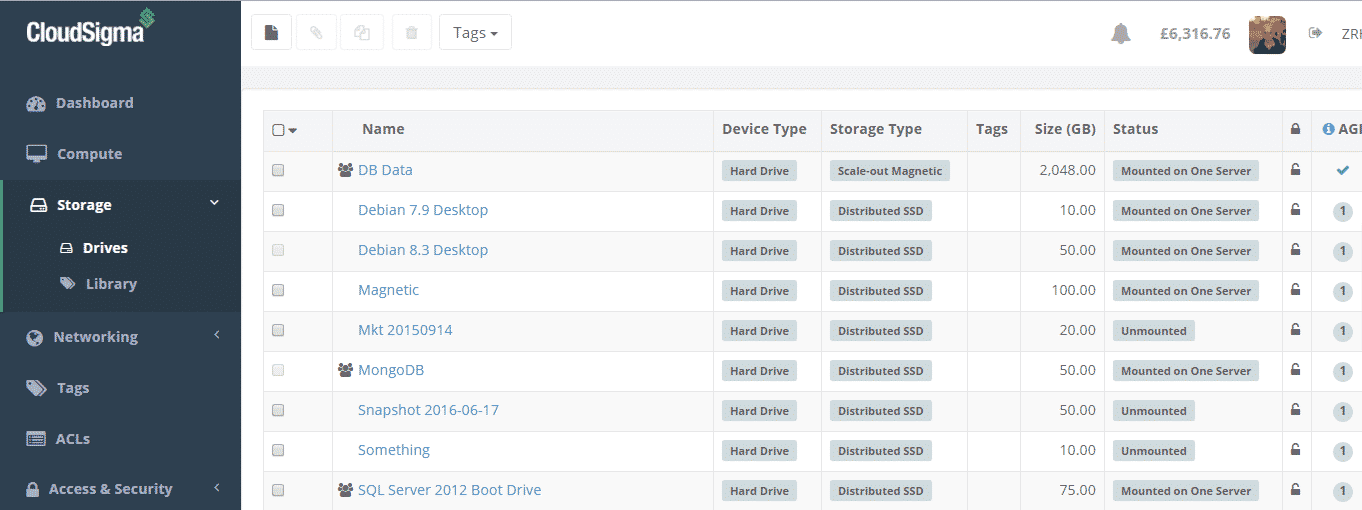
Drives of shared cloud servers
Patrick can now open VNC and the other actions I’ve granted to him. At any point I can add and remove infrastructure using the database tag or change the permissions granted. Also, you can add multiple tags to infrastructure so you might conceivably have servers with multiple tags and multiple policies issued against them.
Use Case 1: An external contractor
You may be collaborating with an external contractor developing a new service, you want them to have access to the infrastructure they need to manage for that project but you don’t want to give them full access to your CloudSigma account and infrastructure. Using ACLs you can now securely share the infrastructure you need with them and not compromise security. All you have to do is create a tag for the project, let’s call it Project X. Next, just tag all the resources you want to share with the newly created Project X tag. Finally, go to the ACLs section and create a new ACL. Decide what resources you want to share and actions they need to do and add their account to the ACL by providing their email and UUID (you will need to ask them for their CloudSigma UUID in all likelihood). Hey presto, the Project X infrastructure will now appear in their account automatically.
Now let’s say the project is ready or the contractor leaves, all you have to do is remove the Project X tag from the resource and it won’t be shared any more or remove the external contractor from the ACL (you may add as many people as you want to a policy so you might want to keep the policy but eject a particular individual). It’s that simple.
Use Case 2: Database Admin
In this example you might want a role based permission set. Because if a person with a particular role within your organisation can have assess the the infrastructure they need. But not to other infrastructure that falls outside their responsibilities. This is the same use case as outlined in the howto of this post also.
For instance, let’s assume you want to allow your database administrator to access only database servers within your infrastructure. It’s pretty simple, first create a tag called ‘database’. Secondly, tag all your database servers with this database tag. Finally create an ACL setting out the permissions you want to grant, add the newly created database tag and then add your database administrators account details to that ACL. Done.
Most importantly, if you have additional database servers that you need your database administrator to have access to, all you have to do is add the database tag to that server. That’s it, the permissions will automatically flow from the ACL in realtime and your database administrator will see the new database server they have access to in their account. Or let’s say you want to remove access? Simply remove the database tag etc.
I hope you find this feature as useful as I do. And if you need any help just use our live chat support who are available 24/7 and are very familiar with the ACL functionality.
Happy computing,
Robert
- Is PaaS Platform Lock-In a Hidden Threat to Your Business? - December 20, 2021
- Are We Stealing from You? Understanding CPU Steal Time in the Cloud - November 17, 2016
- Our CEO Discusses Hybrid Cloud - October 19, 2016
- Share Cloud Infrastructure Securely - August 10, 2016
- Win a OnePlus2 Phone - October 25, 2015


