Go (also known as Golang) is an open-source, statically typed programming language. It was originally developed by Google. Some notable features of Go include simplicity, high performance, readability, and efficiency.
Like any other prominent programming language, the standard library of Go offers a rich set of packages. However, we can also extend the functionalities by incorporating third-party packages. This guide will demonstrate importing packages and incorporating them into your Go projects.
Prerequisites
To follow this guide, you will need the following components prepared at your disposal:
- A properly-configured Ubuntu server. Learn more about configuring your own Ubuntu server on CloudSigma.
- The Go programming environment. You can use this guide on installing Go on Ubuntu.
- A modern text editor, for example, Vim, Sublime Text, Atom, Visual Studio Code, Brackets, etc. This guide will feature Visual Studio Code .
Step 1 – Installing Go
We already discussed installing the core Go programming language on Ubuntu 20.04. However, there’s an easier alternative method: g (a lightweight Go version manager).
The reason we are going to use g is that neither of Go versions available from Ubuntu’s package repos or snap feature the latest Go version available (v1.18 at the time of writing this guide). It’s always recommended to use the latest version available of any programming language package.
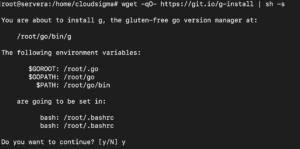
The following command will run the
g installation script:
|
1 |
wget -qO- https://git.io/g-install | sh -s |
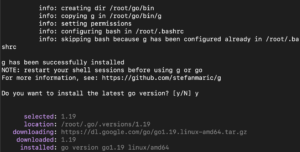
To take the changes into effect, you have to restart the shell session. After restarting, verify the installation:
|
1 |
go version |
|
1 |
which go |
After installing Go, it’s also recommended to install
gopls . It’s the official Go language server. It is compatible with many text editors like VS Code, Vim, Emacs, Sublime Text, Atom, and much more. Run the following command:
|
1 |
go install golang.org/x/tools/gopls@latest |
Our Go programming environment is now ready.
Step 2 – Creating a Sample Go Script
All the codes demonstrated in this guide will fit in a single Go script. Create a sample Go script:
|
1 |
touch practice.go |
After making changes to the script, we can run it using the following Go command:
|
1 |
go run practice.go |
Here, the Go compiler will run the code in interpreter mode.
Step 3 – Using Standard Library Packages
Go comes with a huge collection in its standard library. It consists of numerous packages, for example:
- fmt: Implements formatted I/O with functions analogous to C ( printf and scanf ).
- http: This package provides functions for creating web services, sending and retrieving data over the http protocol, etc.
To incorporate any package in a Go project, it has to be implemented using the
import statement. The statement is declared by the
import keyword along with the names of the packages. For example, to import
math/rand , the import statement would look like this:
|
1 |
import "math/rand" |
The following code implements various functions from the
math/rand package:
|
1 2 3 4 5 6 7 8 9 10 11 12 13 |
package main import "math/rand" func main() { for i := 0; i < 10; i++ { println(rand.Intn(25)) } } |
This code demonstrates a simple for loop that prints 10 random integers (0 to 24) on the screen. Here:
- rand.Int() : This function call returns a random integer.
- rand.Intn() : Acts similar to rand.Int() but accepts a parameter that defines the range for random integers (from 0 to the number specified).
Next, run the code:
|
1 |
go run practice.go |
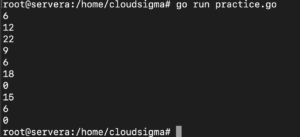
The output will look like this:
Note that the output will be exactly the same as the seed for the random number generator is a fixed value by default. This is the nature of a pseudorandom number generator. You can learn more about random seed here.
Step 4 – Importing Multiple Packages
Bigger and more complex projects need to incorporate multiple packages. How do you import them into your Go code? One valid option is to use individual import statements for each imported package. However, this approach is inefficient compared to the following import structure:
|
1 2 3 4 5 6 7 8 9 |
import ( "<package_1>" "<package_2>" "<package_3>" ) |
Here, a single import statement incorporates multiple packages at the same time. This reduces the amount of code necessary to write while improving readability.
The following code puts this feature into action:
|
1 2 3 4 5 6 7 8 9 10 11 12 13 14 15 16 17 18 19 |
package main import ( "fmt" "math/rand" ) func main() { for i := 0; i < 10; i++ { fmt.Printf("%d) %d\n", i, rand.Intn(25)) } } |
Run the code:
|
1 |
go run practice.go |
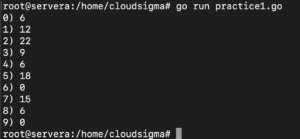
The output will look something like this:
Step 5 – Installing Additional Go Libraries
The standard library of Go ships with numerous useful packages. Those are, by design, general-purpose. It enables developers to create their own packages on top of the standard library to meet their specific needs. Check out the official Go package database.
What if you need to implement a third-party Go package? Go ships with the go install command ( go get is deprecated). It can grab any third-party Go package from the internet.
For demonstration, we are going to install the
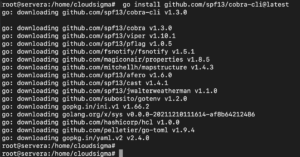
cobra-cli package. The following Go command will download and install the necessary files and integrate the package into the Go library system:
|
1 |
go install github.com/spf13/cobra-cli@latest |
The binary of
cobra-cli should be located at the following location:
|
1 |
ls -l $GOPATH/bin |
The other package files should be located at the following location:
|
1 |
ls -l $GOPATH/pkg/mod/github.com/spf13 |
Starting from Go v1.11, Go modules define the version of the package you wish to import. This is explained in detail here: Go Modules GitHub.
Step 6 – Package Aliases
In various situations, you may find conflicting package names between the local and the imported packages. This is where aliasing can solve the collision. The aliasing structure looks something like this:
|
1 |
import <alias> "import_package_name" |
Let’s modify our simple Go program to incorporate
fmt_alias as an alias for the package
fmt :
|
1 2 3 4 5 6 7 8 9 10 11 12 13 14 15 16 17 18 19 |
package main import ( fmt_alias "fmt" "math/rand" ) func main() { for i := 0; i < 10; i++ { fmt_alias.Printf("%d) %d\n", i, rand.Intn(25)) } } |
Notice that instead of using fmt.Printf() , we are using the package alias fmt_alias.Printf() .
However, Go is not so welcoming to aliases. When you are using aliases to avoid import name collision, it’s recommended to alias the most local or project-specific import. For example, if you want to have both a local package strings and a system package strings , then you should alias the local package, not the system package.
The best practice is to avoid name collisions in the first place.
Step 7 – Imports Formatting
We learned to declare all the imports using a single
import statement. What if you had several imports? For example:
|
1 2 3 4 5 6 7 8 9 10 11 12 13 14 15 |
import ( "fmt" "os" "github.com/example/foo" "github.com/example/bar" "math/rand" "github.com/abc/pqr/xyz" ) |
Imports formatting sorts the packages into a specific order, improving the consistency of the code. As it only sorts the order of the imports, it also prevents random commits. It also prevents unnecessary code churning and confusing code reviews.
Most modern editors will format the imports for you automatically. Alternatively, they will support goimports. It’s a common practice in the industry to use goimports instead of manually sorting the imports. In addition, goimports also reflects style changes in the code.
Here’s what the
import block may look like after applying
goimports :
|
1 2 3 4 5 6 7 8 9 10 11 12 13 14 15 16 17 18 19 20 21 |
import ( fmt_alias "fmt" "math/rand" "os" "github.com/example/foo" "github.com/example/bar" "github.com/abc/pqr/xyz" ) |
Notice any pattern?
- All the standard libraries are grouped first.
- The groups are separated by blank lines, improving the code readability.
Final Thoughts
Imports in Go is a powerful feature that allows calling functions not built into Go. While the standard library offers many general-purpose packages, Go also supports third-party packages. This guide demonstrates importing built-in and third-party Go packages.
In this guide, we ran our Go programs using the interpreter. However, you can compile the codes into standalone binaries for better performance. You can learn more about compiling Go programs here. If you want to learn how to deploy a Go web application with Nginx, check this tutorial. In addition, you can take a look at our guide that showcases how to write your own Go packages.
Are you a Go developer? CloudSigma offers Go API support for seamless integration with your projects.
Happy Computing!
- Removing Spaces in Python - March 24, 2023
- Is Kubernetes Right for Me? Choosing the Best Deployment Platform for your Business - March 10, 2023
- Cloud Provider of tomorrow - March 6, 2023
- SOLID: The First 5 Principles of Object-Oriented Design? - March 3, 2023
- Setting Up CSS and HTML for Your Website: A Tutorial - October 28, 2022


