When you need to transfer data and files between two computers, there are two protocols that can finish the job. Тhe typically used method is the FTP or the File Transfer Protocol. However, rising concerns over the security of data moved from one device to another have encouraged the use of SFTP.
SFTP stands for Secure File Transfer Protocol. It is a protocol that uses SSH to enable transferring data between separate remote servers. The transfer goes through a safeguarded connection that will maintain your data integrity. The unsafe nature of FTP has limited its use, relegated to systems and connections where you can guarantee data and connection security yourself.
If you are looking to start using SFTP to transfer your data from a remote server, this tutorial will guide you through the process and ensure you do it the right way.
Establishing a Connection with SFTP
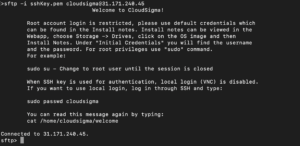
First and foremost, you need to connect to the protocol and establish a secure connection, which is enabled by SSH. You can either use the passwords associated with your SSH protocol or you can create keys and then transfer the public key to the device in question. The latter method is preferable as it ensures better security. You can always confirm your SSH connection by running this command:
|
1 |
ssh sammy@your_server_ip_or_remote_hostname |
Once you are done, type and run exit. To open up a new SFTP season, use the command:
|
1 |
sftp sammy@your_server_ip_or_remote_hostname |
If you are using a custom SSH port instead of the default port 22, use this command:
|
1 |
sftp -oPort=custom_port sammy@your_server_ip_or_remote_hostname |
This will establish your connection with the remote system and subsequently transform into an SFTP prompt.
Using The Help Command
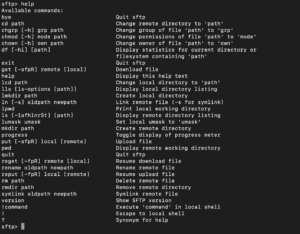
If you want to use this protocol to its full potential, you need to learn how to use the help command to your advantage. Help in SFTP can be summoned by either the simple command:
|
1 |
help |
or even just :
|
1 |
? |
This will give you access to a list of all of the commands that you can use to accomplish various tasks and goals in SFTP. Below, you can see a list of some of the commands that you can use in SFTPs:
Navigation in SFTP
In order to familiarize yourself with the protocol and get it working better, you need to learn how to execute some basic commands. For example, a good idea is to begin with figuring out how to find the directory you are currently in. In order to do that , all you need to do is run:
|
1 |
pwd |
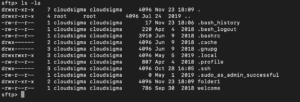
On the other hand, you can put up on display the contents of the directory with the following commands as well:
|
1 |
ls |
While compared to shell commands, the SFTP commands are limited in regards to features. However, they are able to give you the ability to use a number of optional flags, such as the following:
|
1 |
ls -la |
The following command works for switching directories in the remote system:
|
1 |
cd testDirectory |
This command can be used to change your directory to one that is located on the local system instead of the remote server:
|
1 |
lcd Desktop |
Inside the remote file system, you can run commands in order to access the local file system. All you need to do is simply add an ‘l’ before the commands you would typically use to navigate the local file system. For example, if you want to print the local working directory, you can use the following commands:
|
1 |
lpwd |
Similarly, you can list the contents of the directory you are currently in by using these commands:
|
1 |
lls |
File and Data Transfer
Once you have gotten the hang of some of the basic navigation tools in SFTP, you can move on to actually transferring data across the servers.
Remote to Local
When transferring your files from the remote server to the local one, use the following command to download your files from the host:
|
1 |
get remoteFile |
Since you are using the ‘get’ command, it means that the files will be downloaded onto your local system with the same name as the one on the remote system. If you want to assign it a different name, you can grant yourself the ability to do so later by issuing this command:
|
1 |
get remoteFile localFile |
You can also use some option flags with the ‘get’ command. In the occasion that you wish to copy the contents of a given directory in their entirety, all you need to do is use the recursive option like so:
|
1 |
get -r someDirectory |
If you want the system to retain the permissions and access times, you can add the ‘P’ or ‘-p’ flag in combination:
|
1 |
get -Pr someDirectory |
Local to Remote
Alternatively, if you need to transfer files to the remote server from the local host, you can use this command:
|
1 |
put localFile |
The difference between the two is in the ‘get’ and ‘put’ commands in reference to the remote system. However, similar to the ‘get’ commands, ‘put’ also enables you to use the same flags. This means that if you want to copy all the contents of a local directory, you can use the command:
|
1 |
put -r localDirectory |
If you are using any of the newer Ubuntu versions, from 14.04 to 15.10, you may experience difficulty executing this command because of a bug that is plaguing OpenSSH. You will be faced with an error that says:
|
1 |
Couldn't canonicalise: No such file or directory |
In order to run this command without any errors, you will have to make a destination directory for the content on your remote server. This can be done with the command:
|
1 |
mkdir localDirectory |
The ‘df’ Command
The ‘df’ command is useful when it comes to downloading and uploading files in SFTP. This command can be used to see whether or not you have the space required to make certain transfers. This can prove to be extremely helpful if you are working with a large load. You can execute this command by typing:
|
1 |
df -h |
The ‘!‘ Command
While you will not find any local variations for the ‘df’ command, you can make certain exceptions. You can do this by implementing the ‘!’ command along with it. The ‘!’ command puts you in a local shell. This means that you have the ability and permission to use all commands affiliated with the local system. So, for instance, if you want to check the disk usage, you can do so like this:
|
1 2 |
! df -h |
As mentioned before, you can always go back to your SFTP session by entering and running:
|
1 |
exit |
File Modifications
Apart from basic navigation and data transfer, you can also use this secure protocol sphere to modify files on your remote system. This feature comes in handy when dealing with file hierarchies. You can easily use commands like this to change the owner of the file:
|
1 |
chown userID file |
Or type this command if there is a group owner that needs to be changed:
|
1 |
chgrp groupID file |
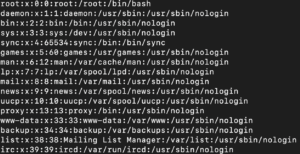
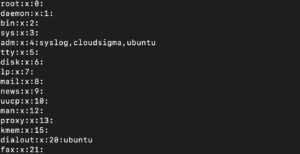
One thing that may strike as odd is that instead of using user names, SFTP requires you to enter the user ID. Finding out the UID can be difficult through SFTP but there is a way you can bypass it:
|
1 2 3 |
get /etc/passwd !less passwd |
You will be able to locate the UID in the third column of the file. Similarly, you can make your life easier by using the following workaround to get a listing of all the groups on your remote system:
|
1 2 |
get /etc/group !less group |
The group in the column has their ID located in the third column. The remote file system can accommodate the ‘chmod’ command as well:
|
1 |
chmod 777 publicFile |
You can also set a local unmask which means that all of your copied files will have the relevant permissions on the local system:
|
1 |
lumask 022 |
|
1 |
Local umask: 022 |
To make new directories, you can use the ‘lmkdir’ for the local system and ‘mkdir’ for the remote system. Other commands that you can use can be executed in the local system as well with the ‘!’ command placed as a prefix:
|
1 2 3 |
ln rm rmdir |
Once you are done transferring and manipulating files within your SFTP bubble, you can close the connection by typing in the command ‘exit’ or ‘bye’- easy as that.
|
1 2 |
exit bye |
Conclusion
All in all, there is no denying just how useful the SFTP channel has proven to be for the sake of data transfer in susceptible networks. It is not as advanced a tool as some of the others available for these purposes, but it can be very helpful for transferring files between servers.
Happy Computing!
- Removing Spaces in Python - March 24, 2023
- Is Kubernetes Right for Me? Choosing the Best Deployment Platform for your Business - March 10, 2023
- Cloud Provider of tomorrow - March 6, 2023
- SOLID: The First 5 Principles of Object-Oriented Design? - March 3, 2023
- Setting Up CSS and HTML for Your Website: A Tutorial - October 28, 2022


